How to Check Refrigerator Thermostat
Learn how to safely test your refrigerator thermostat, diagnose common faults, and reset or replace components with clear, actionable steps from How To Refrigerator.

This guide helps you confirm whether your fridge thermostat is accurately maintaining temperature and how to adjust or replace it if needed. Before you start, unplug the unit, locate the thermostat behind the thermostat dial or control panel, and have a thermometer ready to verify interior temps. We'll walk you through safe checks and practical fixes.
What the refrigerator thermostat does and why it matters
A refrigerator thermostat is a small temperature sensor and control switch that tells the compressor when to run. It maintains the interior temperature within a safe range (usually around 35-38°F / 1.7-3.3°C) to preserve food quality. If the thermostat is off, stuck, or miscalibrated, you might experience warm spots, frost, excessive frost on the evaporator, or the compressor running constantly. Understanding how it works helps you distinguish between a thermostat issue and other cooling problems like door seals, evaporator coils, or dirty condenser fins. In this guide, we’ll explain how to check the thermostat safely, how to read its readings, and how to decide whether recalibration or replacement is necessary. By the end, you’ll know how to check refrigerator thermostat readings and verify that your food is stored at safe temperatures.
Common thermostat faults you may notice
Thermostats can drift over time due to wear, vibration, or temperature fluctuations. Common signs include the fridge feeling warmer than the dial setting indicates, frequent cycling on and off, or the freezer not reaching the expected cold. Some models have an adjustable dial with a marked range; others use electronic controls that display numbers. Another fault is a thermostat that sticks in the closed position, preventing cooling, or one that fails safe and runs too long, increasing energy use and frost issues. Additionally, poor readings can be caused by wiring damage, poor sensor placement, or a blocked air return. While some issues point directly to the thermostat, others require testing with a thermometer to separate sensor readings from actual appliance temperature.
Safety and preparation before you begin
Before touching electrical components, unplug the refrigerator at the wall outlet. If you can access the back panel, wear non-slip shoes and work on a dry surface. Have an insulated flashlight, a digital thermometer, and a notebook to record readings. Do not use metal tools to poke around electrical connections. If the unit is under warranty, check the policy as opening the control module may void coverage. Finally, wait at least 10 minutes after unplugging to allow any capacitors to discharge before testing any components. This ensures you won’t receive a false reading or risk a shock.
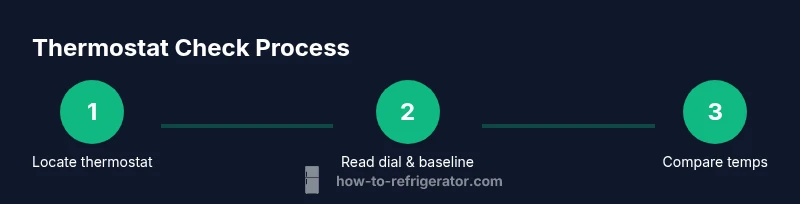
Locating the thermostat and confirming its range
Many refrigerators house the thermostat behind the control panel or inside the fresh food compartment near the temperature sensor. In older units, the dial is located on the front panel; newer models may use touch controls with an on-screen temperature reading. Once located, take a baseline reading using a calibrated thermometer placed in the center of the fridge where the thermometer sits. Compare this interior reading to the thermostat setting. If the dial reads 3 and interior temperature sits around 40°F (4–5°C), you have evidence of a miscalibration or a faulty sensor. Record the dial setting and the interior temp reading for later reference.
Testing methods: using a thermometer and power-on checks
Power-on checks involve running the unit and monitoring how quickly the temperature stabilizes after a door open or door close. Place a fridge thermometer toward the center shelf and another in the freezer to cross-check. For an electronic thermostat, you may test the sensor by gently warming or cooling the sensor area and watching if readings follow changes. If using a mechanical dial, temporarily adjust to a known setting and wait 2–4 hours to reach a stable temperature, then compare to your thermometer. Document all readings to identify drift.
Troubleshooting mismatched readings: recalibrate vs replace
When readings don’t align with the dial, you have options. Some thermostats are recalibratable via a small screw or dial on the sensor housing; follow the manual to adjust by a few degrees. If the readings continue to drift after recalibration, the thermostat or sensor may be faulty and require replacement. Replacements vary by model; consult the manufacturer’s guide for part numbers and installation steps. If you’re uncomfortable, a professional repair service can confirm the fault and perform the replacement safely.
Cleaning, maintenance, and preventing thermostat drift
Regular maintenance helps extend thermostat life. Clean the coils and vents, keep the condenser area clear, and replace gaskets on doors to prevent temperature fluctuations. Dust on sensors can cause inaccurate readings, so wipe the sensor area with a dry cloth. Avoid placing hot foods directly in the fridge, which can temporarily skew readings. Inspect wiring for signs of wear or damage and address issues promptly to avoid accelerated drift.
When to call a professional and what to expect
If you’re uncomfortable with electrical testing or the unit is under warranty, contact a qualified technician. A repair professional will test the thermostat with specialized gear, confirm whether the sensor or control board is faulty, and install a replacement part if needed. Expect a diagnosis and an estimate for parts and labor. The How To Refrigerator team recommends scheduling professional help if the unit is not cooling despite correct thermostat settings, or if the temperature readings refuse to equalize within a broad safe range.
Tools & Materials
- Phillips head screwdriver(Size #2, for removing control panel screws)
- Digital thermometer(Fridge-safe probe, 0°C to 50°C range)
- Ambient room thermometer(For ambient comparison near appliance)
- Gloves(Non-slip, insulated if possible)
- Notebook and pen(Record settings and readings)
- Owner’s manual (model-specific)(Helpful for model-specific calibration steps)
Steps
Estimated time: 45-60 minutes
- 1
Power down and access the thermostat
Unplug the refrigerator from the wall to ensure your safety. If your model has a back panel, remove the screws with a screwdriver and gently lift the cover to reveal the thermostat housing. Take photos of any wiring connections before touching anything so you can reassemble correctly.
Tip: Label wires with masking tape if you must disconnect anything. - 2
Locate the thermostat and note the range
Identify whether you have a mechanical dial or an electronic sensor. Record the current dial setting and the thermostat display reading, if present. This baseline helps determine if there is drift when you compare to interior temps later.
Tip: If you’re unsure, consult the model’s diagram in the manual before touching components. - 3
Take initial interior temperature readings
Place a calibrated thermometer in the center of the main refrigerator compartment and another in the freezer. Wait 15-20 minutes for readings to stabilize, then log the temperatures. Compare these numbers to the thermostat setting to assess accuracy.
Tip: Use the same placement for all readings to maintain consistency. - 4
Test the sensor response (electronic models)
Gently warm and cool the sensor housing area and watch the thermostat display respond. If readings lag or don’t reflect the ambient change, the sensor or control board could be faulty. Do not apply heat directly to electrical components.
Tip: Avoid applying external heat or water near electronics. - 5
Perform a controlled calibration check
If your model supports recalibration, use the small adjustment screw or knob per the manual to shift the setting by a few degrees. After adjustment, wait 2-4 hours and recheck interior temperatures to confirm alignment with the dial.
Tip: Make small adjustments; large shifts can cause overcorrection. - 6
Reassemble and monitor for drift
Reattach the panel, plug the unit back in, and monitor for 24–48 hours. Take periodic readings to ensure the interior temps stay within safe ranges. If drift recurs, prepare for possible sensor or thermostat replacement.
Tip: Keep a temp log for at least 2 days post-calibration.
FAQ
What temperature should my refrigerator be?
Most refrigerators aim for 35–38°F (1.7–3.3°C) with the freezer at 0°F (-18°C). If readings differ significantly from these targets, the thermostat or sensors may be off and require testing.
Aim for about 37 degrees in the fridge and zero in the freezer. If readings drift, you may have thermostat or sensor issues.
Can thermostat issues cause frost buildup?
Yes. A malfunctioning thermostat can cause improper cycling, which may lead to frost or ice buildup on evaporator coils when the system runs too often.
A faulty thermostat can cause improper cooling cycles and frost on the coils.
Is recalibration safe for all models?
Recalibration is model-specific. Always check the manual before adjusting any screw or dial, and stop if the change doesn’t improve readings.
Recalibration depends on the model; refer to the manual and adjust cautiously.
When should I replace the thermostat or sensor?
Consider replacement if readings remain inconsistent after calibration, or if the sensor shows signs of wear, corrosion, or damage.
If calibration doesn’t fix it and the sensor looks worn, replacement is likely needed.
What tools do I need for testing?
You’ll want a digital fridge thermometer, a screwdriver, a notebook for logs, and access to the control panel. Avoid metal tools on exposed circuitry.
Grab a fridge thermometer, a screwdriver, and a notebook to log readings.
Can I fix a non-cooling fridge myself?
Some basic thermostat issues can be diagnosed and recalibrated, but many fixes require a professional, especially if refrigerant handling or wiring is involved.
Some thermostat fixes are doable, but many repairs should be handled by a pro.
Watch Video
Top Takeaways
- Identify if the thermostat is miscalibrated or faulty.
- Use a thermometer to verify interior temperatures against the dial.
- Calibrate carefully and test with a controlled wait period.
- Document readings to guide repair decisions.
- Call a professional if there’s recurring drift or safety concerns.