How to Check If Refrigerator Thermostat Is Working
Learn practical, homeowner-friendly steps to test your fridge thermostat, interpret readings, and decide between calibration or replacement. Clear safety guidance from How To Refrigerator to help you verify accurate cooling.

You can confirm whether your refrigerator thermostat is working by testing the temperature readings, calibrating the dial, and verifying cooling at multiple temperature settings. Before you start, unplug the unit, have an accurate thermometer, and a flashlight. This guide walks you through safe checks, common signs of a faulty thermostat, and practical fixes you can perform or plan for replacement.
What a refrigerator thermostat does and why it matters
The thermostat in a household refrigerator is the control that tells the compressor when to turn on and off to maintain your chosen temperature. When the dial is set to a cooler setting, the thermostat signals for longer cooling cycles; when set warmer, it signals for shorter cycles. Accurate temperatures prevent spoiled food, excessive frost, and unnecessary energy use. According to How To Refrigerator, maintaining precise fridge temps reduces energy waste and extends appliance life. A small drift over time can make the thermometer read correctly while the actual temperature remains too warm or too cold. Understanding this helps you interpret readings accurately and decide whether you need calibration, part replacement, or a professional diagnosis.
Signs your thermostat may be failing
Thermostat issues often show up as temperature inconsistencies rather than one dramatic failure. Look for:
Signs your thermostat may be failing
- Fridge running constantly or cycling on and off with unusual frequency
- Inconsistent temperatures across shelves or compartments
- Food spoiling faster than expected or freezing items in the fresh food area
- A dial that changes temperatures but the actual compartment temps don’t follow
- Frequent frost buildup on the evaporator or freezer
If you notice these signs, start with a careful test rather than assuming a replacement is needed. How To Refrigerator analysis shows that many temperature control problems stem from calibration drift or wiring wear, not a dead thermostat. Document the symptoms so you can reference them when seeking help or ordering parts.
Safety first: before you test
Testing a refrigerator thermostat requires careful preparation. Always unplug the unit before removing any panels, and wear gloves to protect your hands from sharp edges. Work in a well-lit area and use a flashlight to inspect the thermostat housing, wiring, and the sense line. If you must touch wiring, do not rely on shortcuts or improvisation. When in doubt, err on the side of safety and contact a pro. This section also covers how to reassemble components without pinching wires or creating gaps that let warm room air enter the cabinet.
How to test the thermostat using the internal thermometer method
Begin by removing the interior panels to access the thermostat control and sensing bulb. Reconnect power and set the thermostat to a mid-range temperature (roughly 3°C to 5°C in most models). Use a fridge-safe thermometer to monitor actual air temperature inside the fridge over 20–30 minutes. If the thermometer reads notably higher or lower than the set temperature, the thermostat could be drifted or faulty. Repeat this test at several settings (e.g., low, medium, high) to map how the actual temperature responds to dial changes. Keep a log of settings and readings for reference.
How to test the thermostat with ambient and vent readings
A secondary check uses an ambient thermometer placed near the fresh-food compartment door seal, and another near the vent where cold air enters. After adjusting to a new setting, wait 15–20 minutes and compare the vent temperature to the ambient room temperature. If the vent remains consistently cool while the door shows warm temperatures, the thermostat may be misreading. In some models, a small adjustment screw on the thermostat housing allows fine calibration; consult the manual and avoid forceful turning.
Calibrating the thermostat
Calibration should be done only if readings consistently lag or overshoot across multiple settings. First, unplug the unit and identify any calibration screws or dials on the thermostat housing. Make small adjustments (a quarter-turn at a time) and re-test with both internal and vent temperatures. Record each adjustment and resulting readings. If the temperature swings are within 1–2°C after several tweaks, you’ve achieved a stable calibration. If not, replacement may be a better option. Always reassemble panels carefully before testing long-term performance.
When to replace vs recalibrate
If after careful calibration and several measurement cycles the temperatures still don’t track the dial settings, the thermostat or its sensing line may be degraded. In that case, replacement is often the most reliable fix. Cost-effective diagnostics include verifying power supply, checking for frost or ice blocking the sensor, and testing thermostat continuity with a multimeter if you’re comfortable with electrical work. If uncertainty remains, a professional diagnostic can save time and prevent further damage.
Common mistakes and troubleshooting to avoid
Common mistakes include rushing the test without unplugging first, not letting the temperature readings settle, or ignoring frost buildup that can affect readings. Avoid using the fridge as a test bench for long periods; small, controlled tests yield more accurate data. Always use two or more calibrated thermometers and keep a detailed log of settings, times, and readings. If you encounter burnt wiring or melted insulation, stop and call a technician.
What to do if you’re not comfortable working on electrical components
Not all refrigerators are designed for DIY thermostat work. If you’re unsure, postpone testing, contact the manufacturer for your model’s service bulletin, or hire a certified appliance technician. A professional diagnostic can identify failing wiring, sensor issues, or compressor-related problems that look like thermostat trouble. The goal is to ensure food safety and avoid personal injury.
Maintaining thermostat health for long-term reliability
Regular cleaning of the thermostat housing and vent areas can prevent dust and moisture from causing inaccurate readings. Keep the door seals clean and intact to maintain stable interior temperatures. Periodically verify temperatures across settings and maintain a simple log. Well-maintained components last longer and reduce the likelihood of drift.
Verifying results after changes and what to log next
After making calibration adjustments or replacing a thermostat, monitor temperatures for 24–48 hours to confirm stability. Compare the observed results to the expected behavior at each setting and document any anomalies. If the new readings align with the dial settings and stay consistent, you’ve achieved a successful repair. The How To Refrigerator team recommends continuing routine checks as part of preventive maintenance.
Tools & Materials
- Digital fridge thermometer(Accuracy ±1°C; calibrate if needed)
- Ambient room thermometer (optional)(Helps compare room vs fridge temps)
- Multimeter (optional)(For wiring checks; only if you’re comfortable)
- Screwdriver set (flat/philips)(Access panels and thermostat housing)
- Gloves and safety glasses(Protect hands and eyes)
- Flashlight(Bright light for cavities)
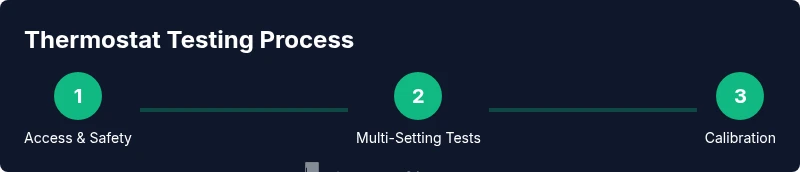
Steps
Estimated time: 60-90 minutes
- 1
Power down and locate access
Unplug the refrigerator and locate the thermostat access panel. In many models, the control is behind a panel in the interior back wall or near the upper shelf. This prevents any risk of shock while you inspect.
Tip: Take a photo of hidden wiring before removing panels. - 2
Remove access panel safely
Use the screwdriver to remove the panel and gently expose the thermostat housing and sensing line. Do not yank wires. Maintain alignment of components as you work.
Tip: Hold screws in a small tray to avoid losing them. - 3
Set mid-range and measure internal temps
With the panel off, set the thermostat to a mid-range setting. Use a fridge thermometer to monitor the air temperature for 20–30 minutes. Compare the observed temp to the dial setting to assess drift.
Tip: Allow 5 minutes for the temperature to stabilize after changing settings. - 4
Test across multiple settings
Repeat the measurement at low and high settings to map how the internal temperature responds. Note any settings where the readings don’t track the dial changes.
Tip: Log the times and temps for each setting. - 5
Vent and ambient checks
Place an ambient thermometer near the vent intake and another near the door seal. After adjusting, wait 15–20 minutes and compare vent temp with ambient room temp to validate thermostat response.
Tip: If vent temp remains overly cold or warm, the issue may be sensor placement or airflow. - 6
Calibrate, if possible
If your model allows, make small calibration adjustments and retest. Use quarter-turn changes and recheck. Record outcomes after each tweak.
Tip: Don’t overshoot; small changes yield stable results. - 7
Decide on replacement vs recalibration
If readings stay erratic after tweaks, consider replacing the thermostat or sensor assembly. Replacements are often more reliable than persistent drift.
Tip: Weight cost, ease of replacement, and model compatibility. - 8
Reassemble and test long-term
Put panels back, secure screws, plug in, and monitor performance for 24–48 hours. Ensure consistent results before concluding.
Tip: Double-check door seals to avoid ambient air intrusion.
FAQ
What is the thermostat in a refrigerator?
The thermostat controls compressor cycling to maintain the set temperature. It signals cold air on and off to keep food safe.
The thermostat tells the fridge when to cool and when to stop.
How do I know if my thermostat is bad?
Signs include unstable temps, the fridge running constantly, or food spoiling despite settings. A mismatch between dial setting and actual temp suggests drift.
If temps don’t match the dial, the thermostat may be faulty.
Can I calibrate a refrigerator thermostat myself?
Some models allow small calibration adjustments. If you’re uncomfortable, follow the manufacturer’s instructions or hire a professional.
Yes, many thermostats can be calibrated with care; otherwise seek a pro.
Is it safe to test the thermostat on my own?
Unplug the unit before inspecting or disassembling. Avoid touching live wires and use proper protective gear.
Safety first: unplug, don’t touch live wires, and use protection.
When should I replace rather than calibrate?
If calibration doesn’t fix the issue and temps remain off, replacement is often the most reliable option.
If it won’t calibrate properly, replace the thermostat.
Do model differences affect thermostat behavior?
Yes, different models have unique calibration methods and sensor placements. Always consult the manual for your specific model.
Model variations mean you should check your manual for specifics.
Will a faulty thermostat raise energy bills?
A thermostat that doesn’t regulate temps well can cause the fridge to run longer, increasing energy usage.
Yes, a bad thermostat can waste energy.
Watch Video
Top Takeaways
- Test temperatures at multiple settings to verify readings.
- Calibrate before considering replacement.
- Document each step for future reference.
- If in doubt, consult a professional to avoid safety risk.