How to Check If Refrigerator Is Cooling: A Homeowner's Guide
Learn a clear, step-by-step method to verify that your refrigerator is cooling correctly, with simple tests, thermometer readings, and maintenance tips from How To Refrigerator.

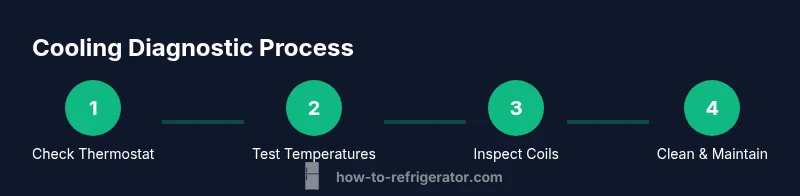
By following these steps, you’ll determine whether your refrigerator is cooling properly. Start with a thermostat check, temperature readings in the fridge and freezer, inspect door seals, listen for the compressor and fans, and perform a simple load test. Gather a fridge thermometer, a clean towel, and a timer before you begin.
How a refrigerator actually cools
A refrigerator cools by moving heat from the fridge cavity to the outside through a closed refrigerant cycle. The main components involved are the compressor (the pump that circulates refrigerant), condenser coils (which release heat to the room), an expansion device, and the evaporator inside the refrigerated compartments. When the compressor runs, it compresses refrigerant and sends it to the condenser; as it cools and expands, it absorbs heat from the interior. Fans help circulate cold air, directing it over shelves and vents. Proper airflow relies on clear vents, unobstructed shelves, and clean coils. The result should be a steady, cool interior with minimal frost buildup. For homeowners, understanding this cycle helps diagnose why you may notice the fridge feeling warm or inconsistent cooling. Throughout this guide we’ll connect practical checks to these underlying mechanics and reference recommendations from How To Refrigerator to ensure safe, reliable results.
According to How To Refrigerator, recognizing the basic cooling cycle equips homeowners to identify when a refrigerator is not cooling as intended and to take targeted, safe action. By grounding checks in the physics of heat transfer, you avoid unnecessary repairs and focus on the right components first.
Prepare for the check
Before you begin, gather the tools and create a safe working area. Start with a fridge thermometer (or a thermometer with two probes), a clean microfiber cloth, a timer, and a notebook for recording readings. If you have a flashlight, keep it handy for inspecting coils and vents. Unplug the fridge if you plan to clean the condenser coils on the back or underneath; otherwise, simply power it down for any invasive inspection. Wipe surfaces and remove oversized containers that block airflow. This preparation helps prevent false readings and makes it easier to notice signs of trouble, such as frost buildup near the evaporator or warm spots in shelves. How To Refrigerator emphasizes preparing properly to avoid skewed results and to keep you safe while handling cooling components.
Step-by-step verification of cooling performance
To verify cooling performance, follow a structured sequence that minimizes guesswork:
- Check thermostat settings: Confirm the control is not off and is set to a sensible cooling level. After adjusting, monitor for 24–48 hours before judging results.
- Listen for the compressor and fans: Close the doors and note whether the compressor cycles on and off and if fans run as expected. Unusual noises may indicate a fan or compressor issue that needs professional attention.
- Measure interior temperatures: Place one thermometer in the center of the fridge and another in the main section of the freezer. Record readings after 30 minutes and again after 60 minutes for a baseline.
- Inspect airflow and shelves: Ensure vents aren’t blocked and that items aren’t pressed against the back wall where cold air comes from. Overloading can impede circulation and create warm spots.
- Check door seals: Perform a simple seal test by closing the door on a dollar bill or a piece of paper; if it slides out easily, gaskets may be worn and require replacement.
- Look for frost or condensation: Frost on the evaporator or excessive condensation can signal defrost or humidity issues. If frost is present, allow the unit to defrost according to manufacturer guidelines or seek service if it recurs.
- Verify condensate and drain: If accessible, inspect the defrost drain for clogs and ensure it drains properly to prevent frost buildup.
Document each test result to identify trends and decide whether you can improve cooling with simple fixes or if professional service is warranted. How To Refrigerator notes that systematic testing makes it easier to pinpoint whether adjustments in temperature, airflow, or seals will resolve the issue.
Common causes of poor cooling
Poor cooling is rarely caused by a single fault. Common culprits include worn or dirty door gaskets, blocked or dirty condenser coils, a malfunctioning fan, improper thermostat calibration, and frost buildup from defrost system issues. Overloading shelves and placing warm items inside can also raise interior temperatures. Additionally, a room that is too warm or placing the unit near heat sources can challenge cooling performance. By understanding these causes, you can prioritize fixes and avoid unnecessary parts replacement. The How To Refrigerator team highlights these frequent issues and offers practical checks you can perform safely at home.
How to test cooling with simple at-home checks
This section pairs practical test steps with quick actions you can take right away. Start with noninvasive checks and progress to maintenance tasks that improve airflow and heat rejection. Remember, avoid using aggressive cleaners near electrical components, and unplug if you must handle coils.
- Thermometer test: Use two thermometers, one in the main fridge and one in the freezer. After placing them, wait a minimum of 30 minutes to obtain a stable reading and compare to your expected range. If temperatures remain warm, you may need a thermostat adjustment or coil cleaning.
- Airflow check: Remove items that block vents, shelves, or the back panel. Rotate stock to ensure air can circulate evenly and isn’t trapped around thirsty zones in the fridge.
- Seals inspection: Look for cracks or hardened gaskets. Replace worn seals promptly, as a poor seal allows warm air to leak in and disrupt cooling.
- Coil cleanliness: If accessible, gently clean the condenser coils with a soft brush or a vacuum attachment. Dusty coils reduce heat exchange efficiency and can cause the compressor to work harder and louder.
- Drain and defrost: If your unit shows frost buildup, follow defrost guidelines from the manufacturer. Persistent frost may signal a defrost heater or control problem that requires a technician.
- Document and compare: Keep notes of temperatures, noises, and observed symptoms over days to determine if a pattern exists and whether a professional evaluation is necessary.
According to How To Refrigerator, routine checks that combine temperature verification, airflow assessment, and seal inspection substantially reduce the likelihood of overlooked cooling issues. Regular maintenance helps extend appliance life while keeping foods safely cooled.
Maintenance tips to keep cooling reliable
Maintenance is the quiet backbone of consistent cooling. Clean coils at least twice a year if the unit is hard to access or lives in a dusty environment. Ensure doors seal tightly by replacing worn gaskets. Leave space around the refrigerator for proper air circulation and avoid blocking vents inside the unit. Consider a simple morning check to confirm the temperature readings haven’t drifted and that there are no unusual noises. These practices support reliable cooling and can catch early warning signs before they escalate. The How To Refrigerator team recommends a lightweight, proactive approach to maintenance rather than reactive fixes.
When to call a professional
If the interior remains warm after all basic checks, if you notice a loud or unfamiliar noise, if you detect a refrigerant leak, or if there is persistent frost despite defrost attempts, contact a qualified technician. A professional can diagnose issues like a failing compressor, a faulty defrost timer, or a sealed system problem that requires specialized equipment. Do not attempt refrigerant handling yourself. Regular maintenance and timely professional evaluation protect your appliance and your groceries while avoiding safety risks. This approach aligns with How To Refrigerator’s guidance for safe, effective troubleshooting.
Tools & Materials
- Fridge thermometer with probe(Place one in the main shelf and one in the freezer for continuous readings.)
- Soft microfiber cloth(Use for cleaning gaskets and shelves without scratching surfaces.)
- Timer(Track wait times when testing temperatures.)
- Notebook or app(Record readings, dates, and symptoms.)
- Flashlight(Helpful for inspecting coils and vents in hard-to-see areas.)
Steps
Estimated time: 60-90 minutes
- 1
Gather tools and prep
Collect the thermometer, cloth, timer, and notebook. Clear the top and surrounding area, unplug if you need to access coils, and wipe surfaces to remove dust that could affect readings.
Tip: Having everything within reach reduces interruptions and keeps the test accurate. - 2
Check thermostat settings
Locate the thermostat and verify it’s set to a typical cooling range. If it’s off or set very high/low, adjust to a mid-range and monitor for 24–48 hours to see how the unit responds.
Tip: Avoid drastic changes; gradual adjustments reduce stress on the compressor. - 3
Inspect door seals
Close the door on a thin piece of paper or a dollar bill. If you can pull it out easily, gasket wear may be letting warm air in. Replace seals if they’re cracked or deformed.
Tip: A good seal saves energy and stabilizes interior temperatures. - 4
Assess airflow and organization
Remove bulky items and ensure vents aren’t blocked. Air should circulate freely from the evaporator to all shelves to avoid hot spots.
Tip: Keep a clear path around coils and vents for efficient cooling. - 5
Place thermometers and wait
Put one thermometer in the fridge and one in the freezer. Wait 30–60 minutes to obtain stable readings, then record the numbers.
Tip: Use two reads to confirm consistency across compartments. - 6
Check for frost or condensation
Look for frost on the evaporator or excess condensation on shelves. Frost can indicate a defrost problem; follow manufacturer defrost guidance if needed.
Tip: If frost recurs, do not repeatedly defrost; seek professional assessment. - 7
Evaluate condenser coils
If accessible, inspect coils for dust and debris. Clean gently with a brush or vacuum attachment to improve heat rejection.
Tip: Dirty coils dramatically reduce cooling efficiency. - 8
Document results and plan next steps
Record all readings and symptoms. If temperatures stay high or noises persist after adjustments, schedule a professional evaluation.
Tip: A clear log helps a technician diagnose faster.
FAQ
Why isn’t my refrigerator cooling even though the light turns on?
Common causes include a faulty thermostat, dirty condenser coils, a failing fan, or a blocked airflow path. Start with thermostat settings, inspect door seals, and clean coils before pursuing more complex repairs.
If the light is on but it’s not cooling, start with the thermostat and seals, then check the coils and airflow before calling a technician.
Can I test refrigerator temperature without a thermometer?
A thermometer is the most accurate method. If you don’t have one, you can rely on ice or food safety tests, but that is not reliable. It’s best to acquire an inexpensive fridge thermometer for precise readings.
It’s best to use a thermometer for accurate readings; without one, results will be unreliable.
What maintenance steps can improve cooling?
Regularly clean condenser coils, replace worn door gaskets, ensure adequate clearance around the unit, and avoid overloading shelves. Calibrating the thermostat and defrost system checks also help maintain steady cooling.
Keep the coils clean and doors sealing well, and avoid overstuffing the fridge to maintain cooling.
When should I call a professional?
If readings remain high after checks, if you hear unusual noises, detect leaks, or see persistent frost, a professional diagnosis is recommended. Some issues require specialized tools and refrigerant handling.
If the temperatures stay warm after testing or you hear odd noises, it’s time to call a technician.
Is it safe to unplug the fridge to fix it?
Unplugging is safe if you handle the unit carefully and do not move heavy components. Do not unplug during cleaning if you’re uncomfortable with electrical work.
Yes, unplug if you need to clean coils, but proceed with caution.
Can door seals cause poor cooling?
Yes. Worn or cracked gaskets allow warm air to enter, making cooling less efficient. Replace seals if they fail the simple seal test.
Poor door seals let warm air in, so replace worn gaskets to restore cooling.
Watch Video
Top Takeaways
- Check temperatures with a thermometer to verify cooling.
- Ensure doors seals and airflow are not compromised.
- Clean coils and avoid overloading shelves for optimal cooling.
- Document results and act on signs of persistent issues.