How Come My Refrigerator Is Not Cooling? Quick Troubleshooting Guide
Urgent guide to diagnose and fix a fridge not cooling. Learn common causes, safe checks, step-by-step fixes, and maintenance to prevent future issues.

If you’re asking how come my refrigerator is not cooling, start with the simplest checks: door seals, then condenser coils, then frost in the evaporator. If the basics don’t solve it, follow the step-by-step fixes below or call a pro. This quick guide helps homeowners troubleshoot safely.
Symptoms and Urgency
When a refrigerator fails to cool, the impact goes beyond warm milk and spoiled leftovers. Not cooling can waste energy, shorten food shelf life, and indicate a system issue that, if left unaddressed, may worsen. If you’re wondering, not every problem means a full compressor failure—sometimes a simple setter or airflow issue causes the symptom. This is particularly urgent if you rely on medications or perishable items. In addressing, keep in mind the phrase how come my refrigerator is not cooling, which points to the most common root causes: airflow problems, ice buildup, or a defective defrost system. Start with the least invasive checks and move to more involved fixes only as needed.
Safety note: unplug the unit before inspecting electrical components or accessing the compressor area. If you smell burning plastic, hear irregular buzzing, or see refrigerant hissing, evacuate the area and contact a professional immediately. Throughout this guide, you’ll find practical steps for homeowners to safely diagnose and possibly fix the issue.
Common Causes and How to Test Them
There are several frequent culprits behind a fridge that won’t cool. This section highlights the most probable issues and easy tests you can perform to narrow down the cause without specialized tools:
- Poor door seals: A worn gasket lets cold air escape. Visually inspect for gaps, perform a quick water test (lace a thin soap solution around the gasket and close the door—watch for bubbles). A simple fix might be resealing or replacing the gasket.
- Dirty condenser coils: Dust and debris choke heat exchange, reducing cooling efficiency. If accessible, vacuum the coils with a brush attachment; never use water on electrical components.
- Frost buildup on the evaporator: Excess frost blocks airflow. If you see frost accumulation behind the evaporator cover, you may need to defrost or replace a faulty defrost timer/bi-metal switch.
- Faulty evaporator fan: A non-spinning or noisy fan means air isn’t circulating properly. Listen for the fan when the compressor runs. If you hear nothing, this could be the root cause.
- Thermostat or temperature control issues: A miscalibrated thermostat can keep the compressor from cycling correctly. Compare the actual temperature with the setting and adjust gradually.
- Defrost timer or control board fault: If defrost isn’t happening, frost can block cooling. This is less common and often requires professional testing.
- Compressor problems: Persistent warm air with a humming sound may point to a failing compressor. This is a hardware issue that typically requires a technician.
If you’re still asking how come my refrigerator is not cooling after these checks, advance to a structured diagnostic flow to map symptoms to likely causes and precise fixes.
Quick Visual Checks You Can Do Right Now
Visual checks help you quickly identify obvious issues without tools:
- Check the door seals for cracks or deformation and replace if needed.
- Ensure the fridge and freezer doors aren’t left ajar and that items aren’t blocking vents.
- Look for excessive frost on the evaporator compartment or in the freezer.
- Check the back of the fridge for dusty coils; vacuum them gently.
- Listen for fans when the compressor runs; absence of air movement indicates a problem.
- Inspect the thermostat dial; set to mid-range and re-check after 30 minutes.
- Confirm the compressor is running (a warm-to-hot coil at the back is expected; a buzzing or clicking sound can indicate issues).
These checks are designed for homeowners and can often reveal the simplest fixes. If frost is present or the fan is silent, you may have found the primary cause and can proceed to targeted steps in the STEP-BY-STEP section.
Diagnostic Flow: Symptom → Diagnosis → Solutions
A systematic approach helps avoid random fixes and wasted time. Start with observable symptoms and progress through to concrete fixes:
- Symptom: Refrigerator not cooling or cooling inconsistently.
- Diagnosis possibilities: door seal issue, dirty condenser coils, evaporator frost buildup, failed evaporator fan, thermostat misadjustment, defrost timer fault, compressor problem.
- Solution pathway: secure door seals and airflow first; clean coils; check for frost; test fan operation; verify thermostat settings; if frost or defrost timer is involved, perform defrost; if compressor is suspect, call a pro.
This flow keeps the process organized and ensures you don’t miss basic steps before moving to more complex repairs.
Step-by-Step: Fix for the Most Common Cause (Airflow/Coil Dust)
- Unplug the fridge and locate the condenser coils on the back or beneath the unit. Remove dust with a soft brush or vacuum; avoid metal tools that can damage fins. Tip: Do this in short bursts to prevent overheating.
- Inspect door gaskets and tighten any loose latches. If gaps persist, replace the gasket to restore a tight seal. Tip: A simple soapy water test can indicate leaks around the door.
- Check for adequate clearance around the fridge for proper airflow; move items away from the vents and ensure space at least a few inches from walls. Tip: Poor clearance can dramatically reduce cooling efficiency.
- Listen to the evaporator fan; if you hear no air movement when the compressor runs, the fan may be blocked or faulty. Tip: Do a manual spin test; a stuck fan suggests replacement.
- Set the thermostat to a mid-range temperature and monitor for 2–4 hours. If the unit still isn’t cooling, it’s time to move to the next fixes or call a pro. Tip: Record the temperature for a baseline.
- If frost is present on the evaporator, perform a manual defrost by unplugging and letting ice melt, then dry thoroughly before restarting. Tip: Frost can hint at a failed defrost timer or heater.
- Reassemble panels, plug back in, and monitor performance for another 4–6 hours. Tip: Keep a log of temperatures and any abnormal noises.
- If cooling remains inadequate, consider professional service for possible defrost timer, sensor, or compressor issues. Tip: Have your model, serial, and observed symptoms ready when calling.
Estimated total time for these steps: 45–75 minutes (not including potential defrost or professional service).
Safety, Warnings, and When to Call a Pro
Working with electrical appliances requires caution. Always unplug before inspecting any internal components. If you notice burning smells, visible coolant leaks, or hissing sounds, stop and contact a professional. Do not attempt refrigerant repairs yourself; refrigerant handling requires certification and proper equipment. If the defrost system or thermostat tests point to the control board, a technician should be engaged.
Pro tip: label wires and take photos before disconnecting to aid reassembly. A small mistake here can create new problems or safety hazards.
Maintenance and Prevention to Avoid Future Not Cooling Issues
Regular maintenance extends the life of your refrigerator and reduces the risk of unexpected failures. Establish a simple routine:
- Vacuum coils every 3–6 months and keep vents clear for optimal airflow.
- Check and replace door seals every few years or as needed; a good seal saves energy and improves cooling.
- Use the freezer and fridge properly—avoid overfilling, which blocks airflow.
- Keep the temperature in the recommended range and calibrate if necessary; miscalibration can cause overuse of the compressor.
- Schedule professional checkups every couple of years to catch wear on defrost timers, sensors, and the compressor.
If you’re still wondering how come my refrigerator is not cooling after preventive steps, you’ll likely reduce the risk of abrupt failures and keep the appliance performing efficiently.
When to Call a Technician and What to Expect
There are scenarios where DIY troubleshooting isn’t enough. If the unit still isn’t cooling after you've performed the above checks or you hear unusual noises, a professional evaluation is warranted. Technicians can verify refrigerant integrity, test the defrost timer with specialized tools, and safely service the compressor and refrigerant lines. Having your model number, age of the unit, and a concise symptom log ready will speed up the visit. Regular maintenance schedules with a pro can prevent recurrence and extend the life of the appliance.
Steps
Estimated time: 45-75 minutes
- 1
Unplug and Prepare
Turn off and unplug the fridge. Remove items around the condenser and ensure you have clear access to the back or bottom panel. This step prevents accidents and lets you inspect safely.
Tip: Keep kids and pets away during inspections. - 2
Inspect the Door Seals
Check gaskets for cracks or warping. A quick test: close with a sheet of paper and try to pull it out; if it slides out easily, the seal is compromised.
Tip: Replace or reseal if gaps are visible. - 3
Clean Condenser Coils
Locate coils at the back or beneath the unit. Use a soft brush and vacuum to remove dust. Don’t use water on electrical parts.
Tip: Do this in a well-ventilated area. - 4
Check Airflow and Vents
Ensure the interior vents aren’t blocked and there’s adequate space around the appliance for airflow.
Tip: Reorganize shelves to improve air distribution. - 5
Test Evaporator Fan
If accessible, listen for the evaporator fan when the compressor runs. If you hear no air movement, the fan may be faulty.
Tip: Spin the fan manually to see if it’s free or stuck. - 6
Assess the Thermostat
Set the thermostat to a mid-range temperature. After 20–30 minutes, check if cooling improves and monitor for a full cycle.
Tip: Avoid drastic temperature changes—small adjustments work best. - 7
Defrost (if frost is present)
If frost blocks the evaporator, perform a manual defrost by unplugging and letting ice melt. Dry completely before reassembly.
Tip: Be patient—defrost can take several hours. - 8
Reconnect and Monitor
Plug back in, reload items, and monitor performance for several hours. If cooling still fails, escalate to professional service.
Tip: Document observed symptoms and timings for the technician.
Diagnosis: Fridge not cooling or cooling intermittently
Possible Causes
- highDoor seal leaks allowing warm air in
- highDusty condenser coils impeding heat exchange
- mediumFrost buildup blocking evaporator airflow
- mediumEvaporator fan not circulating air
- lowThermostat miscalibration or defective control
- lowDefrost timer or heater failure
- lowCompressor or refrigerant issue
Fixes
- easyRepair/replace door gasket if leaks detected
- easyClean condenser coils and improve airflow
- mediumDefrost evaporator if frost blocks airflow
- mediumRepair or replace evaporator fan if it’s not spinning
- mediumRecalibrate thermostat or replace faulty control board
- hardTest/repair defrost timer or heater
- hardReplace compressor or repair refrigerant lines (professional)
FAQ
What does it mean if my refrigerator is not cooling but the light is on?
That often means the power is fine but airflow or refrigerant-related components aren’t functioning correctly. Check door seals and coils first, then test the evaporator fan and thermostat. If problems persist, a professional needs to inspect the defrost system or compressor.
If the light is on but it’s not cooling, start with door seals and coils, then check the fan and thermostat. If unresolved, a technician should inspect the defrost system or compressor.
Can I fix a not-cooling fridge myself?
Yes for many basic checks like seals and coils, but avoid refrigerant work or compressor repairs without training. DIY can save money on simple fixes but know when to stop and call a pro.
You can handle basic checks yourself, but avoid refrigerant or compressor work unless you’re trained. When in doubt, call a professional.
How long should it take to see improvement after a fix?
Most fixes show results within a few hours. If a frost-related fix was done, give it up to 24 hours to stabilize. Use a thermometer to track steady cooling.
You should see improvement within a few hours after a fix; frost fixes may take up to a day to fully stabilize.
Is defrosting my fridge safe to perform at home?
Defrosting is generally safe but should be done with the fridge unplugged and away from water sources. Dry thoroughly before replugging. If water leaks exceed a small amount, stop and seek guidance.
Defrosting is usually safe if you unplug first and dry thoroughly. If leakage is significant, contact a pro.
When should I call a technician for not cooling?
If you hear buzzing noises, detect refrigerant smells, or the unit remains warm after the above checks, it’s time to call a professional. Also, if the defrost system or compressor is suspected, a pro should handle it.
Call a technician if you hear buzzing, detect leaks, or the fridge remains warm after basic fixes.
Watch Video
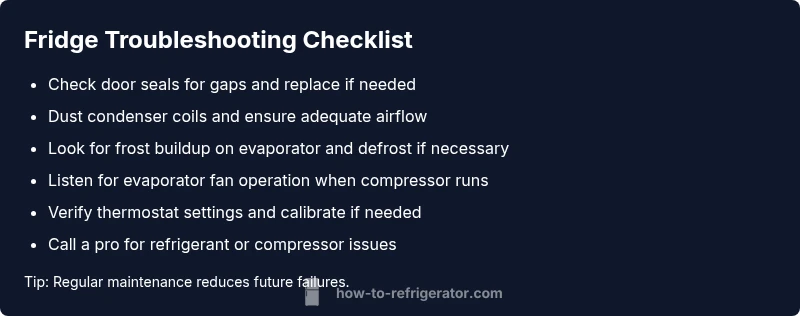
Top Takeaways
- Start with seals and coils.
- Frost and airflow issues are the most common culprits.
- Defrost or thermostat problems require careful testing.
- Call a pro for refrigerant or compressor concerns.
- Prevention reduces future emergencies.