When the Refrigerator Is Not Cooling: Comprehensive Troubleshooting for Homeowners
Urgent, step-by-step troubleshooting for not cooling fridges. Learn safe checks, common causes, diagnostic flow, and clear fixes to restore cooling or know when to call a pro.

Quick answer: When the refrigerator is not cooling, start with simple checks: verify power at the outlet, ensure the thermostat isn’t set too high, and inspect the door gaskets for air leaks. Common culprits include dirty condenser coils, a faulty evaporator fan, or a blocked defrost drain. If cooling still fails, follow the diagnostic flow and step‑by‑step fixes below for a safe, systematic approach.
Understanding the problem: when the refrigerator is not cooling
If you notice your fridge running but not producing cold air, you’re facing a common home comfort issue that can quickly disrupt meals and safety of perishable items. The phrase when the refrigerator is not cooling describes a spectrum from slight inefficiency to total warm compartments. Start with a calm, safety-first mindset: unplug the unit if you hear unusual noises or smell burning; never place your hands near the compressor or sealed components while it’s plugged in. This overview explains why cooling can fail and how small, observable clues—like warmer shelves, frost buildup, or a door that never seals—point to likely culprits. It also clarifies when a DIY fix makes sense and when you should call a professional. Throughout this guide, we reference How To Refrigerator guidance to keep troubleshooting efficient and safe for homeowners. Remember: problems often reveal themselves through simple symptoms you can verify in minutes before taking apart appliances.
Quick checks you can do safely
Before you dive into mechanical inspection, perform a handful of quick, safe checks that can save time and money. Make sure the refrigerator is plugged in and the outlet is live; if unsure, test with a lamp or phone charger. Check that the thermostat is set within the recommended range (usually around 37–38°F for the fresh food compartment and 0°F for the freezer). Inspect door gaskets for tears, warping, or compression that could admit warm air. Confirm that internal vents and the grille at the back are clear of dust, spilled foods, or packaging. Finally, listen for the evaporator fan when the fridge runs; if it’s silent or noisy, that’s a clue to a motor or relay issue. If any of these basic steps don’t restore cooling, proceed with the diagnostic flow and the step-by-step fixes below.
How refrigerators work: a quick refresher
A modern refrigerator removes heat from the interior by circulating refrigerant through a sealed system that includes a compressor, condenser coils, an expansion device, and an evaporator. The coil at the back or underneath releases absorbed heat to the surrounding air, while a fan moves cool air through shelves. Frost or ice can gradually block airflow if the defrost system fails. A simple rule of thumb: if the compressor is running but you don’t feel cold air, or if frost accumulates on the evaporator, something in the cycle is not completing. With this refresher in mind, you can better interpret symptoms and avoid unnecessary disassembly. This section is designed to help homeowners differentiate between a basic setting issue and a genuine component failure that might require professional service.
Inspect the power, settings, and airflow
Start by confirming power delivery. Check that the outlet is hot and the cord isn’t damaged. If you use a surge protector, try plugging directly into a wall outlet. Verify the unit isn’t in a high-heat spot or near a heat source. Then verify the temperature settings: a too-warm dial, a dark kitchen light, or a malfunctioning control board can keep the interior from cooling properly. Next, assess airflow: ensure nothing blocks the vents inside the fridge or freezer, and make sure items aren’t packed so tightly that air can’t circulate. Finally, check door operation: the door should seal snugly; listen for a soft “thud” when closing and look for signs of air leakage around the gasket. If cooling remains unstable, continue with coil and fan checks in the next sections.
Checking the condenser coils and fan airflow
Condenser coils are usually located at the back or beneath the fridge. Dust and pet hair can insulate the coils and reduce heat dissipation, causing the compressor to work harder and temperatures to rise inside. If you can safely access them, unplug the unit and gently vacuum or brush the coils. Remove heavy dust and debris, then wipe with a damp cloth. While you’re at it, inspect the evaporator fan inside the freezer; if the fan blade is stuck, blocked by ice, or makes grinding noises, that’s a sign the fan or its motor needs service. Reassemble, plug in, and monitor temperature for a few hours. If there’s no improvement, move to the defrost or sensor checks described later in this guide.
Defrost drain and frost buildup issues
A blocked defrost drain can cause water to back up and freeze, blocking the passage of cold air. Locate the defrost drain near the back of the fridge or in the freezer and clear any obstructions. Flush the drain with warm water and a small amount of baking soda to cut residue. If frost persists on the evaporator coils, the defrost heater or timer might be failing, leaving ice in the wrong place and impairing cooling. In some models, manual defrost may be needed to reset the cycle. After addressing drainage and frost, give the system a few hours to re-stabilize before judging the outcome. If symptoms continue, consult the diagnostic flow for further steps or professional help.
Temperature control, thermostats, and sensors
In some cases, inaccurate temperature readings come from a failing thermostat, a damaged sensor, or a loose connector. If you have a service manual, locate the thermistor or temperature sensor near the evaporator coil and check for signs of damage or corrosion. A multilimeter can test resistance, but many homeowners find this step challenging; in that case, replace the thermostat or sensor according to manufacturer instructions. Remember that incorrect readings can cause the compressor to cycle too often or not at all, which reduces cooling. After any part replacement, give the fridge time to stabilize and check after each-hour interval.
When to call a professional and practical prevention tips
If you’ve exhausted safe, DIY steps and the refrigerator is still not cooling, it’s time to call a licensed technician, especially if you suspect a sealed system leak or refrigerant issue. A pro can perform a refrigerant pressure check, test the compressor, and diagnose electrical faults that require specialized equipment. In terms of prevention, schedule regular coil cleaning, keep the area around the fridge free of dust, inspect door gaskets every few months, and avoid overpacking shelves. By establishing a simple maintenance routine, you reduce the likelihood of a future call for service. Remember the How To Refrigerator approach: a methodical diagnostic flow, strict safety practices, and timely professional help when needed.
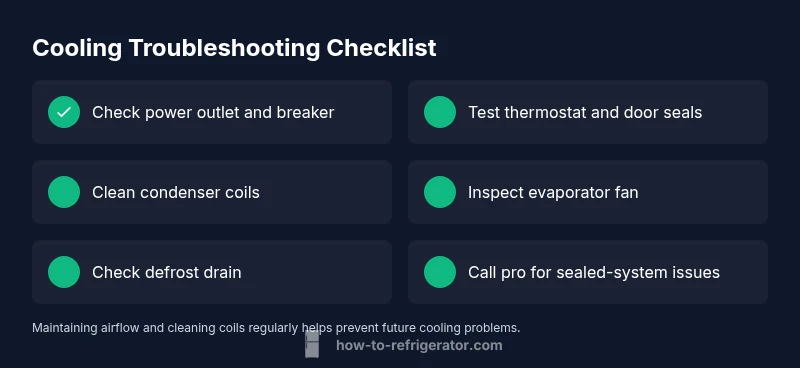
Steps
Estimated time: 60-90 minutes
- 1
Check power and settings
Verify the fridge is plugged in, the outlet is live, and the breaker hasn’t tripped. Confirm the thermostat is set to a normal range (approx. 37–38°F for fresh food). If these basics aren’t met, cooling won’t happen regardless of other fixes.
Tip: If the outlet trips often, consult an electrician to inspect the circuit. - 2
Inspect door seals
Close the door firmly and test with a simple paper test to see if air slips out at the gasket. Replace torn or loose gaskets and re-seal the door to restore proper cold air retention.
Tip: Perform the paper test from multiple corners for a thorough check. - 3
Clean condenser coils
Unplug the unit, locate the coils (back or bottom), and remove dust with a brush or vacuum. A clean coil improves heat rejection and lowers compressor load.
Tip: Do not use water directly on hot components; allow cooling first. - 4
Test evaporator fan and airflow
Listen for the evaporator fan inside the freezer; ensure it spins freely and isn’t blocked by ice. If no airflow is detected, the fan motor or relay may need replacement.
Tip: Run the fridge with the freezer door open briefly to observe airflow movement. - 5
Check defrost system and drainage
Examine the defrost drain for clogs and clear obstructions. If frost persists on the evaporator, the defrost heater or timer may have failed.
Tip: Be cautious with frost; excessive thawing can create water on the floor. - 6
Evaluate temperature control and sensors
If readings are inconsistent, verify wiring and sensors per the service manual. Replace a faulty thermostat or sensor to restore accurate cooling control.
Tip: Only perform sensor tests if you have the correct multimeter and instructions. - 7
Assess when to call a pro
If you suspect a sealed-system leak, refrigerant issue, or electrical fault beyond basic checks, contact a licensed technician.
Tip: Document symptoms and results of each step for the technician. - 8
Post-fix verification
Allow the fridge to stabilize for several hours after any repair and recheck temperatures in both compartments.
Tip: Keep a log of dates and temperatures to track improvements.
Diagnosis: Refrigerator not cooling
Possible Causes
- highPower issue (outlet, breaker, or cord)
- mediumDirty condenser coils or blocked airflow
- mediumFaulty evaporator fan or motor
- lowDefrost system failure or frost buildup
- lowDoor gasket leak causing warm air intrusion
Fixes
- easyCheck outlet, test with a known live device, and reset circuit breaker; ensure the fridge is receiving power
- easyVacuum and brush condenser coils; clean vents to restore airflow
- mediumInspect evaporator fan and motor; replace if damaged or noisy
- mediumDefrost drain inspection and cleaning; check defrost heater if frost persists
- easyInspect door gaskets for leaks and replace if torn or loose
- hardIf the compressor or sealed system is suspected, contact a licensed technician
FAQ
What should I do first when the refrigerator is not cooling?
Begin with safe checks: power, thermostat, and door seals. If cooling still fails, follow a structured diagnostic flow and note any observations. Avoid opening sealed refrigeration components yourself.
Start with power, thermostat, and door seals; then follow the diagnostic flow if needed.
Can a dirty condenser coil cause not cooling?
Yes. Dirty coils impede heat rejection, forcing the compressor to work harder and reducing cooling efficiency. Clean the coils from the back or bottom after unplugging.
Dirty coils can stop cooling; clean them after unplugging.
What if the door gasket looks fine but cooling is poor?
Gasket damage can be subtle. Test for air leakage with a simple paper check and replace if it slides out easily. Frost buildup may also indicate defrost issues.
Even good-looking gaskets can leak; test with a paper and replace if needed.
When should I replace the thermostat or sensor?
If temperature readings are inconsistent or the compressor cycles abnormally, replacement may be needed. A trained technician can verify with proper tools.
If readings are off, consider replacement and get a pro to verify.
Is a buzzing noise normal in a fridge not cooling?
Some humming is normal, but persistent buzzing or clicking could signal a faulty compressor, relay, or fan. Have a technician diagnose persistent noises.
Buzzing or clicking can signal component failure; have it checked.
Is it safe to repair a refrigerant leak myself?
No. Refrigerant leaks require licensed technicians and proper safety practices. DIY repairs are dangerous and often illegal.
Refrigerant leaks aren’t DIY safe.
Watch Video
Top Takeaways
- Start with power, thermostat, and gasket checks.
- Dirty coils and blocked airflow are common culprits.
- Defrost drain issues often drive frost buildup and cooling loss.
- Test the evaporator fan before pursuing costly repairs.
- Regular maintenance reduces future cooling problems.