GE Refrigerator Ice Maker Repair Guide
Comprehensive, step-by-step guidance to diagnose, fix, and maintain your GE refrigerator ice maker. From safety basics to part replacements, learn practical, homeowner-friendly techniques to restore reliable ice production.

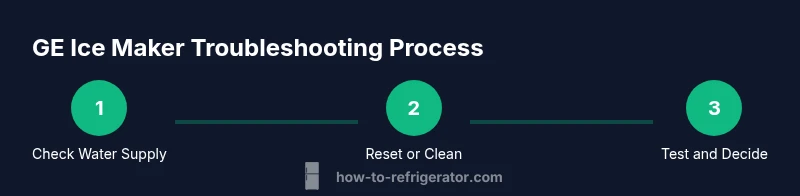
By the end of this guide, you will diagnose common GE refrigerator ice maker problems and complete safe, practical fixes. You’ll verify water supply, reset or recalibrate the ice maker, inspect the ice mold and motor, and determine whether a simple repair will restore ice production or if replacement is needed. This approach helps homeowners save time and avoid unnecessary service calls.
Understanding the GE Refrigerator Ice Maker System
The GE refrigerator ice maker is a compact module built into most side-by-side and top-freezer models. It relies on a cold-water supply, a mating ice mold, a heater, and a small motor to eject ice into the bin. For reliable ice production, all components must be clean, aligned, and free of frost buildup. According to How To Refrigerator, the most common failure points are the water inlet valve, clogged lines, or a tripped sensor. By understanding how each part functions, you can diagnose issues more quickly and decide whether a simple reset, cleaning, or part replacement is needed. In this guide, we focus on generic GE ice maker configurations and provide practical steps you can perform safely in a typical home kitchen. This foundational knowledge helps homeowners approach problems with confidence and avoid unnecessary replacements.
Common Symptoms and Quick Diagnoses
If you notice the GE refrigerator ice maker stops producing ice, makes small cubes, or produces no ice, the cause is often water-related or electrical. Signs include a thin ice sheet or frost around the ice mold, a frozen water line, or an ice bin that overflows. Another frequent symptom is the ice maker running but not ejecting ice into the bin. Use these symptoms to guide your checks: water supply integrity, ice mold heating, and the reset status of the ice maker control module. Remember, some GE ice maker issues arise from simple things like a clogged filter or a loose connector, so start with the basics before diving into parts.
Safety and Preparation: Power, Water, and Tools
Before touching any appliance, unplug the refrigerator and turn off the water supply if accessible. Wear safety glasses and dry hands. Gather the tools you will need and place towels to soak any spillover. Keep a bucket to catch condensate. This is also a good time to check the model compatibility of any replacement parts. A careful approach minimizes the risk of electric shock or water damage, and it helps you keep the work area clean and organized for a quick reassembly.
Troubleshooting Flow: From Symptoms to Action
A practical approach is to start with the simplest fixes. If ice production is intermittent, verify water supply and valve operation. If the line is kinked, straighten it. If the ice maker cycles but produces no ice, reset the module and check for frost on the ice mold. Document what you observe to guide any future service. This flow keeps you focused and reduces needless disassembly. It also provides a clear trail for when you need to escalate the issue to a professional.
Replacement and Recalibration: When and How
In many GE ice maker issues, the fix is a simple reset or cleaning. If problems persist after basic maintenance, you may need to replace the ice maker assembly or water inlet valve. Replacement requires measuring the mounting points, disconnecting electrical connectors, and fitting a compatible unit. After installation, run several test cycles to confirm ice production and proper ejection. When buying parts, verify compatibility with your exact GE model and note any warranty implications to avoid unnecessary costs.
Preventive Maintenance for Long-Term Reliability
Schedule routine cleaning of the ice mold and water inlet to prevent mineral buildup. Periodically inspect the water filter (if your model includes one) and replace as recommended. Check the freezer temperature to ensure it stays within the manufacturer's range, which supports consistent ice production. Keeping the area around the ice maker dry reduces frost buildup and helps prevent future failures. Regular checks also make it easier to spot wear, cracks, or loose connections before they fail.
When to Call a Pro and What to Expect
If basic troubleshooting does not restore ice production, professional repair may be needed. A technician will typically test the ice maker module, verify electrical continuity, inspect the water line and valve, and check for ice mold damage. They will also calibrate the unit, replace faulty parts, and confirm proper cycle timing. Expect a visit lasting from one to two hours, plus parts. For many homeowners, a pro’s diagnostic fee is offset by avoiding incorrect DIY replacements and ensuring proper refrigerant-safe handling where applicable.
Quick Maintenance Checklist
- Inspect water line for kinks and leaks; fix any tight bends that restrict flow.
- Clean the ice mold and the heater surface to prevent mineral buildup that hampers release.
- Reset the ice maker after reseating connectors or replacing parts to re-sync the control module.
- Replace worn components promptly, including the water inlet valve or ice maker module if tests indicate failure.
- Keep the area around the ice maker dry and clear of clutter to prevent frost and improve air circulation.
Tools & Materials
- Flathead screwdriver(For panel access and component removal)
- Phillips screwdriver(For securing screws on ice maker housing)
- Nut driver set(If mounting screws are larger than common screws)
- Multimeter(To test electrical continuity and voltages)
- Replacement ice maker module(Only if diagnostic tests indicate module failure)
- Water inlet valve (replacement if needed)(Choose OEM-compatible part)
- Water line clamps and spare tubing(To secure or reroute the water line)
- Bucket and towels(To catch spills and keep area clean)
- Safety glasses and gloves(Personal protection during disassembly)
Steps
Estimated time: 60-90 minutes
- 1
Power down and access the ice maker
Unplug the refrigerator and pull the unit away from the wall if possible. Remove any access panels to reveal the ice maker and wiring harness. This prevents electric shock and limits water exposure during inspection.
Tip: Take a quick photo of wire connections before unplugging anything to simplify reassembly. - 2
Inspect water supply and shutoff
Check the water line for kinks or freezes along the path from the wall valve to the ice maker. Ensure the shutoff valve is fully open. A restricted flow is a common cause of no ice or weak production.
Tip: If you detect a kink, gently straighten the line and test for improved flow after reassembling. - 3
Remove ice bin and disconnect harness
Carefully remove the ice bin and detach the electrical harness from the ice maker. Avoid pulling on wires; disconnect at the plug end and keep track of which connector goes where.
Tip: Keep screws organized in a labeled container to prevent mix-ups. - 4
Test heater and mold for frost
With the ice maker exposed, check the mold for frost buildup and verify the heater circuit is functioning using a multimeter. Frost can prevent ice release and indicate a heating element issue.
Tip: If frost is present, allow a short defrost period and re-test before replacing parts. - 5
Reset or recalibrate the ice maker
Use the reset button if available, or perform a controlled reset by unplugging for 10 seconds and reconnecting. Recalibration aligns timing and cycle control, which helps restore consistent ice production.
Tip: After reset, listen for the normal cycle sound and watch for ice ejection during the first few cycles. - 6
Test cycles and decide on replacement
Run 2–3 test cycles to confirm ice production and ejection. If ice quality remains poor or production stops, consider replacing the ice maker assembly or the water inlet valve as indicated by diagnostics.
Tip: Document test results and any parts replaced for future service records.
FAQ
What are the most common GE ice maker problems?
Most GE ice maker issues stem from water supply problems, a blocked line, a tripped sensor, or a failed ice mold heater. Start by checking the water line, valve, and reset status. If frost or ice buildup is present, cleaning or component replacement may be necessary.
The most common GE ice maker problems involve water supply, blockages, or a failed heater. Start with the basics: water line and reset status, then clean and replace as needed.
How do I reset the GE refrigerator ice maker?
Locate the reset button on the ice maker housing or control module. Press and hold it for several seconds until you hear a chime or see a cycle indicator. If no reset button is present, unplug the unit for 10 seconds and plug it back in to reset the system.
Press and hold the reset button, or unplug for 10 seconds and plug back in to reset.
Why is my ice maker not filling with water?
No water flow usually means a shutoff valve issue, a kinked line, or a failing water inlet valve. Inspect the line, confirm valve operation, and test electrical continuity to the valve.
If it’s not filling with water, check the valve and line for kinks and test the valve to confirm if it’s passing water.
Is it safe to replace the ice maker myself?
DIY replacement is possible for many models if you follow safety guidelines and use compatible parts. Ensure the unit is unplugged and the water supply is shut off. If you’re unsure, consult a professional.
Replacing the ice maker yourself is doable, but unplug first and know when to call a pro if you’re unsure.
How long does a typical ice maker repair take?
A standard diagnostic and repair visit can take 1–2 hours, depending on part availability and the complexity of the issue. If a full module replacement is required, add time for parts ordering and setup.
Most repairs take about one to two hours, more if parts need to be ordered.
Should I service the ice maker before moving the fridge?
If you notice persistent problems, perform a basic reset and verify water supply before moving the unit. For complex issues, schedule service after positioning the fridge to minimize risk during reinstallation.
Do a quick reset and check water supply before moving; more complex problems should be handled by a pro.
Watch Video
Top Takeaways
- Diagnose water supply issues first before replacing parts.
- Reset and clean the ice maker as a first-line fix.
- If problems persist, test and replace the correct component with care.
- Maintain a routine to prevent mineral buildup and frost.
- Document procedures and results for future maintenance.