Repair Refrigerator Ice Maker: Step-by-Step Guide
Learn to diagnose and fix common ice maker issues in a refrigerator with safe, step-by-step instructions, practical tips, and maintenance advice from How To Refrigerator.

Goal: diagnose and repair common ice maker issues in a standard refrigerator using safe, basic tools. This quick answer outlines the most reliable DIY checks—water supply, ice mold, shutoff valve, and wiring—and highlights safety precautions. It also clarifies when to stop DIY work and call a professional for complex repairs. Having the right tools ready speeds up the process and protects your fridge.
How a refrigerator ice maker works and why failures happen
Ice makers in most refrigerators operate as a small water system coupled to a mechanical ejector. When a cycle starts, the fill valve opens briefly to fill the ice mold, the mold freezes, and the ejector arm pushes ice cubes out into the bin. If any part of this sequence stalls, you’ll notice either no ice, oddly shaped ice, or inconsistent harvesting. According to How To Refrigerator, understanding the basic cycle helps you diagnose failures quickly and avoid unnecessary repairs. In practice, most problems fall into a few broad categories: water supply issues, ice mold jams, wiring or control problems, and defective ice-maker assemblies. By recognizing which category your symptom fits, you can decide whether a DIY fix is feasible or if a professional service is needed. This overview focuses on practical, safe steps you can perform to repair a refrigerator ice maker in a typical home kitchen.
Common culprits include a kinked water line that prevents the valve from filling, mineral buildup in the inlet screen, a frozen ice mold that traps cubes, or a loose wire connection. The ice maker’s electrical controls expect clean signals and predictable timing. If the motor or valve never receives power, the cycle won’t start; if the fill period is too short, the mold may not fill enough water to form ice; if the mold heater fails, cubes can stick or melt slowly, causing jams. You don’t need advanced tools to identify most of these issues, but a basic toolkit and a calm, methodical approach help.
In short, repair refrigerator ice maker issues map to three subsystems: water supply, mold/ejector, and control electronics. The How To Refrigerator team emphasizes careful inspection, safety, and a structured approach to reset or replace components. While brands and ice maker styles vary, the core principles stay the same.
Safety and prep before you begin
Before touching any fridge components, power down to avoid electric shock. Unplug the refrigerator at the wall outlet and, if accessible, switch off the dedicated circuit breaker. Keep a towel or small basin ready to catch any water that spills when you open panels. Work in a well-lit area and use non-conductive tools where possible; avoid metal tools when probing live connections. If your model uses a water filter, replace it or ensure it flows freely to the intake. Remember to consult your user manual for model-specific precautions. For extra protection, wear safety glasses when working around ice-maker components. By taking these precautions, you reduce risk and preserve both your appliance and your home.
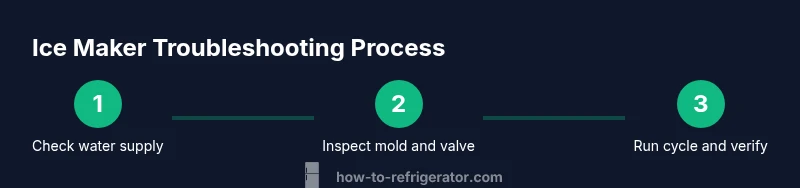
A diagnostic checklist: step-by-step approach
Follow these steps in order, testing the system after each to narrow the cause. 1) Power and status: verify the ice maker is selected and the freezer light is on; 2) Water supply: check the supply line for kinks or leaks; ensure the shutoff valve is fully open and there is water pressure; 3) Inlet screen and line: inspect for mineral buildup and clean or replace if clogged; 4) Ice mold and ejector: remove any ice jams and inspect the mold for cracks or deformations; 5) Arm switch and harness: ensure the arm is down and signals reach the control board; 6) Control signals: listen for a relay click when the cycle starts and, if possible, test for voltage at the ice maker housing. If you encounter power or signal issues, address wiring first; if water or mold problems exist, fix those before cycling again.
If you cannot reliably confirm the cause, consider pausing and seeking professional help. The goal is to isolate the fault to one subsystem so you know whether a simple cleaning, adjustment, or part replacement will fix the unit.
Do-it-yourself fixes you can try safely
Start with non-invasive steps and avoid disassembly of sealed refrigerant components. First, thaw a frozen water line by warming the freezer compartment gently or directing a warm airflow toward the line for 10-20 minutes. Next, clear any ice from the mold and run a manual cycle if your model supports it. Clean the inlet screen and check for mineral buildup; a thorough rinse with warm water often resolves slow fills. Inspect the water valve wiring and connectors for corrosion or loose pins; reseating connectors can restore function. If the ice maker seems dead but the wiring and water supply look fine, you may need to replace the ice-maker module or kit compatible with your model. While many fixes are doable with basic tools, avoid replacing the control board yourself unless you have the right experience and a clear replacement part with proper instructions. After any fix, run several cycles to confirm reliability and watch for leaks. If the problem reappears, it may be time to escalate to professional service.
Maintenance and prevention for long-term reliability
To keep the ice maker humming, perform light maintenance every 3-6 months. Clean the ice mold and bin to prevent mineral buildup, and replace the water filter on schedule as recommended by your manufacturer. Keep the water line clear by occasionally flushing the line; run a few cycles to purge air and sediment. Check the fill level—the mold should fill to the level indicated by your model’s specs; if you notice consistently small or misshapen cubes, adjust the water valve or re-seat the line if accessible. Avoid heavy use of metal tools on the ice maker components; use plastic pry tools to minimize scratches. If you have hard water, consider installing a water-softening solution or a better filtration system to reduce mineral deposits in the inlet. Regular inspections of the ice maker’s wiring harness for wear or loose connections can prevent intermittent failures. By committing to a simple maintenance routine, you reduce the likelihood of a surprise breakdown and keep ice production steady.
When to call a professional—and what to expect
Some issues are best handled by a trained technician. If you exhaust safe DIY fixes, but ice production remains inconsistent, you should seek professional help. A pro will verify power and signal integrity, test the valve and solenoid under load, and inspect the control module for faults. Replacing an ice-maker assembly is common, but specialists will ensure correct model compatibility and proper wiring. If you notice refrigerant smells, unusual warmth near the compressor, or flooded areas around the ice maker, contact a licensed tech immediately, as these indicate larger appliance or safety concerns. The How To Refrigerator team recommends documenting symptoms, the model number, and a timeline of attempts before you call for service; this helps the technician diagnose faster and minimize downtime.
Tools & Materials
- Digital multimeter(Test voltage and continuity for ice maker circuits.)
- Screwdriver set (Phillips and flathead)(Access ice maker housing and mounting screws.)
- Nut driver or socket set(Remove mounting hardware if needed.)
- Needle-nose pliers(Grip small connectors, clamps, and hoses.)
- Towels or absorbent cloths(Catch drips and keep area clean.)
- Flashlight(Better visibility inside the freezer.)
- Replacement ice maker kit/module(Only if you determine the module is defective and compatible with your model.)
- Small container or bowl(To collect water during testing.)
- Isopropyl alcohol or cleaner(For cleaning mineral buildup on inlet screens.)
Steps
Estimated time: 60-120 minutes
- 1
Power down and safety
Power off the refrigerator at the wall and unplug it. This eliminates the risk of electric shock while you inspect the ice maker housing. Double-check there are no live wires before you begin any hands-on work.
Tip: Use a non-contact voltage tester to confirm power is off. - 2
Locate the ice-maker housing
Open the freezer door and locate the ice-maker assembly. If there is a cover, remove it with the appropriate screwdriver to expose the ice mold, ejector mechanism, and wiring harness. Photograph connections before disconnecting anything to simplify reassembly.
Tip: Label wires or take a quick photo for reference. - 3
Check the water supply
Trace the water line from the valve to the ice maker. Look for kinks, cracks, or leaks, and ensure the shutoff valve is fully open. If water pressure is low, the mold may not fill adequately, causing thin or no ice.
Tip: If the line is blocked by mineral buildup, you may need to flush or replace sections. - 4
Inspect ice mold and ejector
Inspect the ice mold for cracks or warping and check any jammed ice in the mold. Ensure the ejector arm moves freely and does not bind. If the mold is damaged, replacement is usually required.
Tip: Remove any ice stuck in the mold with a plastic tool to avoid scratching. - 5
Check arm switch and wiring harness
Make sure the arm switch is engaged (down) and listen for a control panel signal when you cycle the ice maker. Inspect the wiring harness for loose pins or corrosion and reseat connectors if needed.
Tip: A loose connector is a common source of intermittent failures. - 6
Test cycle and verify signals
With power restored, initiate a test cycle if your model supports it. Listen for a click from the valve and relay, and observe whether the mold fills correctly. If you don’t hear a cycle or you see no voltage at the connector, the fault is electrical.
Tip: If you must measure voltage, do so safely and briefly to avoid shock. - 7
Test voltage and continuity
With the unit powered down, use the multimeter to check continuity on the ice maker harness and valve terminals. Look for open circuits or unexpected resistance that indicates a faulty wire or bad connector.
Tip: Only attempt this step if you are comfortable with basic electrical testing. - 8
Replace or reseat components
If a single component is clearly defective or loose, reseat connectors or replace the component with a compatible part. Reassemble, run several cycles, and monitor for leaks or unusual noises.
Tip: Verify compatibility before ordering a replacement part for your model.
FAQ
Why won’t my ice maker produce ice?
Most often the issue is water supply, a frozen line, or a jammed mold. Electrical faults can also prevent the cycle from starting. Work through the diagnostic steps to pinpoint the subsystem at fault.
Most often it’s water supply, a frozen line, or a mold jam. Check the cycle and supply first.
My ice maker stops producing ice after a few days. What should I do?
Intermittent ice often indicates a loose connection, mineral buildup in the inlet, or a failing solenoid. Clean the inlet, check the wiring, and test the cycle. If the problem persists, consider replacing the ice-maker module.
Intermittent ice usually means a loose connection or buildup; check wiring and clean the inlet.
How do I reset the ice maker?
Many models reset by turning the unit off for several minutes or pressing a dedicated reset button. Refer to your manual for model-specific steps. A reset can clear simple electronic glitches.
Reset by turning the unit off for a few minutes or using the reset button, if available.
Can I fix this myself without special tools?
Yes for many basic checks such as water line inspection, mold clearing, and valve reseating. Do not attempt refrigerant work or disassembly of sealed components. If in doubt, seek guidance.
You can usually fix basic ice maker issues with common tools; avoid touching sealed refrigerant parts.
What if the water line is frozen?
Power down and thaw the line gently with warm air or a safe heat source. Then inspect for a return path and any kinks that could cause re-freezing. Ensure the line is clear before testing again.
Thaw the line with gentle heat and check for kinks to prevent re-freezing.
When should I replace the ice maker vs repair?
If failures persist after multiple fixes or the unit is old, replacement can be more cost-effective. A professional can help compare parts cost and expected lifespan.
If problems keep returning, replacement may be cheaper in the long run.
Watch Video
Top Takeaways
- Power off before any inspection to avoid shock.
- Isolate the fault to water, mold, or electronics with a stepwise approach.
- Many fixes improve reliability; replace only when necessary.
- Maintenance prevents future failures and keeps ice production steady.
- Call a professional if you encounter refrigerant risks or complex wiring.