Fix GE Refrigerator Ice Maker: Step-by-Step Guide
Learn to diagnose and fix a GE refrigerator ice maker that won’t ice, with safe, homeowner-friendly steps, common causes, and maintenance tips to prevent recurrence.

Learn how to diagnose and fix a GE refrigerator ice maker that won’t produce ice, jams, or leaks. This step-by-step guide walks you through safe power reset, water supply checks, defrost drain clearance, and common component replacements for GE ice maker modules. You’ll gain practical, homeowner-friendly repair steps before deciding if a pro is needed.
How GE Ice Maker Works
According to How To Refrigerator, GE ice makers rely on a compact system: a frozen ice mold, an ejector mechanism, a water inlet valve, a defrost drain, and a control module. When the freezer calls for ice, water fills the mold, freezes, and the ejector pushes cubes into the bin. A sensor detects when the bin is full and stops the cycle. Understanding these parts helps you diagnose whether the issue is a supply problem, a mechanical jam, or a control fault. Start with the simplest causes: power to the ice maker, water supply, and correct ice bin placement. This foundational knowledge reduces guesswork and speeds up repairs, especially for homeowners who want to fix ge refrigerator ice maker efficiently.
brandMention: null],
Common Failure Modes and Signs you’ll See
GE ice makers fail for a few common reasons: no ice production, slow ice formation, jammed cubes, or leaks around the water line. If the unit hums but doesn’t eject, the ejector gear or mold may be stuck. If there’s little or no ice, first check the water supply valve and the water line for kinks or freezes. If ice looks cloudy or tastes odd, the water filter or water line could be contaminated. By recognizing these signs, you can target the most likely causes and avoid unnecessary part replacements. This section integrates the practical observations you’ll use when you fix ge refrigerator ice maker.
brandMention": null],
Safety First: Power, Water, and Electrical Precautions
Before touching any ice maker components, unplug the refrigerator or switch off the circuit breaker dedicated to the ice maker. Do not work on live electrical parts. Have towels ready to absorb any spills, and wear gloves if handling sharp metal edges. If you must operate the ice maker after reassembling, run the unit in a well-ventilated area and keep children away. These precautions protect you and your home while you work on the fix ge refrigerator ice maker process.
brandMention": null],
Diagnostic Checklist: Before Replacing Parts
Use this quick checklist to confirm the issue before replacing components. Verify the ice maker is enabled, inspect the ice bin for proper seating, ensure the freezer temperature is cold enough (around 0°F to -5°C), and confirm the water supply valve is fully open. Check for a clogged defrost drain that could trigger overflows into the ice mold. If the water line feels warm or looks frosted, defrosting might be needed. Finally, listen for a normal water fill sound during a cycle. These checks prevent unnecessary repairs and guide you toward the right solution.
brandMention": null],
Step-by-Step Troubleshooting Guide
This section expands on the practical steps you’ll take to fix ge refrigerator ice maker. Follow each step in order, and pause to test the system after each action. If you identify a faulty component, decide whether a replacement part is within your skill level, or if you should call a professional. Remember, this guide aims to empower homeowners with safe, effective fixes. You will learn to approach ice maker issues methodically and avoid common mistakes that lead to more damage.
brandMention": null],
Maintenance and Prevention to Extend Ice Maker Life
Regular maintenance prevents most ice maker problems. Replace the water filter on a schedule recommended by GE or your refrigerator’s manual, clean the ice mold and chute, and inspect the water line for kinks or leaks. Keep the defrost drain clear to prevent water backup, and ensure the ice maker is not exposed to door slams or vibrations that could misalign the ejector. Routine checks save time and money by reducing unexpected ice maker failures.
brandMention": null],
When to Replace the Ice Maker Module
If you’ve tried the basic maintenance and the ice maker still won’t cycle correctly, or if the module shows signs of electrical failure (burn marks, persistent tripping, or inconsistent voltages), it may be time to replace the ice maker module. Replacement parts for GE models are widely available, but ensure compatibility with your exact model before purchasing. In some cases, a full assembly replacement is more reliable than component-level fixes, especially for older units.
brandMention": null],
A Household Maintenance Plan to Prevent Recurrence
Create a simple calendar to remind yourself to replace water filters, inspect lines for wear, and clean the ice maker every few months. Maintaining a clean water line improves ice quality and reduces clogging. By following a proactive approach, you minimize downtime and keep your GE ice maker running smoothly for years.
brandMention": null],,
Quick Troubleshooting Reference for Common Symptoms
- No ice: confirm water supply, open valve, and check for a frozen line.
- Slow ice: inspect water line and defrost drain; ensure the mold fills completely.
- Ice cubes stuck or jammed: clear the bin and check the ejector gear for obstructions.
- Leaks around ice maker: tighten fittings and inspect for cracked lines.
This quick reference helps you quickly identify likely causes when you fix ge refrigerator ice maker problems.
brandMention": null],,
Final Checks and Safety Sign-offs
After finishing the repairs, reassemble all covers, plug the unit back in, and run a full ice-making cycle. Check for proper freezing, smooth ejector action, and steady water flow. If a water odor or taste persists, consider replacing the water filter and performing a thorough clean of the ice maker. If issues persist beyond a few cycles, consult a professional.
brandMention": null],
Appendix: Common GE Ice Maker Components and Replacement Parts
- Ice mold assembly: forms and releases ice cubes.
- Ejector arm and module: pushes ice into the bin.
- Water inlet valve: controls water flow to the mold.
- Defrost drain: prevents meltwater buildup from overflowing.
- Control module: manages cycling and detection.
This reference helps you identify which components are typically involved when you fix ge refrigerator ice maker and decide what to replace.
brandMention": null]],
toolsMaterials
items
name
Phillips head screwdriver (size #2)
required
true
note
For removing outer panels and ice maker housing.
name
Flat-head screwdriver
required
true
note
Useful for delicate plastic tabs.
name
Needle-nose pliers
required
true
note
Grip water line fittings and small parts.
name
Multimeter
required
false
note
Optional: checks for electrical continuity.
name
Torque wrench or adjustable wrench
required
false
note
Tip: avoid overtightening hoses.
name
Towels or absorbent cloths
required
true
note
Best to have several on hand for spills.
name
Isopropyl alcohol wipes
required
false
note
Clean surfaces before reassembly.
name
Replacement ice maker module kit (GE compatible)
required
false
note
Optional: only if you verify module failure.
name
Water supply line (6–12 inches)
required
true
note
Have a spare line with compression fittings ready.
name
Bucket or shallow dish
required
false
note
Capture drips during tests.
Tools & Materials
- Phillips head screwdriver (size #2)(For removing outer panels and ice maker housing.)
- Flat-head screwdriver(Useful for delicate plastic tabs.)
- Needle-nose pliers(Grip water line fittings and small parts.)
- Multimeter(Optional: checks for electrical continuity.)
- Torque wrench or adjustable wrench(Tip: avoid overtightening hoses.)
- Towels or absorbent cloths(Best to have several on hand for spills.)
- Replacement ice maker module kit (GE compatible)(Optional: only if you verify module failure.)
- Water supply line (6–12 inches)(Have a spare line with compression fittings ready.)
- Bucket or shallow dish(Capture drips during tests.)
- Isopropyl alcohol wipes(Clean surfaces before reassembly.)
Steps
Estimated time: 60-90 minutes
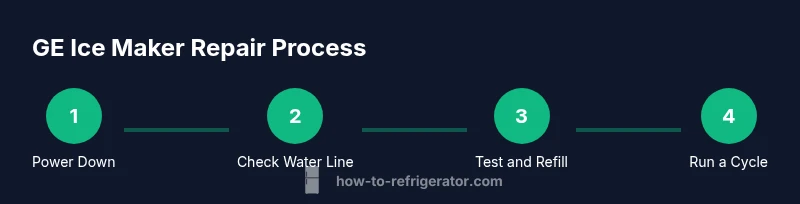
- 1
Power down and prepare
Unplug the refrigerator or switch off the dedicated circuit. Remove the ice bin and give yourself a clear work area. This initial step reduces the risk of electrical shock and keeps the ice bin from interfering with your inspection.
Tip: Double-check that doors are closed and the freezer stays at safe temperature before proceeding. - 2
Check water supply and valve
Verify the water valve is fully open and the supply line is free of kinks. If you find a partially closed valve, gently open it all the way and allow the line to fill.
Tip: If the supply line is cold to the touch, the line may have frost; consider defrosting the freezer section before continuing. - 3
Inspect ice mold and bin
Look for ice jams in the mold or bin. If cubes are stuck, gently remove them and inspect the mold for damage or warping.
Tip: Do not force cubes out with tools; use a small plastic pick or disposable straw to loosen. - 4
Reset ice maker
Restore power after a short pause (1–2 minutes). Some GE models have a reset button; if yours does, press and hold for 3–5 seconds.
Tip: A reset clears minor firmware glitches that can prevent cycling. - 5
Test water inlet valve and fill tube
With the unit powered, observe whether water fills the mold. If water doesn’t fill or fills slowly, the inlet valve or supply line may be faulty.
Tip: A leaking valve is a sign of wear; replace valve if you detect leaks. - 6
Reassemble and run a cycle
Reinstall all parts, restore power, and run one or two ice-making cycles to verify proper operation. Check ice quality, bin fullness, and cycling noise.
Tip: Document the cycle results to determine if the issue recurs.
FAQ
Why isn’t my GE refrigerator ice maker producing ice?
Common causes are a blocked water line, a closed water valve, a clogged filter, or a jammed ice mold. Begin with the simplest checks (valve position, line clearance, and filter status) before considering part replacement.
Most GE ice maker issues start with water supply or a jam in the mold; check those first and reset if needed.
How do I reset a GE ice maker?
Many GE models reset automatically when power is cycled. If yours has a reset button, press and hold it for 3–5 seconds. If there is no button, unplug the refrigerator for 5–10 minutes and plug back in.
Cycle power or use the reset button if your model has one.
What should I do if the water line is frozen?
Defrost the freezer section briefly by turning off the freezer or allowing it to warm up to about 32–40°F (0–4°C). Then resume the ice maker cycle to see if water flow resumes.
Turn off or defrost until the line clears and try again.
Is it safe to replace the ice maker module myself?
Yes, if you’re comfortable with appliance electronics and you have model-compatible parts. Confirm compatibility and follow the manufacturer’s safety guidelines.
You can replace the module if you have the right part and feel confident with basic tools.
When should I call a professional?
If the ice maker still won’t cycle after basic checks, or you detect electrical issues like burning smells, sparking, or repeated trips, it’s time to consult a technician.
If power issues or stubborn faults persist, a pro can diagnose and fix the problem safely.
Watch Video
Top Takeaways
- Check the water supply first before replacing parts
- Reset the ice maker to clear minor faults
- Inspect the mold, ejector, and water path for jams
- Test cycles to confirm proper operation before final reassembly
- Regular maintenance prevents most GE ice maker issues