Fix Ice Maker Refrigerator: A Step-by-Step Guide
Learn how to diagnose and fix common ice maker issues in a refrigerator with practical, safe steps, maintenance tips, and when to call a professional.

To fix an ice maker refrigerator that's not producing ice, start by verifying the water supply line for kinks or leaks, inspect the ice maker bin for jams, and reset the ice maker control. Gather basic tools, then run the step-by-step diagnostic. If ice still isn’t forming, continue with the full guide for deeper troubleshooting.
Diagnosing common ice maker faults
According to How To Refrigerator, most ice maker problems start with the water supply or simple mechanical jams. If the ice isn't forming or is misshapen, start by tracing the water line from the home supply to the back of the fridge and inspecting the ice mold for frost or debris. If you hear buzzing or chirping, the solenoid may be stuck. If there is water leakage around the ice maker, the fill tube or fittings are common culprits. For homeowners, a quick visual check often resolves minor issues without tools. The goal is to identify whether the problem stems from a supply issue, a stuck mechanism, or a sensor/control fault. By staying calm and methodical, you can avoid unnecessary disassembly and keep your fridge running efficiently.
Essential checks before you disassemble
Before you take tools to the ice maker, perform basic checks to avoid unnecessary disassembly. First, unplug the refrigerator or switch off the circuit to ensure safety. Verify the water supply line is connected and not kinked. Check the freezer temperature—ideally 0°F (-18°C)—because warm freezers slow ice production. Inspect the ice bin for clumps or frost bridging. Look for a switched-on ice-maker arm or bail; some models require the arm to be in the down position. If your fridge has a water filter, replace it if it’s clogged. Slowly run a diagnostic cycle if your model supports it. This pre-check routine saves time and reduces the risk of damaging delicate components.
Step-by-step diagnostic flow
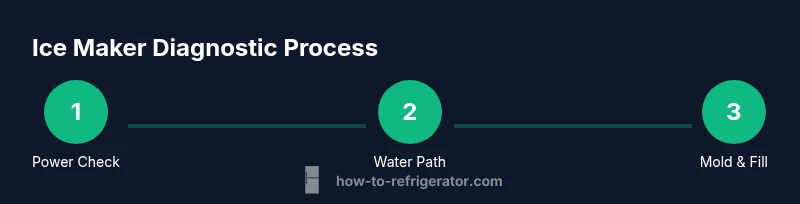
Follow this sequence to narrow down the problem: test power to the ice maker, inspect water path, observe ice mold for frost, listen for solenoid click, and run a cycle to observe water flow. If there’s no electrical response, confirm the outlet is functioning and that the fridge’s internal fuse is intact. If you hear distinct ticks or buzzing without ice formation, the issue may lie with the valve or sensor. This flow helps homeowners distinguish simple issues from more complex malfunctions that require professional service.
Common fixes you can perform safely
Many ice maker issues resolve with safe, simple actions. First, reset the ice maker by turning the power off, waiting 60 seconds, and turning it back on. Then, inspect and clear any jams in the ice mold and fill tube using a plastic tool; avoid metal tools that can scratch or bend parts. Clean the ice mold and verify there’s no frost bridging. If you notice the bin fills slowly or overfills, check the fill tube angle and clear any obstruction. Finally, ensure the water filter is fresh and properly seated, as a clogged filter reduces water supply and ice production.
When to call a professional
If you encounter refrigerant smells, noticeable water leaks beyond the drain pan, unusual electrical shocks, or persistent error codes after basic troubleshooting, it’s time to call a technician. Electrical or refrigerant issues require specialized training and safety equipment. The How To Refrigerator team recommends avoiding DIY repairs on high-voltage components or sealed refrigeration circuits when you’re unsure. A pro can diagnose valve failures, sensor faults, or line blockages that are not safe to address at home.
Maintenance to prevent future ice-maker problems
Preventive maintenance goes a long way. Schedule a quarterly check of the water line for kinks or leaks, and replace the water filter every 6–12 months depending on usage and manufacturer guidance. Regularly clean the ice mold and bin to prevent clogging and mineral buildup. Keep the freezer temperature stable and avoid frequent door openings that disrupt cooling. If you notice persistent frost buildup around the ice maker, address it early to prevent mold and ice blockages. By adopting a routine, you minimize downtime and extend the life of your ice maker.
Authority Sources
- Energy.gov: Refrigerator maintenance and energy-saving tips for appliances, including ice makers and water lines.
- CPSC.gov: Appliance safety and general guidance on avoiding hazards during home repairs.
- Consumer Reports: Independent testing and practical advice for evaluating ice maker performance and reliability.
Tools & Materials
- Safety gloves(Non-slip, insulated work gloves)
- Flashlight(Shine behind and under the fridge for visibility)
- Bucket or shallow pan(Catch water from the drain or fill line)
- Small screwdriver set (Phillips and flathead)(Access panels and small screws)
- Nut driver or adjustable wrench(Loosen fittings or valve connectors)
- Pliers(Grasp clamps and small fittings)
- Towels or rags(Clean up spills and wipe surfaces)
- Multimeter (optional)(Check electrical continuity for valve/solenoid)
- Defrost-safe cleaner (optional)(Gently remove mineral buildup from mold)
Steps
Estimated time: 45-75 minutes
- 1
Power down and access ice maker
Safely unplug the refrigerator or switch off the dedicated circuit. Remove the access panel or ice-maker cover so you can see the mold, bin, and connectors. Keep a bucket handy in case water drips during inspection.
Tip: Always unplug before handling electrical components to prevent shocks. - 2
Inspect water line and fittings
Trace the water line from the wall valve to the back of the fridge. Look for kinks, bends, or leaks in the line and tighten fittings if needed. If you find frost near the valve, allow it to thaw before continuing.
Tip: Shut off the water supply and use towels to catch any residual water. - 3
Check ice mold and fill tube
Examine the ice mold for cracks, mineral buildup, or frost bridging. Clear any blockages gently with a plastic tool. Inspect the fill tube for obstructions that could restrict water flow.
Tip: Do not use metal implements that could damage the mold. - 4
Test valve and solenoid basics
If accessible, inspect for obvious damage and ensure the solenoid clicks when power is applied. A simple continuity check with a multimeter can help; if readings are inconsistent, the valve may need replacement.
Tip: If you’re unfamiliar with electrical checks, skip this and proceed to resetting the ice maker. - 5
Reset and run a test cycle
Reset the ice maker by cycling power off for 60 seconds, then back on. Run a test cycle or wait for a complete cycle to complete while observing ice formation and water flow.
Tip: Allow at least one full cycle to determine if the problem repeats. - 6
Reassemble and observe
Reattach the panel, reconnect power, and monitor for consistent ice production over the next few cycles. If issues recur, move to professional assessment.
Tip: Keep a log of cycle behavior to share with a technician if needed.
FAQ
My ice maker won’t dispense ice, what should I check first?
Start with the water supply, confirm the bin is properly aligned, and ensure the arm or switch is engaged. If water is flowing but ice isn’t dispensing, the issue may lie with the dispenser mechanism or the solenoid.
Check the water line and bin alignment first; if water flows but ice won’t release, the dispenser mechanism may be blocked.
What causes small or hollow ice, and how can I fix it?
Small or hollow ice is often due to poor water pressure, a clogged filter, or a slightly warm freezer. Replace the water filter if needed and verify the freezer temp is at 0°F (-18°C).
Low water pressure or a clogged filter usually makes ice small; check the filter and freezer temperature.
How do I reset the ice maker on a typical fridge?
Unplug the unit or switch off the circuit, wait about 60 seconds, then plug back in or switch on. Run a test cycle to confirm the reset took effect.
Unplug, wait a minute, and replug; then test a cycle to verify.
Is it safe to use metal tools to fix the ice maker?
No. Use plastic or wooden tools to avoid damaging plastic molds and delicate components.
Avoid metal tools; they can scratch or bend the parts.
When should I call a professional for ice maker problems?
If you detect refrigerant odors, active leaks, or persistent electrical issues after basic troubleshooting, a licensed technician should assess the system.
Call a pro if you suspect leaks or electrical issues after trying the basics.
Can a clogged defrost drain affect ice production?
Yes. A clogged defrost drain can cause frost buildup that blocks ice production. Clear the drain and monitor for repeat frosting.
Defrost drain blockages can stop ice from forming; clear it and watch for frost.
Watch Video
Top Takeaways
- Start with the water line and mold, not the whole system.
- Unplug safely and work methodically to avoid damage.
- Reset and test cycles before calling a pro.
- Regular maintenance prevents most ice-maker problems.
- Call a professional for refrigerant or high-voltage issues.