Frigidaire Refrigerator Ice Maker Repair Guide
A practical, step-by-step guide to diagnosing and repairing ice maker issues in Frigidaire refrigerators, with safety tips, required tools, and when to call a pro.

By following this guide, you can diagnose and repair common ice maker issues on Frigidaire refrigerators, from jammed molds to water-line problems. The How To Refrigerator team emphasizes safety, proper tools, and knowing when a problem requires professional service. This quick overview helps you prepare, understand typical failure modes, and decide if a DIY fix is appropriate for your model.
Understanding Frigidaire Ice Maker Systems
Frigidaire ice makers are built to harvest, freeze, and dispense ice using a coordinated sequence of molds, harvest arms, a heater, a water inlet valve, and a control board. In many models, the ice maker operates independently from the main freezer temperature, but still relies on a steady water supply and accurate sensors. This understanding helps you identify where failures occur and how to test them methodically. Start by locating the ice maker inside the freezer—usually mounted to the interior ceiling or wall—and consult the user manual for model-specific diagrams. According to How To Refrigerator Team, knowing the basic subsystems and their interactions makes it easier to spot a fault and choose a safe, effective remedy.
Common subsystems include the water inlet valve that feeds the mold, the mold heater that releases frozen cubes, and the harvest mechanism that ejects cubes into the bin. A malfunction might involve a clogged inlet screen, a faulty heater, or a jammed harvest arm. Since many ice maker issues stem from water delivery, begin with the water supply path and filter integrity before delving into electronics. With patience and a methodical approach, you can isolate the problem without risking further damage to the appliance.
wordCountCatchAllForBlock1
notUsed
Tools & Materials
- Safety gear (gloves and safety glasses)(Protect hands and eyes while working)
- Screwdrivers (Phillips and flat-head, various sizes)(For cabinet panels and ice maker housing)
- Nut driver set(For retaining nuts on ice maker assembly)
- Pliers (needle-nose)(Useful for connectors and hoses)
- Notebook and pen(Document steps and part numbers)
- Voltage tester or multimeter(Verify electrical supply safely if testing circuitry)
- Towel or shallow tray(Catch water and spills during tests)
- Replacement ice maker kit or parts (optional)(Only after diagnosing faulty components)
Steps
Estimated time: 45-75 minutes
- 1
Power down and shut off water supply
Unplug the refrigerator and turn off the household water supply to the ice maker. This prevents accidental shocks and water leaks while you inspect components. If your model has a dual valve, shut off both lines. Verify power is off using the control panel or a tester before touching any wiring.
Tip: Double-check the main power cord unplugged and allow any capacitors to discharge for a few minutes before handling components. - 2
Open ice maker housing and inspect for jams
Remove the ice maker cover to access the mold, heater, and harvest arm. Look for a jammed ice cube or mineral buildup that blocks the harvest cycle. Gently clear any obstruction with a plastic tool—avoid metal objects that could bend sensors. Check for loose or disconnected wires at the mold and heater.
Tip: If you see mineral buildup, plan for a thorough cleaning in a follow-up step to prevent recurrence. - 3
Inspect water inlet valve and supply line
Trace the water line from the dispenser or supply valve to the ice mold. Look for kinks, leaks, or a clogged filter. If you have a water filter, replace it if it looks dirty or hasn’t been changed recently. Ensure the valve solenoid clicks when the ice maker cycles.
Tip: Replace a clogged filter and straighten any kinks to restore proper water flow. - 4
Test the harvest cycle and micro-switch
With power off, gently move the harvest arm to confirm it returns to its resting position. If the cycle doesn’t engage or the micro-switch feels loose, there may be an alignment or connection issue. Re-seat any loose connectors and consider a test cycle to observe the mechanism in motion.
Tip: A misaligned harvest arm can prevent ice ejection; realign and test again. - 5
Inspect and clean the ice mold and heater
Remove the ice mold and clean it with warm water and a mild cleaner to remove mineral deposits. Inspect the heater element for visible damage and ensure it makes proper contact with the mold. Reassemble carefully to avoid pinching wires.
Tip: Mineral buildup can prevent ice release; regular cleaning reduces future jams. - 6
Reconnect power, flush line, and run a test cycle
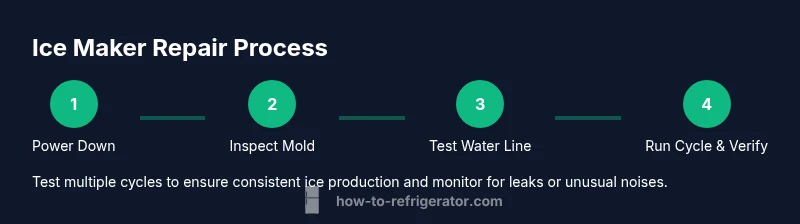
Reattach all components securely, restore power and water supply, and run a complete ice-making cycle. Listen for normal cycling sounds and watch the mold fill, harvest, and eject phases. If ice still fails, document the symptoms for professional diagnosis.
Tip: Run multiple cycles to confirm consistency; a single cycle may not reveal intermittent faults.
FAQ
Why is my Frigidaire ice maker not producing ice?
Common causes include a blocked water line, a faulty ice mold heater, a jammed harvest arm, or a malfunctioning sensor. Start by inspecting the water supply and mold for obstructions before testing electrical components.
If your ice maker isn’t producing ice, check the water line for blockages, inspect the mold for jams, and verify the heater and sensor are functioning.
Why are the ice cubes hollow or cloudy?
Hollow or cloudy ice often results from incomplete freezing due to low freezer temperature, slow water flow, or air trapped in the mold. Ensure the freezer is cold enough and the water line is delivering water smoothly.
Cloudy ice usually means the freezing is incomplete or air is in the mold; check freezer temperature and water flow.
What should I do if the ice maker is leaking water?
Leaks typically come from a loose valve fitting, a cracked hose, or a faulty inlet valve. Inspect all connections, tighten fittings, and replace any damaged hoses. If the leak persists, shut off water supply and call a pro.
If you see water leaking, check fittings and hoses for tightness or damage, then replace faulty parts if needed.
Can I fix an ice maker without disconnecting the water line?
Some diagnostic steps can be performed with the line attached, but for safety and accuracy you should disconnect the line when inspecting the valve or hoses. Always follow model-specific guidance.
You can do basic checks with the line in place, but disconnecting is safer for more involved inspections.
How often should I replace the ice maker assembly?
There’s no fixed interval; replace when repeated failures occur, repairs are cost-prohibitive, or the ice maker cannot meet demand after diagnostic checks. Consider model compatibility and warranty terms.
If failures keep happening, it might be time to replace the ice maker assembly.
Watch Video
Top Takeaways
- Identify root cause by starting with water supply and freezer temperature
- Safety first: unplug, turn off water, and protect against leaks
- Test cycles after each adjustment to confirm improvements
- Regular cleaning reduces mineral buildup and jams
- Know when to replace vs repair based on symptom patterns