Repair of Frigidaire Refrigerator: Step-by-Step Guide for Homeowners
Learn how to diagnose and repair common Frigidaire refrigerator problems safely. This How To Refrigerator guide covers DIY fixes, maintenance tips, and when to hire a pro for cooling issues, leaks, and ice-maker troubles.

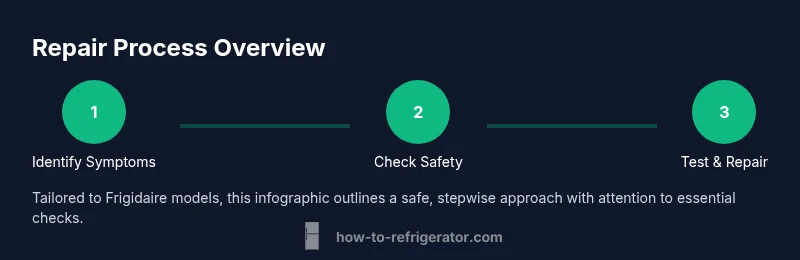
By the end of this guide, you can diagnose and repair common Frigidaire refrigerator issues affecting cooling and food safety. This quick overview covers when DIY is appropriate, essential safety steps, the tools you’ll need, and how to test solutions safely. For more detail, follow the step-by-step sections below. According to How To Refrigerator, a methodical plan reduces risk and saves time.
Why the repair of frigidaire refrigerator matters
Frigidaire refrigerators are designed for reliability, but like any appliance, they accumulate wear and faults. When a Frigidaire unit stops cooling, frost builds up, or you notice leaks, addressing the issue promptly protects food safety, reduces energy waste, and extends the life of the appliance. The How To Refrigerator team notes that proactive troubleshooting saves more money than waiting for symptoms to escalate. By understanding the common failure points—cooling system, defrost, door seals, and condensate drainage—you can prioritize the right fixes and avoid wasted time on unlikely causes. In this guide, we discuss practical, model-respecting approaches, emphasizing safety and clear repair steps you can perform with common household tools. Remember, some problems require a professional service, especially when refrigerant or high-voltage components are involved. Always consult your Frigidaire model’s manual before starting any repair, and use model-specific service data whenever possible.
Common Frigidaire refrigerator problems
Frigidaire models share many failure points, but symptoms can guide you to the likely culprit. If cooling is weak or absent, inspect the evaporator or condenser sections and verify thermostat settings. Frost on the evaporator coil suggests defrost problems, while water on the floor may indicate a clogged defrost drain or a leaky door seal. Ice-maker malfunctions can stem from water inlet valve issues or sensor faults. Temperature swings might point to poor door seals, fan problems, or wiring faults. Always consider the model’s age, energy usage patterns, and recent changes like door access frequency or new storage habits. In many cases, a targeted fix delivers results without replacing the entire unit. This section frames the most common failure modes so you can plan your repair path with confidence.
Safety first when working on cooling appliances
Safety must come first when you work on any refrigerator. Never work with live electrical components unless the unit is unplugged and the capacitor is discharged. Avoid touching metal parts with wet hands, keep the work area dry, and use insulated tools. If you have to move or lift the appliance, get help to prevent personal injury or appliance damage. For models with exposed refrigerant lines or high-voltage components, consult the manual and consider a professional for refrigerant-related work. Always wear eye protection and gloves when handling sharp edges or hot electrical components. By prioritizing safety, you reduce the risk of shock, burns, or accidental damage during repairs.
Diagnosing problems without disassembly
Begin with non-invasive checks that can reveal obvious causes and spare you from unnecessary disassembly. Verify the thermostat setting against the user manual and confirm the door seals are intact and clean. Listen for unusual fan noise that might indicate a failed condenser fan or motor. Check the outside condenser coils for dirt or lint buildup, which reduces cooling efficiency. If your model has an ice-maker, inspect the water line and valve for kinks or leaks. Use a digital thermometer to confirm whether the fridge interior is within the recommended range. Document symptoms, times, and any recent changes to help you decide between DIY fixes and professional service.
DIY vs pro: decision framework
Decide whether a repair is appropriate for DIY or requires a professional. Simple maintenance tasks—like cleaning coils, replacing worn door seals, or adjusting thermostat settings—are common DIY projects. More complex issues—such as refrigerant leaks, compressor faults, or electrical harness failures—usually require licensed technicians. Always check your model’s warranty and data sheets; some repairs may affect coverage. When in doubt, consider a diagnostic visit from a trained technician to avoid accidental damage or unsafe handling of refrigerants.
Parts, sourcing, and safe replacement
Sourcing the right replacement parts is crucial for a durable repair. Use manufacturer-approved components or high-quality equivalents matched to your exact Frigidaire model. Before purchasing, record the model number, serial, and part numbers from your unit’s data plate. When replacing components like thermostats, defrost heaters, or door seals, follow the manufacturer’s installation instructions verbatim. If you’re unsure about a part, request a parts diagram from Frigidaire or a reputable repair guide. After installation, recheck all electrical connections and test for proper operation. Keeping a spare parts kit on hand can reduce downtime and keep your fridge in service longer.
Maintenance to extend life and prevent future breakdowns
Proactive maintenance minimizes the risk of sudden failures. Schedule quarterly checks of door seals, gaskets, and drain lines; ensure proper airflow around the condenser; clean coils and fans; and verify proper thermostat calibration. Use a fridge thermometer to verify accurate temperatures and adjust settings as seasonal loads change. Regularly inspect the defrost system for frost buildup and verify that the drip pan and drain are clear. A short monthly maintenance routine can dramatically extend service life and reduce energy use.
Case studies: typical fixes for common Frigidaire models
Case Study A: A 6-year Frigidaire refrigerator stopped cooling. Inspection revealed a dirty condenser coil and a clogged defrost drain. After cleaning the coils and clearing the drain, cooling returned to normal without parts replacement. Case Study B: An ice-maker failed to dispense ice due to a blocked inlet valve. Replacing the inlet valve restored ice production. These cases illustrate how targeted, model-aware fixes avoid unnecessary replacements and minimize downtime.
Troubleshooting chart: symptoms and likely causes
- Not cooling: could be thermostat, dirty coils, or a faulty fan. - Excess frost: defrost system or failed heater. - Water on the floor: blocked defrost drain or leaking door seal. - Ice-maker not producing: valve or sensor issue. - Noise: struggling fan or compressor. Use a methodical approach to confirm the cause before replacing parts.
Tools & Materials
- Multimeter(For measuring voltage across components and verifying continuity)
- Screwdriver set (Phillips and flat-head)(Magnetic tips preferred; have assorted sizes)
- Nut driver or open-ended wrenches(Common sizes: 5/16, 1/4, 3/8 inch)
- Torx/hex keys(Some models use Torx screws; keep a small set handy)
- Flashlight or headlamp(To inspect shaded coils and connections)
- Insulated gloves(Electrical safety and protection when handling metal parts)
- Replacement parts ( OEM or compatible )(Thermostat, defrost heater, door seals, water inlet valve, or fan motor depending on symptoms)
- Washer / container for parts(Keeps work area organized and protects surfaces)
Steps
Estimated time: 90-180 minutes
- 1
Identify the symptoms and gather model data
Document current cooling performance and any unusual noises, frost, or leaks. Locate the Frigidaire data plate to confirm model and serial numbers. This ensures you select the correct parts and follow model-specific instructions.
Tip: Take clear photos of control panels and internal wiring before disassembly. - 2
Power down and ensure safety
Unplug the unit at the wall outlet and switch off any nearby breakers if accessible. Allow the compressor to stop and capacitors to discharge before touching wiring.
Tip: Never work on energized components; use dry hands and insulated tools. - 3
Check basic operational settings
Verify normal temperature settings, door alignment, and gasket integrity. Adjust as needed and monitor after reassembly for stable cooling. If doors don’t seal well, warm interior air may impact efficiency.
Tip: A warm room can cause fluctuating indoor temperatures; account for environment when troubleshooting. - 4
Inspect condenser coils and airflow
Locate and clean the condenser coils and fan housing. Dust and lint impede heat rejection and can lead to overheating and reduced cooling capacity.
Tip: Use a soft brush or vacuum with a brush attachment; avoid bending the fins. - 5
Test defrost system and drainage
Inspect the defrost timer or control board and defrost heater for continuity. Check the defrost drain for blockages that cause water backing up into the cabinet.
Tip: Run a brief defrost cycle if your model supports it and observe for proper drainage. - 6
Check evaporator fan and refrigerant paths
If cooling is weak, listen for evaporator fan operation. A faulty fan hampers air distribution and can mimic compressor problems.
Tip: Visually inspect for obstructions and ensure the fan blades spin freely. - 7
Replace faulty components and reassemble
Install the identified faulty part(s) and reassemble components in reverse order. Reconnect power and monitor for a full cycle.
Tip: Only replace one part at a time to isolate issues and avoid cascading failures. - 8
Test run and record results
Allow the fridge to reach target temperatures (about 24-48 hours for full stabilization). Verify no leaks, noise, or frost returns. Document results for future reference.
Tip: Keep a log of temperatures and symptom changes after each repair.
FAQ
Is it safe to repair a Frigidaire refrigerator myself?
DIY repairs can be safe for non-critical issues when you follow the manual, use proper tools, and disconnect power. Avoid refrigerant handling or high-voltage components unless you are trained. When in doubt, consult a professional.
DIY repairs are sometimes safe for simple tasks, but avoid refrigerant work and high-voltage components. If unsure, hire a pro.
How do I know which part is defective?
Start with symptoms and check basic components such as door seals, thermostat settings, coils, and the defrost system. Use the model’s service data to identify likely parts and test with simple continuity checks where applicable.
Match symptoms to likely parts using your model’s service data, then test with basic tools.
What tools are essential for Frigidaire repair?
A basic toolbox with a multimeter, screwdriver set, flashlight, and insulated gloves is usually enough for many fixes. Keep a parts diagram and the correct replacement components on hand.
A multimeter, screwdrivers, a flashlight, and gloves cover most DIY tasks.
When should I replace the entire unit instead of repairing?
If the compressor or refrigerant circuit shows persistent faults after multiple attempted repairs, or if energy use remains high despite fixes, replacement may be more cost-effective.
If major components keep failing after repairs, replacement may be better.
Can the defrost drain cause ongoing leaks?
Yes. A clogged defrost drain can cause water to pool under the fridge and create frost. Clear the drain and verify proper drainage during maintenance.
A clogged defrost drain is a common cause of leaks and frost; clear it to fix the issue.
What maintenance helps prevent future breakdowns?
Regularly clean coils, inspect seals, verify temperature settings, and test defrost function. Simple preventive steps can extend appliance life and reduce energy waste.
Keep coils clean, seals tight, and temperatures steady to prevent future issues.
Watch Video
Top Takeaways
- Diagnose before disassembly to save time.
- Use model-specific parts for reliable repairs.
- Prioritize safety and unplug before any work.
- Maintain coils and seals to extend life.
- Know when to call a pro to avoid unsafe repairs.