GE Refrigerator Ice Maker Repair: A Homeowner's Step-by-Step Guide
Learn how to diagnose and repair GE refrigerator ice maker issues with clear, actionable steps. This homeowner-friendly guide covers common failures, safety tips, tools, and maintenance to keep ice flowing.

This guide helps homeowners fix their GE refrigerator ice maker by diagnosing common failures, checking the water supply, ice maker assembly, and control settings. You will learn a safe, step-by-step approach to identify the root cause and perform repairs or decide when to call a pro. This article emphasizes safety, common failure modes, and cost-effective home solutions.
Overview of GE Ice Maker Systems
GE refrigerator ice makers are integrated into the freezer compartment and rely on a small, sealed mechanism that cycles when powered. The system includes a water inlet valve connected to the household supply, a frozen water reservoir, an ice mold, an ejector arm, and a microcontroller or control board that times the cycling. When any part of this chain fails—water supply, motor operation, or control signals—the ice maker stops producing ice. In the context of ge refrigerator ice maker repair, most home diagnostics begin with simple checks that don’t require removing the main refrigerator cabinet. Demystifying the system helps homeowners make informed decisions about repairs and when to call a professional. The goal is to restore consistent ice production without risking damage to the appliance or voiding warranties. Understanding the sequence: water is delivered, the mold fills, ice freezes, the ejector arm pushes ice into the bin, and the cycle resets for the next batch.
As you begin, note that many issues revolve around water supply problems, blocked ice molds, or simple actuator faults. By following a logical diagnostic path, you can often identify the root cause in under an hour and determine whether a DIY repair is feasible or if a service visit is warranted. Throughout this guide, we reference general GE ice maker configurations and common failure modes, and we remind readers to consult the appliance’s manual for model-specific instructions. The How To Refrigerator team emphasizes practical, safe steps for homeowners seeking to fix ice maker issues themselves while knowing when to request professional service.
Diagnosing the Most Common Symptoms
Ice maker problems present in several recognizable ways. Not producing ice may indicate supply line issues, a jammed ice mold, or a malfunctioning ejector. Excess ice or broken ice cubes can point to a misaligned ejector arm or a damaged mold. Audible buzzing or humming sounds often mean the motor is trying to cycle but is blocked or starved of water. Frozen blocks of ice in the mold indicate overfreezing or a stuck mechanism. Slow ice production can result from a clogged filter, mineral buildup in the water line, or a weak inlet valve.
To triage these symptoms, start with the simplest checks: confirm the water supply is on and not kinked, inspect the ice mold for visible ice buildup, and listen for the ice maker motor cycling. Record what you observe and any error codes or LED indicators on the control board. If your model uses a sensor or microcontroller that displays fault codes, consult the GE manual for code definitions. While some GE models share common failure patterns, each model has unique quirks. By documenting symptoms, you’ll be prepared to pursue targeted repairs or confirm the need for a service call. This approach also helps you communicate clearly with a technician if you decide to hire a pro.
Safety First and Prep Work
Before any interaction with the ice maker, prioritize safety. Unplug the refrigerator or switch off the dedicated circuit at the breaker to eliminate the risk of electrical shock. If you need to move the appliance for access, do so with help and avoid pulling on hoses or power cords. Use insulated gloves when handling cold components to prevent skin contact with sharp edges or frozen parts. Keep a shallow tray or towel handy to catch any residual water when panels are removed. Read model-specific safety instructions in the GE manual and follow lockout/tagout practices when applicable. Do not use heat or metal tools to thaw ice molds, as this can damage the mold or nearby components. With safety confirmed, you can proceed to inspect the ice maker area for obvious obstructions, loose wires, or damaged components at a comfortable pace.
Clear labeling of wires and screws is helpful if you need to reassemble later. If the unit is under warranty, consult the manual or GE support before attempting disassembly to avoid warranty voidance. Safety is the foundation of a successful repair, and taking time to prepare reduces the risk of mistakes that could lead to bigger issues later on.
Step-By-Step Diagnostic Flow
- Power down and access the ice maker housing. Remove the ice bin, then locate the front cover or access panel. This step gives you visibility into the mold, ejector, and the wiring harness. 2) Check the water supply. Ensure the water line is connected firmly, the valve is not blocked, and there is adequate water pressure. Flush the line if necessary to remove air bubbles. 3) Inspect the ice mold and ejector. Look for ice buildup, cracks in the mold, or a misaligned ejector arm. Manually cycle the arm if the model allows, listening for smooth operation. 4) Test electrical signals. Use a multimeter or voltage tester to confirm the ice maker motor and control board receive signals when powered. If voltage is absent or erratic, the issue is likely electrical. 5) Reassemble and run a short test. Reattach the panel, plug the unit back in, and run a few cycles to observe the cycle timing and ice ejection. 6) Document results and plan next steps. If symptoms persist after these checks, seek professional diagnosis. This flow helps you narrow to water supply, mold issues, mechanical jams, or control board faults, guiding whether DIY repair is feasible or if a service appointment is warranted.
Common Fixes for GE Ice Maker Issues
Many GE ice maker problems respond to simple, low-cost fixes. If the ice maker is not producing ice, first ensure the water supply valve is fully open and the line is not kinked or frozen. Clear mineral buildup in the water line and mold with a gentle flush and a mild descaler designed for refrigerators. If the ejector arm is misaligned, carefully reposition it so it engages the ice mold properly. A jammed motor or stuck gear often responds to a gentle manual cycle after removing obstructions, plus a quick lubrication if the model permits. In some cases, the ice maker module or control board can be the root cause, especially in older GE models; if the module is not cycling, replacement parts may be necessary. Always verify compatibility with your model number and avoid using non-approved parts. If uncertain, contact GE support or a qualified technician. The goal is to restore reliable ice production without compromising the freezer’s overall performance. A record of symptoms and steps taken will help you evaluate whether professional service is the best option.
Additionally, consider routine maintenance to prevent future problems: replace water filters on schedule, check for leaks or mineral buildup around the ice maker, and periodically inspect the harness and connectors for corrosion or looseness. Regular maintenance reduces calls to repair services and extends the life of your GE refrigerator ice maker.
When to Replace Versus Repair
If your GE ice maker is old or if repeated repairs fail to restore consistent ice production, replacement may be more cost-effective in the long run. Evaluate the age of the appliance, the availability of replacement parts, and the total repair cost relative to buying a new unit. For some models, a single component repair (like a valve or motor) can revive performance, but if multiple subsystems show wear or if the control board is failing, replacement could be the smarter choice. If you’re considering replacing, research modern GE refrigerators for energy efficiency, warranty terms, and compatibility with your kitchen layout. In all cases, weigh the downtime and inconvenience against the expected lifespan of the repair. The How To Refrigerator team suggests discussing options with a certified technician if you’re unsure about the scope of required parts or safety concerns. The decision to repair versus replace should align with long-term reliability goals and budget considerations, not just immediate discomfort from a non-functioning ice maker.
Maintenance and Long-Term Care
Proactive maintenance helps prevent future GE ice maker trouble. Schedule regular water filter changes and ensure the water line remains free of kinks and leaks. Clean the ice mold and ejector arm at set intervals to prevent mineral buildup that impedes operation. Periodically inspect electrical connections for signs of wear or corrosion, and replace damaged wiring harnesses promptly. If your model supports a diagnostic mode, run it occasionally to catch issues early. Keep a log of fixes and parts replaced to help you track patterns over time. A little routine upkeep reduces the likelihood of major breakdowns and keeps ice production steady for households that rely on a steady ice supply. Remember that simple, consistent maintenance is often the best defense against unexpected ice maker failures.
Tools & Materials
- Safety gear (gloves and safety glasses)(Protect hands and eyes during panel removal and handling frozen components)
- Screwdrivers (Phillips and flathead)(For removing ice maker housing screws)
- Nut driver or socket set(Useful if mounting screws are behind heavy covers)
- Multimeter or voltage tester(Check electrical signals to the ice maker motor/control board)
- Soft brush or cloth(Clean mold and debris from mold and ejector area)
- Container or towel(Catch water when panel is removed and lines are flushed)
Steps
Estimated time: 60-90 minutes
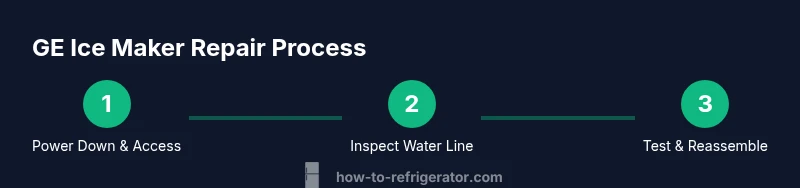
- 1
Power Down and Access
Unplug or switch off the circuit, then remove the ice bin and front cover to access the ice maker housing. This initial step prevents shocks and gives you visual access to the mold, ejector, and wiring harness.
Tip: Label any wires you disconnect to ensure correct reassembly. - 2
Check Water Supply
Inspect the water line for kinks or blockages. Confirm the valve is fully open and there is visible water at the valve outlet when the line is disconnected for testing. Flush the line to remove air pockets.
Tip: If the line feels spongy or air is present, bleed the line before reassembly. - 3
Inspect Mold and Ejector
Examine the ice mold for cracks or ice buildup. Ensure the ejector arm moves freely without obstruction. If necessary, manually cycle the arm to observe motion without resistance.
Tip: Do not force metal tools into the mold; use a non-metallic implement if needed. - 4
Assess Electrical Signals
With power restored, use a multimeter to verify voltage at the ice maker motor terminals or check the control board indicators. If signals are absent or erratic, the issue may lie with wiring or the board.
Tip: Only perform voltage checks if you are comfortable with electrical work. - 5
Reassemble and Test
Reconnect any harnesses, replace the front cover, reinsert the ice bin, and restore power. Run several cycles to confirm ice formation and ejector operation, watching for consistent cycling.
Tip: Allow several cycles to fully clear any residual air or moisture before judging success. - 6
Evaluate Results
If ice production resumes, monitor for a few hours to ensure stability. If issues recur, document symptoms and consider service or part replacement.
Tip: Keep the symptom log for future reference or when consulting a technician.
FAQ
Can I repair a GE ice maker myself?
Yes, many ice maker issues can be diagnosed and repaired by homeowners with proper caution and the right tools. Complex electronics or sealed parts may require a professional.
Yes, many ice maker issues can be fixed at home with proper safety steps; for complex electronics, consider a professional.
What are the most common reasons the GE ice maker stops producing ice?
Typical causes include a frozen ice mold, a clogged water line, a faulty water inlet valve, or a misaligned ejector arm.
Common causes are a frozen mold, clogged water line, bad valve, or a misaligned ejector arm.
Should I replace the ice maker module or the entire refrigerator?
Repair may be cost-effective if the module is available and the rest of the fridge is in good condition. Replacement becomes reasonable for older units or when modules are discontinued.
Repair is often fine if the module is available and the fridge is healthy; replacement can be better for older units.
Is it safe to work on the ice maker with the freezer running?
Always unplug the unit before servicing. Do not touch electrical components with wet hands or when the area is damp.
Unplug first; don’t work around live parts.
How long does GE ice maker repair typically take?
Most home diagnostics and fixes take a few hours, but complex issues may require more time or professional service.
Most fixes take a few hours; complex issues may need a pro.
Watch Video
Top Takeaways
- Identify root cause before replacing parts
- Always unplug before service
- Check water supply first
- Test after each repair
- Document symptoms for future reference