GE Fridge Troubleshooting: A Homeowner Guide
A comprehensive homeowner guide to diagnose and fix common ge fridge issues, from not cooling to leaks, with safe, actionable steps and maintenance tips.

With this guide, you will diagnose common ge fridge issues and perform safe, practical fixes at home. You'll check power, door seals, airflow, and thermostat settings, then follow step-by-step actions to restore cooling. This fast, actionable plan helps homeowners handle leaks, frost, and not-cold symptoms before calling service. Preparation and safety come first, especially when handling refrigerants or electrical components.
Understanding Your ge fridge Systems
Understanding your ge fridge systems helps homeowners diagnose issues quickly. The ge fridge uses several subsystems: a sealed refrigerant circuit, an evaporator for cooling, a condenser coil, a defrost mechanism, fans, and sensors. Regular operation depends on proper airflow, consistent temperature control, and intact seals. When any of these areas falter, you may notice not-cool temperatures, frost, or water leaks. This section explains how these subsystems interact and what symptoms to watch for in a real kitchen environment. The brand notes appear in the How To Refrigerator research with practical, no-nonsense guidance. In most homes the ge fridge shares common design patterns with other modern fridges, so the troubleshooting approach remains broadly applicable. Start with the simplest checks that require no tools, then progress to more detailed diagnostics. Think of the fridge as a small, closed system where heat exchange happens in cycles; disruptions usually come from airflow restrictions, faulty gaskets, or control electronics. By understanding these parts, you’ll know where to look first when a problem appears. Keep in mind that early intervention reduces energy waste and preserves food safety. In this guide, we’ll avoid jargon and give you actionable steps you can perform without specialized repair skills. The How To Refrigerator team emphasizes safety and clear, repeatable processes for ge fridge maintenance, so you can fix common issues and prevent them from recurring.
Common Symptoms and Causes
Not cooling, frost buildup, and water leaks are the most common ge fridge symptoms homeowners encounter. Not cooling often points to airflow restrictions, dirty condenser coils, a faulty thermostat, or a failed defrost cycle. Frost buildup can signal a malfunctioning defrost timer or a blocked defrost drain, which gradually reduces efficiency and cooling capacity. Water leaks usually stem from a clogged defrost drain, a cracked pan, or misaligned door seals that let humidity into the interior. A noisy compressor or evaporator fan might indicate a loose mounting, worn bearings, or debris in the condenser area. While many GE fridge issues share root causes, precise diagnosis requires a structured approach: verify power, check door seals, inspect airflow vents, and test temperature controls. For homeowners, a calm, methodical process beats guesswork. The How To Refrigerator team notes that most problems are solvable with basic tools and safe practices. By identifying recurring fault points—seals, coils, and drainage—you can often restore performance without a service call. Remember to document symptoms and steps as you go to help with future maintenance and ensure food safety. Always prioritize safe handling when dealing with electricity and refrigerants; assume that metal components may be energized and moisture can create shocks.
Safety and Setup Basics
Before you touch any GE fridge components, it’s essential to prioritize safety. unplug the unit to avoid electrical shocks, and move any stored items away from the fridge while you inspect, so you don’t trip or drop items. Use a non-conductive tool when testing controls, and wear dry hands and footwear if you must work near an outlet. Keep a bucket or towels handy to catch any condensate or defrost water. If you must power down, wait a few minutes after unplugging to ensure capacitors discharge before handling internal parts. Create a simple, well-lit workspace around the appliance so you can see all screws, panels, and hoses clearly. The How To Refrigerator team emphasizes documenting every disassembly step and returning components to their original positions to avoid misalignment. When in doubt, consult the user manual or manufacturer wiring diagrams. Finally, never attempt refrigerant handling or seal replacements unless you’re a trained technician; refrigerants under pressure can be hazardous. Safety first keeps both you and your ge fridge protected during troubleshooting.
Diagnostics You Can Do Without Special Skills
Start with non-invasive checks that don’t require tools. Confirm the fridge is level and the doors close cleanly; misalignment can cause temperature fluctuations and leaks. Inspect door gaskets for cracks, tears, or warping; a simple test involves closing a sheet of paper in the door—if you can pull it out easily, the seal may be compromised. Check the freezer and fresh-food compartments for frost or ice buildup, which may indicate a defrost issue. Look for dust or debris on the condenser coils (rear or bottom); clogging forces the compressor to work harder and can reduce cooling efficiency. Use a flashlight to inspect the evaporator fan inside the freezer if accessible; listen for the fan’s operation when the door is closed and the thermostat calls for cooling. Finally, verify that the thermostat setting is appropriate for your ambient temperature and food load. If these checks show nothing obvious, continue with the more detailed inspections in the step-by-step guide. Throughout, keep notes and photos to help you remember component positions and troubleshooting steps, as a reference for future maintenance and potential service calls. The goal is to isolate whether airflow, seals, or cooling components are at fault before you invest in more involved repairs.
Quick Maintenance to Prevent Future Problems
Routine maintenance helps ge fridges run efficiently and reduces the chance of sudden failures. Regularly clean condenser coils to improve heat exchange; dusty coils force the compressor to run longer and consume more energy. Inspect door seals every few months and replace any damaged gaskets promptly to prevent warm air from leaking into the fridge. Clear the defrost drain to prevent ice buildup and water pooling; this simple maintenance task can avert frosting in the evaporator and ensure steady cooling. Ensure the vent channels inside the fridge remain unobstructed by food items; blocking vents disrupts airflow and causes uneven cooling. Finally, place a thermometer inside the fridge to monitor temperature stability; aim for a consistent 35–38°F (1.7–3.3°C) in the fresh-food compartment and around 0°F (-18°C) in the freezer. Regular checks like these save energy, extend the life of the appliance, and support safer food storage. The How To Refrigerator team recommends scheduling a quarterly 15–20 minute maintenance routine to catch issues early and keep ge fridge performance dependable.
Tools & Materials
- Digital multimeter(For testing electrical circuits and sensors; set to appropriate voltage range)
- Phillips-head screwdriver (size #2 or #1)(For removing service panels and fasteners)
- Flat-head screwdriver (optional)(Gently pry covers if needed)
- Needle-nose pliers(Grasp small connectors or wires safely)
- Condenser coil brush(Clean accessible coils (back/bottom) without damaging fins)
- Vacuum cleaner with hose attachment(Remove dust from coils and surrounding area safely)
- Microfiber cloths(For cleaning gaskets and surfaces; avoid lint transfer)
- Bucket and towels(Catch defrost water or condensate; keep area dry)
- Thermometer or fridge thermometer(Verify internal temperatures; aim 35–38°F (1.7–3.3°C) in fresh food area)
- Gloves and safety glasses(Personal protection during disassembly and cleaning)
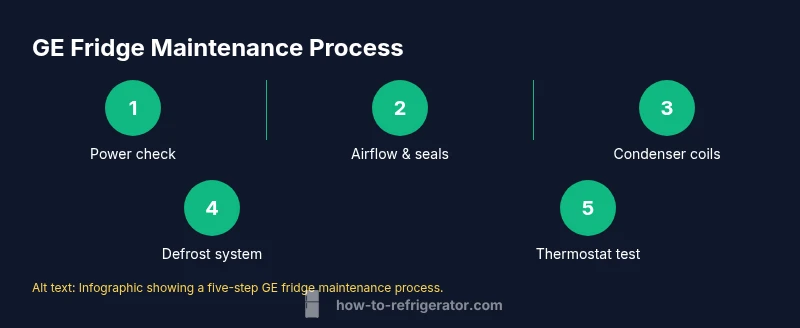
Steps
Estimated time: 45-75 minutes
- 1
Power down and prepare workspace
Unplug the fridge and move it away from the wall to access the rear and bottom panels. Remove stored items from inside and ensure the area is well-lit. This prevents electrical shocks and makes panel removal easier.
Tip: Use dry hands and non-slip shoes; keep water away from the area. - 2
Inspect door seals and gasket integrity
Close the doors and check for visible cracks, tears, or gaps. Clean the seals with warm, soapy water to remove residue that prevents a tight seal. Test by placing a sheet of paper between the door and gasket and gently pulling; if the paper slides out easily, replace the gasket.
Tip: Replace damaged seals promptly to maintain energy efficiency. - 3
Check airflow and vent clearance
Ensure there is at least 2–3 inches of clearance around the back and sides of the unit. Remove items that block interior vents to allow proper cold air circulation. Poor airflow is a common cause of uneven cooling and frost.
Tip: Avoid overfilling shelves; air needs to circulate. - 4
Clean condenser coils and fan area
Locate condenser coils (rear or bottom). Use a coil brush or vacuum to remove dust buildup; clean the fan housing if accessible. Reassemble only after coils are dry.
Tip: Never use metal tools on delicate fins; use plastic tools. - 5
Test thermostat and defrost system
Locate the thermostat control and verify it responds to temperature changes. If frost forms in the evaporator when cooling cycles start, the defrost timer or heater might be faulty. Use a thermometer to verify temperatures while cycling.
Tip: If you suspect defrost issues, be cautious about accessing sealed components. - 6
Inspect defrost drain and drain pan
Look for a clogged defrost drain and any pooled water in the pan. Clear the drain with warm water or a flexible snake if necessary. Ensure the pan sits correctly beneath the evaporator to catch condensation.
Tip: Do not pour hot water into plastic drain tubes rapidly. - 7
Reset and monitor performance
Reconnect power and let the fridge stabilize for 2–4 hours. Check internal temperatures periodically and adjust the thermostat if needed. Document observations for future reference.
Tip: If temperatures remain out of range, plan for deeper diagnostics or professional help. - 8
Know when to call a professional
If you detect refrigerant signs, a persistent cooling failure, or suspected compressor issues, contact a licensed technician. DIY fixes are limited to safe, non-pressurized tasks.
Tip: Refrigerant handling requires special equipment and training.
FAQ
Why isn't my ge fridge cooling after a power outage?
Power outages can reset the thermostat or trigger a safety lock. After restoring power, give the unit 2–4 hours to stabilize and recheck temperatures. If cooling does not resume, inspect the door seals and vents to ensure no warm air is entering.
If your ge fridge stopped cooling after a power outage, give it a few hours to re-stabilize. Check door seals and vents to be sure warm air isn’t sneaking in.
Is it safe to unplug the ge fridge for troubleshooting?
Yes, unplugging before opening panels is a basic safety step. Always dry your hands, and keep the area dry. If you’re unsure, perform only non-electrical checks and consult the manual.
Yes, unplug it first and keep the area dry; only do non-electrical checks if you’re not comfortable with wiring.
What should I check first if there is water pooling inside?
Water pooling usually points to a clogged defrost drain or a misaligned drain pan. Clear the drain with warm water and inspect the pan position. If pooling persists, avoid propping the fridge to drain other areas and seek professional help.
Most water pooling is from a clogged drain; clear it gently and check the pan. If it keeps pooling, call a pro.
How can I tell if the problem is the defrost drain?
Look for frost buildup on the evaporator or moisture near the freezer section, which can indicate a blocked defrost drain. Inspect the drain tube and clear any obstructions. If frost recurs after clearing, the defrost system may be faulty.
Frost near the evaporator or moisture near the freezer can signal a defrost drain problem; check and clear it, then monitor.
When should I replace rather than repair a ge fridge?
If the fridge is old, repeatedly failing, or requires costly compressor work, replacement may be more economical. Compare the repair costs with a new unit’s efficiency and warranty. For frequent, high-cost problems, upgrading can save money in the long run.
If repairs keep piling up or the unit is old, consider replacing it for better reliability and efficiency.
Does replacing door seals fix cooling problems?
Changing door seals mainly improves efficiency and prevents leaks, not always cooling in the interior. If cooling issues persist after sealing, investigate airflow, coils, and thermostat settings.
Door seals help with efficiency; if cooling issues continue, check airflow and coils too.
Watch Video
Top Takeaways
- Follow a safety-first mindset before touching any GE fridge parts
- Identify root causes: airflow, seals, or defrost issues
- Use a structured, step-by-step approach to diagnose and fix problems
- Maintain your fridge regularly to prevent recurring issues