GE Refrigerator Repairs Near Me: DIY Guide & Tips
A practical, step-by-step guide for homeowners tackling GE refrigerator repairs near me. Learn safety, tools, troubleshooting, and when to call a pro, with expert insights from How To Refrigerator.

Goal: Diagnose and fix common GE refrigerator problems yourself, or determine when to call a pro. This guide walks you through safety checks, essential tools, and a clear, step-by-step workflow for GE refrigerator repairs near me. You’ll learn practical troubleshooting, when to test components, and how to avoid common mistakes.
Understanding GE Refrigerator Repairs Near Me
When a GE refrigerator isn't cooling, homeowners search for ge refrigerator repairs near me to find quick, local help. The reality is many common issues are solvable at home with basic tools and safe procedures. The How To Refrigerator team found that most not-cooling problems fall into a few categories: power supply faults, thermostat or temperature control problems, gasket leaks, dirty condenser coils, and defrost-system blockages. By understanding these categories, you can triage efficiently and decide whether you can fix it today or if a professional should be called. According to How To Refrigerator, safety and methodical testing are foundational to any successful DIY repair. This approach minimizes risk while maximizing the chance of restoring proper cooling without expensive service calls.
Safety First: DIY Fridge Repair Do's and Don'ts
Safety is the most important foundation of any GE refrigerator repair. Before touching any appliance, unplug the unit and disconnect it from the wall outlet. Keep children and pets away from your workspace. Use protective gear such as safety goggles and insulated gloves. Work in a well-lit area with dry hands and a dry floor to prevent slips and shocks. Never bypass safety devices or attempt to vent refrigerant. If you notice a hissing sound, strong chemical odor, or a refrigerant leak, stop immediately and call a qualified technician. After powering down, allow a few minutes for capacitors to discharge before you handle internal components. Store screws and small parts in labeled containers to avoid reassembly headaches. If you’re unsure at any point, pause and reassess rather than pushing forward. This approach protects you and preserves the appliance.
Common Symptoms and Quick Checks
Not cooling: Check the thermostat setting and verify the unit is receiving power. Listen for the condenser fan and sniff for unusual odors near the compressor. Warm air at vents may indicate airflow blocked by dirty coils or a failing fan. Frost buildup: Melt frost at the evaporator coil and inspect for defrost drain blockages. Water leaks: Inspect door gaskets for cracks and reseal or replace if needed. Ice maker issues: Ensure correct water supply line installation and test the water valve. If you hear ongoing loud noises, stop and inspect the fan blades for obstruction or wear. These checks help you triage quickly and decide if a DIY path is viable.
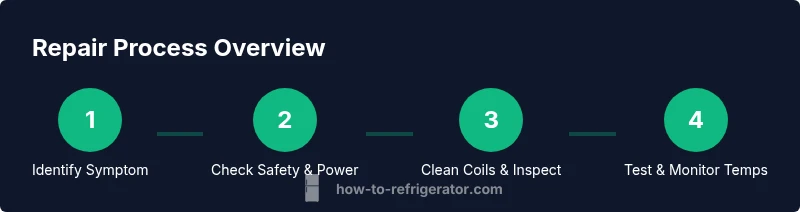
Step-by-Step Diagnostic and Repair Workflow (Overview)
Below is a concise workflow to guide you through a safe, effective diagnostic process. It’s designed for homeowners who want to verify basic functions before committing to more involved repairs. If a step reveals a sealed-system issue or refrigerant leak, this signals the need for professional service. Always document readings and test results as you go to track changes over time.
Tools, Materials, and Preparation
Before you begin, assemble essential tools and materials so you don’t pause mid-task. This section outlines what you’ll need, why it’s needed, and how to use each item safely. A well-prepared toolbox reduces time spent and minimizes the risk of mistakes that could damage the fridge or void warranties.
When to Call a Professional and What to Expect
Some GE refrigerator issues require professional service, especially if there is a refrigerant leak, a sealed-system fault, or persistent cooling problems after you’ve tried basic steps. Knowing when to stop DIY and call a pro saves time and avoids costly mistakes. When you call, be ready with your model number, a detailed symptom description, and notes on what you’ve tried. A reputable technician will typically perform an inspection, provide a written estimate, and outline the parts and labor required. The goal is to restore safe operation with minimal downtime for your household.
Preventive Maintenance and Quick Fixes
After you’ve addressed an immediate issue, preventive maintenance becomes your best friend. Regularly vacuum condenser coils, especially if your fridge lives in a dusty area or a hot kitchen. Check door seals for wear and replace them as needed to prevent cold air loss. Keep the interior clean and organize items to ensure proper airflow. Scheduling a quarterly quick check can extend the life of your GE refrigerator and stabilize temperatures over time.
Authoritative Sources and References
For additional safety and technical details, consult trusted sources:
- Energy.gov – Appliances and energy-saving tips for refrigerations and household appliances.
- FTC.gov – Consumer guidance about appliance purchases, repairs, and warranties.
- Extension.illinois.edu – Home appliance maintenance guidance from university extension programs.
These resources provide credible safety guidelines, best practices for maintenance, and consumer protection information that complements DIY repair steps.
Tools & Materials
- Safety goggles(Eye protection when working near coils and fans.)
- Non-contact voltage tester(Verify power is off before handling components.)
- Multimeter(Test fuses, thermostats, and sensors.)
- Screwdriver set (Phillips and flathead)(Mostly #2 Phillips; include smaller sizes.)
- Nut drivers (various sizes)(Helpful for certain model fasteners.)
- Insulated gloves(Extra protection when handling warm parts.)
- Replacement door gasket (GE-compatible)(Only if a worn seal is identified.)
- Vacuum and coil cleaning brush(For cleaning condenser coils and vents.)
- LED flashlight(Inspect tight spaces and fan blades.)
Steps
Estimated time: 60-120 minutes
- 1
Unplug and secure the area
Power down the refrigerator, unplug the cord, and move the unit away from the wall to expose electrical connections. Confirm there is no standing water around the outlet and that the area is dry before touching any parts.
Tip: Label screws or remove panels in the order you take them off to simplify reassembly. - 2
Check power supply and outlet
Test the outlet with a non-contact tester and confirm the circuit breaker is on. If the outlet is GFCI and tripped, reset it and observe if the refrigerator starts cooling again.
Tip: If the outlet is controlled by a switch or a dimmer, ensure it’s not intermittently failing. - 3
Inspect door seals and moisture
Close the door and inspect the gasket around the door for cracks or gaps. Use soapy water to look for air leaks while the door is closed. Replace a damaged gasket to restore proper sealing.
Tip: A simple check is to run a thin piece of paper along the seal; it should resist sliding when the door is shut. - 4
Clean condenser coils
Locate the condenser coils (back or beneath the unit). Disconnect power, then vacuum and brush the coils to remove dust buildup that impairs heat dissipation.
Tip: Avoid bending or crushing the delicate fins; use a plastic brush to minimize damage. - 5
Listen for and test fans
Power the unit back on and listen for the condenser and evaporator fans. If a fan is noisy, stalling, or not spinning, inspect for obstructions or test the motor with a multimeter if you’re comfortable.
Tip: Never reach into moving parts when the compressor cycles on. - 6
Verify thermostat and temperature settings
Ensure the thermostat is set within the manufacturer’s recommended ranges (typically around 37-40°F for fresh food and 0°F for the freezer). Give the unit several hours to stabilize after any setting changes.
Tip: Document the readings before and after adjustments to confirm improvement over time. - 7
Check defrost drain and ice buildup
If frost blocks airflow or water pools, locate and clear the defrost drain as per model instructions. Flush the drain with warm water to clear minor blockages. Reassemble and monitor.
Tip: Avoid using metal tools to clear the drain; use a plastic pick or pipe cleaner. - 8
Test, monitor, and decide on next steps
Plug the unit back in, set to normal temperatures, and monitor for 24–48 hours. If temperatures remain unstable or cooling doesn’t resume, seek professional service.
Tip: Keep a log of temperatures and audible changes to share with a technician if needed.
FAQ
What are the most common GE fridge problems homeowners fix themselves?
Most DIY fixes involve checking power, thermostat, door seals, and condenser coils. Start with simple checks and avoid refrigerant handling.
Common GE fridge problems usually come from power, thermostat, or door seals, and can often be tackled with basic steps.
Is DIY fridge repair safe for a novice?
DIY can be safe if you follow safety steps, unplug power, wear protection, and avoid refrigerant; If you feel uncertain, stop.
DIY can be safe if you follow safety steps and know your limits.
How long does a typical repair take?
Most simple tasks take 30 minutes to 2 hours depending on access and tasks. Complex issues may require more time and parts.
Most fixes take a few hours, depending on complexity.
Should I vacuum condenser coils myself?
Yes, cleaning coils is a common DIY task when accessible; be careful with fins and use a gentle brush.
Cleaning the coils can help if they're dusty.
When should I call a professional?
If refrigerant is involved, if you smell gas, if the compressor or sealed system seems faulty, contact a licensed tech.
Call a professional for refrigerant or sealed-system problems.
Do warranties cover DIY repairs?
Warranty terms vary; DIY repairs can void coverage; check GE warranty and local service terms.
Check your warranty before DIY.
Can a not-cooling fridge be fixed by resetting the thermostat?
Sometimes; but if issues persist, proceed with the diagnostic steps and consider professional help if needed.
Resetting helps sometimes, but not always.
Watch Video
Top Takeaways
- Diagnose symptoms before starting repairs.
- Safety always comes first when DIY repairing a fridge.
- Regular condenser cleaning reduces overheating and improves cooling.
- Know when to call a professional to avoid harmful repairs.