GE Cafe Fridge: Troubleshooting and Maintenance Guide
Comprehensive, expert-backed steps to diagnose, repair, and prevent common GE Cafe fridge issues. Learn safe DIY fixes and maintenance tips from How To Refrigerator for not-cooling, ice maker, and drainage problems.

By following this guide, you will diagnose and fix common cooling issues on a ge cafe fridge, plus ice maker and water line problems. You’ll learn to safely check the condenser coils, door seals, thermostat, and defrost drain with a practical, stepwise approach. Gather a few tools and follow clear safety guidelines to complete the fix.
About the GE Cafe fridge: design and common issues
The GE Cafe fridge line blends style and performance, and homeowners frequently report issues such as uneven cooling, frost buildup, or occasional not-cooling events. This guide is designed to help you diagnose the most common causes with practical, safe steps you can perform yourself. According to How To Refrigerator, regular maintenance and careful observation can significantly improve efficiency and prevent minor faults from becoming major repairs. Throughout this article you’ll find actionable checks for not cooling, ice maker, water line, and drainage concerns. Note: always unplug the unit before inspecting exposed wiring or fans to avoid electric shock.
We’ll keep terminology simple and provide a clear path so you can decide whether the issue is a quick fix or something that needs professional service. The GE Cafe fridge deserves a methodical approach: start with visible, non-invasive checks, then proceed to internal components only if you feel confident and have the right tools. If you’re unsure at any point, consult the manufacturer manual or a licensed technician.
Quick diagnostic checklist for cooling problems
Before you begin any disassembly, run a concise diagnostic checklist to narrow down causes. This saves time and reduces risk:
- Check door gaskets for cracks or gaps that let warm air in.
- Verify the temperature setting is correct (use a separate thermometer to confirm actual temperature).
- Listen for fan operation and ambient compressor activity; unusual noises can indicate a problem.
- Look for frost buildup on coils or around the evaporator area.
- Inspect for visible leaks or signs of moisture around connections.
If any item is off, fix it first: a poor seal or incorrect temperature often explains most complaints. This practical approach aligns with guidance from How To Refrigerator and minimizes unnecessary disassembly. If the freezer appears colder than the fresh-food section, focus on airflow and door seals as probable causes.
How to inspect the condenser coils and airflow
Condenser coils dissipate heat and are typically located behind a grille or at the back/base of the unit. To inspect: unplug the fridge, remove the grille or rear access panel as per the manual, and use a flashlight to check for dust, pet hair, or grease buildup. Use a soft brush or a small vacuum to remove debris, working from the top of the coils downward. After cleaning, ensure there is at least several inches of clearance around the back and sides to maintain airflow. Poor airflow is a common culprit in weak cooling, and routine coil cleaning can restore efficiency, as highlighted by How To Refrigerator’s maintenance guidance. Handle panels gently and reassemble securely to prevent rattling.
If you notice bent fins or heavy dust, clean more thoroughly and recheck airflow after 24 hours of operation. Keep a log of when you cleaned the coils to track improvements and plan future maintenance.
Temperature control and ice maker diagnosis
Temperature control is essential to consistent cooling. Ensure the thermostat dial is set within the recommended range for your model (refer to your user manual for the exact numbers). If the fridge is too cold or not cold enough, adjust incrementally and monitor for 24–48 hours. The ice maker can fail for several reasons: a blocked fill tube, ice jam, or a defective ice-maker module. Check the ice maker housing for loose connections and ensure the water line is kink-free and properly connected to the fridge.
If the ice maker still won’t produce, confirm the freezer temperature is cold enough to trigger ice-making conditions and inspect the ice mold for frost. Small adjustments and cleaning can resolve many ice-maker problems without replacement parts. This section aligns with practical, safe fixes that homeowners can perform with basic tools.
Diagnosing water dispenser and drainage issues
Water dispenser problems often trace back to water line obstructions, shut-off valves, or air bubbles in the line. Inspect the water supply line for kinks, leaks, or loose fittings. If you hear a bubbling sound or observe reduced water flow, purge the line by running water into a cup or container for a few minutes. The defrost drain can become clogged with mineral buildup or debris; locate the drain tube, flush it with warm water, and use a flexible pipe cleaner if needed. A clear drain prevents standing water and frost buildup in the fridge.
Always ensure the defrost system is operating correctly; a blocked drain can lead to pooling water on the crisper shelves and ongoing frost in unusual areas. This can often be resolved by a thorough drain cleaning and checking the defrost heater for continuity if frost persists.
Safety and tools required for DIY fixes
Before starting any fix, commit to a safety-first mindset. Unplug the appliance and discharge capacitors if applicable, wear cut-safe gloves, and use eye protection. Working with electrical components, fans, and refrigerant lines requires careful handling and proper tool use. Essential tools include a multimeter, insulated screwdrivers, a flashlight, a soft brush for coils, microfiber cloths, and a small bucket for condensate or drainage cleaning. Keep a copy of the GE Cafe fridge manual handy for model-specific instructions, and always reassemble firmly to prevent leaks or fan interference. Remember: if something feels beyond your scope, stop, and contact a professional.
When to call a professional vs DIY
DIY fixes work well for routine maintenance and minor faults, such as cleaning coils, tightening loose connections, or replacing a clogged defrost drain. If you encounter refrigerant smells, putrid materials, refrigerant hissing, an unusual loud compressor, or persistent cooling failure after basic maintenance, it’s time to call a technician. A professional can perform a thorough refrigerant check, diagnose sealed-system issues, and ensure safe handling consistent with local codes. The decision to DIY versus professional service should balance cost, risk, and confidence in safe handling. How To Refrigerator emphasizes starting with simple, low-risk tasks and escalating only when necessary.
Preventive maintenance to extend GE Cafe fridge life
Regular preventive maintenance is the best way to extend the life of any refrigerator, including GE Cafe models. Clean coils every 6–12 months, verify door seals annually, and monitor the temperature and defrost functions routinely. How To Refrigerator analysis shows that systematic maintenance reduces energy waste and helps compressors run more efficiently over time. Keep a maintenance log with dates and findings to track improvements and catch issues early. Small, consistent actions can prevent major failures and save money in the long run.
In addition to internal checks, ensure the unit sits on a stable surface, with adequate ventilation, and avoid placing hot items directly in the fridge. Small changes in placement and operational habits can yield noticeable performance improvements.
Troubleshooting table: not cooling, not cold enough, leaks
- Not cooling: Check the thermostat, inspect coils, and verify proper airflow. Clean coils and ensure seals are intact.
- Not cold enough: Confirm door seals, adjust the temperature setting gradually, and check for frost buildup blocking airflow.
- Water leaks: Inspect the drain tube and defrost system; clear clogs and verify drainage path.
- Ice maker issues: Look for water line kinks, ice jams, or a faulty ice maker module.
- Loud noises: Listen for fan or compressor issues; ensure panels are tight and not vibrating against the chassis.
- Overall energy use: Ensure proper ventilation and avoid overfilling, which can impede airflow and cooling. These steps provide a practical, model-agnostic framework that aligns with How To Refrigerator’s general maintenance guidance.
How to reassemble and test after repair
With cleaning and component checks complete, reassemble any panels you removed and plug the unit back in. Allow the fridge to run for 6–24 hours to stabilize temperatures before performing a final check. Use a thermometer to verify both the refrigerator and freezer compartments reach their target temperatures, and listen for normal fan and compressor operation. If temperatures drift again, revisit any suspected components (seals, coils, coolant pathways) and reassess. Regular follow-up checks after repairs help confirm the fix and prevent a recurring issue. The reintegration phase is crucial for ensuring long-term reliability.
Tools & Materials
- Flat-head screwdriver(For grille/screw removal)
- Phillips-head screwdriver(For interior panels)
- Nut driver or socket set(May be needed for rear components)
- Multimeter(Check voltage, continuity on fans/compressor)
- Vacuum with brush attachment(Clean coils and debris)
- Coil brush or small airstream brush(Gently remove dust)
- Microfiber cloths(Wipe surfaces and coils)
- Safety gloves(Protect hands during repairs)
- Safety glasses(Eye protection during cleaning)
- Flashlight(Illuminate coil and interior areas)
- Bucket or tray(Catch condensate or defrost water)
- Manual or digital copy of GE Cafe fridge model(Model-specific guidance)
Steps
Estimated time: 60-90 minutes
- 1
Power down and prepare
Unplug the fridge and remove items from shelves to prevent spills. Set up a clean workspace and gather tools. This prevents accidental electric shock and keeps components accessible for inspection.
Tip: Label shelves or take photos before removal to ease reassembly. - 2
Access condenser area
Locate the condenser coils (grill or rear panel) and remove the access panel if applicable. Check for obvious dust or debris and prepare to clean.
Tip: Use a vacuum brush attachment to avoid damaging delicate fins. - 3
Clean condenser coils
Gently brush the coils and vacuum away dust. Wipe with a microfiber cloth to remove fine particles. Recheck airflow clearance around the unit.
Tip: Do not bend coil fins; gentle pressure is enough. - 4
Check door seals
Inspect gaskets for cracks or warping. Clean the seals and test for air leaks by closing on a dollar bill or feeler card; if it slides easily, the seal is compromised.
Tip: If damaged, replace seals promptly to restore efficiency. - 5
Verify thermostat settings
Confirm the thermostat is within the recommended range for your model. Make a small adjustment and monitor for 24–48 hours to see if temperatures stabilize.
Tip: Avoid extreme settings; gradual changes yield reliable results. - 6
Inspect defrost drain
Locate the defrost drain and flush with warm water. Remove clogs with a flexible brush if necessary. Ensure water flows freely through the drain tube.
Tip: Caution: defrost components may be cold; handle carefully. - 7
Test fans and compressor
With panels removed, power the unit and listen for fan operation and compressor cycling. Use a multimeter to verify voltage and continuity if you suspect electrical issues.
Tip: If the compressor runs continuously or hardly starts, this may indicate a sealed-system problem. - 8
Check ice maker and water line
Inspect water line for kinks and ensure the valve is open. If ice production is inconsistent, check for ice jams and verify the ice maker module is seated correctly.
Tip: Run water through the line to clear any air pockets before reconnecting. - 9
Reassemble and test
Secure all panels, reconnect power, and allow 6–24 hours for stabilization. Confirm both compartments reach target temperatures and listen for normal operation.
Tip: Keep a log of temperatures over the first 24 hours to verify consistency. - 10
Document and plan next steps
Record what was checked, what was fixed, and any parts replaced. Schedule periodic maintenance based on usage and manufacturer recommendations.
Tip: If issues recur, compare notes with prior visits to identify patterns.
FAQ
What should I check first when my GE Cafe fridge isn't cooling?
Start with door seals, thermostat settings, and coil cleanliness. These are the most common and easiest fixes. If cooling remains weak after these checks, proceed to inspect the defrost drain and airflow.
Start with door seals, thermostat, and coils. If still not cooling, check the defrost drain and airflow next.
Why isn’t the ice maker producing ice?
Verify the water line is connected and not kinked, check that the valve is open, and inspect the ice mold for jams. If still stuck, ensure the freezer temperature is low enough for ice production.
Check the water line, valve, and ice mold. If needed, lower the freezer temperature a bit and test again.
How should I unplug the fridge safely for a DIY repair?
Pull the plug from the wall outlet without pulling on the power cord. If access is tight, switch off the circuit breaker, then unplug. Avoid touching exposed wires.
Unplug the unit at the wall socket, or switch off the circuit breaker if needed, never pull the cord.
How often should I clean the condenser coils?
Clean coils every 6–12 months or sooner if you notice dust buildup or reduced cooling efficiency. Regular cleaning helps maintain airflow and energy efficiency.
Clean coils about once a year unless you see a lot of dust building up.
Can a defrost-drain issue cause leaks?
Yes, a clogged or blocked defrost drain can lead to water pooling inside the fridge. Clear the drain with warm water and a flexible brush as needed.
A clogged defrost drain can cause leaks; flush it with warm water to clear the blockage.
When should I replace parts instead of repairing?
If a component is significantly damaged, shows repeated failure, or involves the sealed refrigerant system, replacement by a professional may be more cost-effective and safer than continuing DIY repairs.
If a critical part keeps failing, or it involves the sealed system, consider replacement by a pro.
Watch Video
Top Takeaways
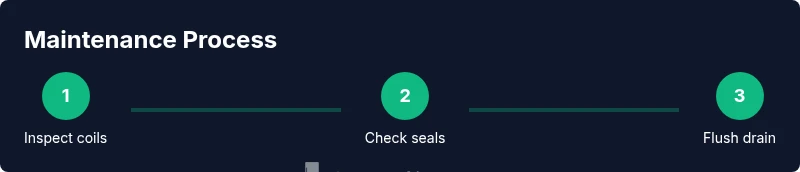
- Inspect coils and seals first to fix most cooling problems
- Unplug and use proper safety gear before any DIY
- Test and document temperatures after each fix
- Know when to escalate to a professional
- Maintain a proactive maintenance schedule