Broken Refrigerator Troubleshooting: Urgent Fixes
Learn fast, safe steps to diagnose and fix a broken refrigerator. This urgent guide covers common causes, DIY fixes, safety warnings, and when to call a pro.

Your broken refrigerator is usually caused by a simple power issue, thermostat miscalibration, or dirty condenser coils. Start by checking the outlet, reset breakers, and verify the thermostat is within the recommended range. If these quick checks don't restore cooling, follow the step-by-step guide for deeper diagnostics, safety, and when to call a professional.
Why a broken refrigerator demands urgent attention
A malfunctioning fridge is more than a nuisance; it puts perishable food at risk and wastes energy. According to How To Refrigerator, refrigerators operate through a balance of power, temperature control, and airflow. When any piece of that balance falters, food safety can be compromised and electricity usage can spike. The How To Refrigerator team found that many freezer-fridge issues stem from simple, reversible problems rather than expensive replacements. Starting with basic checks often yields quick wins, preserves groceries, and buys time while you plan next steps. This is especially important for households that rely on fresh produce, dairy, or medication that requires refrigeration. By understanding the system, you’ll learn to verify that power is stable, the thermostat is correctly set, and airflow remains unobstructed. The goal is to troubleshoot safely and effectively, minimizing waste and downtime while you decide whether to DIY or call a pro.
Common symptoms and quick checks
Typical signs of a problem include the fridge not cooling adequately, frost buildup in the freezer, unusual buzzing or humming noises, water leaks, or doors that won’t seal properly. Start with the simplest checks: confirm the fridge is plugged in, inspect the circuit breaker, and ensure the thermostat is set to a safe cooling range. If the compressor runs continuously or cycles on and off erratically, there’s likely an underlying issue that requires deeper inspection. The presence of frost around the evaporator coil can indicate a defrost problem or airflow obstruction. If you observe moisture or warm air escaping from the door, inspect the gasket for gaps or tears. Document the symptoms with dates and times to share with a technician if you escalate repairs. While many fixes are quick, don’t ignore persistent problems, as they can worsen food safety and energy usage. How To Refrigerator emphasizes starting with these low-risk checks to avoid unnecessary service calls.
Safety first: what not to risk
Never ignore electrical or refrigerant hazards. Always unplug the unit before touching cords, backs, or internal components. Avoid using metal tools around energized parts, and keep liquids away from outlets to prevent shock. Do not attempt refrigerant handling or recovery—this is hazardous and often illegal without certification. If the appliance is in a tight space, ensure adequate ventilation and avoid bending or pulling on copper lines. If you smell gas, notice hissing sounds, or see oil-like residues, evacuate and contact a licensed technician immediately. This section prioritizes safety and prevents common DIY injuries, so you can focus on effective, lower-risk fixes first.
Diagnostic flow overview
The diagnostic flow helps convert symptoms into a probable cause and a safe next step. Start with the simplest, most likely issues (power, thermostat, seals, airflow) before moving to more complex components (defrost system, compressor, start relay). Use a stepwise approach: observe symptom, test a cause, apply a fix, recheck results. If at any point you feel uncertain or unsafe, stop and call a professional. This method minimizes risk while maximizing chances of restoring cooling quickly.
Quick checks that usually solve the issue
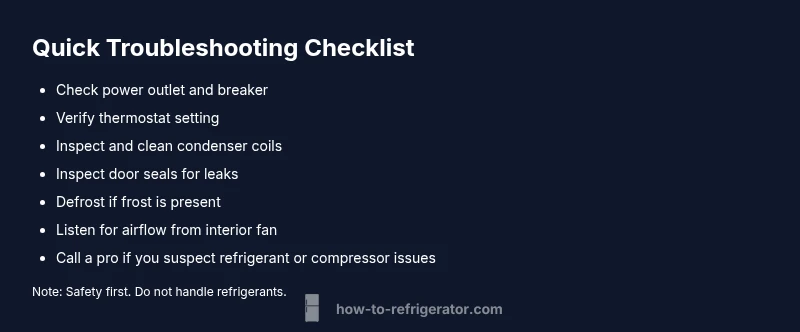
If you’re dealing with a non-cooling fridge, begin with these quick checks: verify the outlet and breaker, reset the circuit, and confirm the thermostat is within the recommended range. Clean the condenser coils to restore airflow and reduce overheating. Inspect door seals for gaps and replace if worn. If frost or ice accumulates, perform a defrost cycle and clear the drain. By methodically ruling out common causes, many households avoid expensive service calls and preserve perishable food while the unit recovers.
Steps
Estimated time: 60-90 minutes
- 1
Power safety and prep
Before you touch any components, unplug the fridge and move nearby items to prevent spills. Wear dry hands and work on a non-slip surface. This initial step dramatically reduces the risk of electric shock while you inspect wiring and the back panel.
Tip: Always unplug first; use a non-contact voltage tester to confirm power is off before touching wires. - 2
Verify the outlet and breaker
Check the wall outlet with a known-good device and inspect the circuit breaker. If the outlet is dead, or the breaker trips repeatedly, there is a power delivery problem that needs correction before other tests.
Tip: If you must reset a GFCI, press the reset button firmly and test both appliances on the same circuit to avoid overload. - 3
Set the thermostat correctly
Confirm the thermostat is within the manufacturer’s recommended range (roughly 3-5°C / 37-41°F for the refrigerator). Do not drastically adjust during troubleshooting; small changes can curb icing and improve airflow.
Tip: Note the original setting before changing it, so you can revert if needed. - 4
Inspect door seals and alignment
Close the door on a dollar bill or similar thin object; if it pulls out easily, the seal may be worn. Check hinges and alignment to ensure an airtight seal. A poor seal lets warm room air in, forcing the compressor to work harder and potentially spoil items.
Tip: Clean the gasket with mild soap and water; replace if cracking or tearing is present. - 5
Clean condenser coils
Unplug the unit and locate the condenser coils (usually beneath or behind the grille). Use a brush or vacuum to remove dust and debris. Clean coils improve airflow and reduce compressor load.
Tip: Do not use metal tools that can bend fins; work gently to avoid damage. - 6
Check for frost and defrost drain
If you see frost around the evaporator or excessive ice buildup, allow a manual defrost if safe to do so. Clear any clogged defrost drain and verify water can flow freely into the drain pan.
Tip: Never slam doors during defrost; water can spill and create electrical hazards. - 7
Test airflow and interior fan
Listen for the evaporator and condenser fan sounds. A non-running fan can prevent proper airflow, causing uneven cooling. Gently feel airflow near vents after rebooting the unit.
Tip: If you hear buzzing but no airflow, the fan motor may be stuck or worn. - 8
Run a post-test and observe
Plug the fridge back in, restart it, and monitor temperatures for 2-6 hours. If cooling improves, you’ve addressed the issue; if it worsens, note the behavior for a technician.
Tip: Take photos of any frost or ice patterns that develop during tests. - 9
Know when to call a pro
If the unit still doesn’t cool, or you suspect refrigerant leaks, compressor faults, or electrical hazards, contact a licensed technician. A professional can safely diagnose and repair with the right tools and certification.
Tip: Document symptoms, dates, and any tests; this helps the technician diagnose faster.
Diagnosis: Refrigerator not cooling properly or temperature fluctuates
Possible Causes
- highPower issue (tripped breaker or unplugged)
- highThermostat or temperature control malfunction
- mediumDirty condenser coils restricting airflow
- mediumDefrost drain blocked causing frost buildup
- lowLeaky door seals allowing warm room air in
- lowFaulty compressor or start relay
Fixes
- easyCheck outlet and circuit breaker; ensure fridge is plugged in firmly
- easyReset the breaker; wait a few minutes for the fridge to restart
- easySet thermostat to the recommended range (usually 3-5°C / 37-41°F)
- easyClean condenser coils and ensure 2 inches of clearance for airflow
- easyInspect door seals for cracks or gaps; replace if needed
- mediumIf frost forms on evaporator, perform a manual defrost and clear the drain
- hardIf compressor or start relay is suspected, contact a professional
FAQ
What should I do first when my refrigerator stops cooling?
Start with power and thermostat checks. Ensure it’s plugged in, reset the breaker if needed, and verify the thermostat is set correctly. If cooling still fails, consult the step-by-step guide for deeper diagnostics.
First, check power and the thermostat. If it still won’t cool, follow the troubleshooting steps in the guide.
Is it safe to DIY repair a broken refrigerator?
Some fixes like cleaning coils or resetting a thermostat are safe for DIY. More complex problems such as refrigerant leaks or compressor faults require a licensed technician.
Some fixes are safe to do yourself, but refrigerant or compressor issues need a pro.
How long do common fixes take?
Simple checks and cleaning can take 30-60 minutes. More involved steps or parts replacement may require 1-3 hours, plus any scheduling time with a professional.
Most quick fixes take under an hour, but more involved repairs can take longer.
When should I replace instead of repair?
If the compressor or refrigerant system is failing, replacement is often more cost-effective in the long run. Consider age, energy efficiency, and repair costs when deciding.
If major components are failing or the unit is old, replacement might be best.
What are signs of a refrigerant leak?
Signs include a hissing sound, oily residues around copper lines, and persistent cooling failure despite proper settings. A leak requires a licensed technician to repair and recharge.
Look for hissing sounds and oil around lines; leaks need a pro.
Watch Video
Top Takeaways
- Check power and thermostat first.
- Dirty condenser coils are a common fixable cause.
- Safety always comes first; call a pro if unsure.
- Document symptoms for service visits.
- Regular maintenance prevents future failures.