Bar Cooler Repair and Maintenance: A Homeowner's Guide
Learn how to diagnose, repair, and maintain a bar cooler at home with actionable steps, safety tips, and expert guidance from How To Refrigerator to keep drinks cold and equipment efficient.

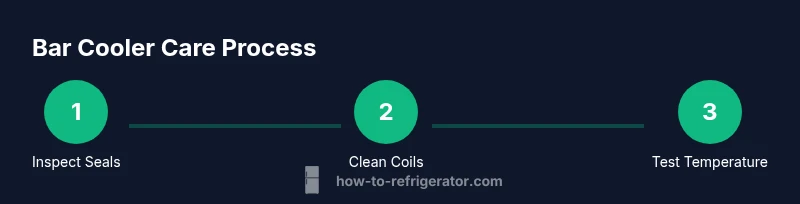
Bar cooler care is doable at home. Start by checking door seals, thermostat, coils, and frost buildup. If issues persist, follow the full step-by-step guide for safe diagnosis and repair steps before calling a professional.
Understanding Bar Coolers
Bar coolers are compact refrigeration units designed to store beverages and perishable bar items at safe temperatures while fitting into homes, kitchens, or commercial-style home bars. They come in various configurations, including under-counter models, freestanding beverage centers, and compact wine coolers, each with unique airflow, door design, and fan arrangements. In this guide, How To Refrigerator explains how these differences influence performance and maintenance. Common failure modes include doors that don’t seal properly, coils that accumulate dust, and fans that struggle to move air when blocked by bottles. Understanding how a bar cooler operates helps homeowners spot issues early and plan effective fixes. By keeping the unit clean, level, and well-ventilated, you reduce energy waste and extend the appliance’s life. The goal is to maintain a stable interior environment so drinks stay cold without overworking the compressor. Use this section as a foundation for diagnosing issues, then follow the step-by-step guide for hands-on tasks and maintenance routines that fit your model.
According to How To Refrigerator, bar cooler setups vary from compact under-counter units to larger, freestanding beverage centers, but routine checks keep temperatures stable and drinks safe. Regular maintenance also supports energy efficiency and prolongs unit life.
Symptoms and Quick Diagnostics
Before taking tools in hand, observe your bar cooler’s behavior and list the symptoms. Typical problems include: not cooling adequately, inconsistent temperatures, excessive frost on evaporator or coils, unusual noises from the compressor or fan, water leaks around the base, or condensation on shelves. Start with simple checks: verify the door closes fully and the gasket is intact (no cracks or tears), ensure the unit has at least a few inches of clearance for airflow around the condenser, and confirm the thermostat is set correctly. If doors seal well but temperatures drift or frost forms, the issue is often related to airflow or defrost efficiency. For frost, a blocked drain or faulty defrost cycle might be the culprit. Remember to unplug the unit when performing any interior inspection to avoid electric shock. Keeping a small log of temps and symptoms helps identify patterns over time. This section helps you triage problems without jumping to expensive replacements.
How To Refrigerator emphasizes that simple airflow and sealing issues are frequent culprits that homeowners often resolve without service.
Safety First: Before You Begin
Safety should always come first when working with appliances. Unplug the bar cooler before inspecting electrical components or removing shelves. If you notice burning smells, exposed wires, or leaking refrigerant, stop and contact a professional immediately. Avoid using water jets or harsh cleaners on electrical parts or control panels. When handling coils or fans, wear eye protection and gloves to prevent injury from sharp edges. Work in a dry area to minimize slip hazards, and never bypass safety devices or jump-start a malfunctioning compressor. If you are unsure about a procedure, consult the manufacturer’s service manual for model-specific guidance. Adhering to basic safety procedures protects you and extends the life of the appliance.
The recommended approach is to perform non-invasive checks first, then progressively move to more involved tasks only if you feel confident and the manual permits.
Cleaning, Seals, and Routine Maintenance
A clean bar cooler runs more efficiently and reduces the risk of contamination. Begin by unplugging the unit and removing shelves for thorough interior cleaning with a mild, non-abrasive detergent. Wipe down walls, door gaskets, and shelves, then dry completely. Inspect door seals for cracks or stiff edges; clean the gasket surface with a damp cloth and ensure it creates a tight seal when closed. For maintenance of cooling efficiency, locate the condenser coils (typically at the back or beneath the unit) and remove dust using a soft brush or vacuum with a brush attachment. Dust buildup restricts airflow and forces the compressor to work harder. If your model has a drain tube, check for blockages and clear them if necessary. After cleaning, reassemble, plug in, and monitor interior temperatures to ensure the unit returns to a stable setting. Regular cleaning helps maintain efficiency and prolongs life.
Clear and concise upkeep supports both performance and food-safety readiness.
Troubleshooting Not Cooling or Fluctuating Temps
If the bar cooler isn’t reaching or maintaining a safe temperature, the cause can be straightforward or more complex. Start by confirming the thermostat setting matches your preferences and verify that the door seal forms a complete closure. Next, inspect condenser coils for dirt and debris, as dirty coils impede heat rejection. Listen for the evaporator fan; if it’s obstructed or faulty, air may not circulate properly, causing uneven cooling. Frost on the evaporator or a clogged defrost drain can also prevent efficient operation. For persistent issues, check the door alignment and hinge torque, as a misaligned door can cause heat exchange inefficiencies. If after these checks the problem persists, it’s wise to schedule service—some issues require refrigerant handling or compressor testing that is best left to a qualified technician. This section equips you to perform a structured diagnostic workflow, reducing unnecessary service calls.
Following a logical sequence helps you identify root causes without guessing.
Noise, Leaks, and Frost: What to Do
Unusual noises can signal a range of problems from a loose panel to a failing fan motor. Start by tightening any loose panels and mounting hardware. A buzzing or humming sound may indicate a faulty fan or motor; if the fan blade hits a shelf or bottle, reposition items to restore clearance. Water leaks often originate from a blocked drain or improper tilting of the unit. Check the drain tube for clogs and ensure the unit is level so condensation runs to the drain and not onto the floor. Frost buildup can be a sign of a defective defrost system or frequent opening of the door in a warm room. Address frost by allowing the unit to defrost if recommended by the model manual and check for proper defrost timer operation. If issues persist after these checks, seek professional help.
This section helps you recognize and triage noises, leaks, and frost so you can reduce downtime and prolong the cooler’s life.
When to DIY and When to Call a Pro
Many routine maintenance tasks are well within a motivated homeowner’s skill set, including cleaning coils, replacing a damaged gasket, or cleaning the drain and interior. However, repairs involving refrigerant, sealed systems, or compressor replacement should be handled by a licensed technician. If you encounter refrigerant odors, a buzzing that continues after cleaning or tightening, or signs of electrical issues such as arcing or sparking, stop immediately and contact a pro. Document symptoms, take clear photos of the area, and reference the model number and serial number when you call for service. A proactive approach saves money and minimizes downtime. The How To Refrigerator team emphasizes that safe, informed DIY can be effective for non-technical repairs, but preserving the integrity of the sealed refrigeration system requires professional expertise.
Long-Term Care and Smart Upgrades
Keep energy efficiency high by ensuring the door seals are intact, the unit is level, and airflow is unobstructed. Consider upgrading to models with better insulation or adjustable shelves that improve air distribution. If you frequently stock drinks in reach-in spaces, organize items to avoid blocking the rear vents. Regular cleaning and preventive maintenance extend the life of a bar cooler and reduce energy costs over time. When it’s time to replace, compare efficiency ratings and review warranty terms to choose the best value. This final section guides you through thoughtful long-term care and smart upgrade considerations to maximize performance.
Tools & Materials
- Screwdrivers (Phillips and flathead)(Phillips #2 and flat #2 are common sizes for handles and panels)
- Nut driver set(For removing mounting hardware on some models)
- Multimeter(Useful for checking electrical components (voltage, continuity))
- Vacuum with brush attachment(To clean dust from condenser coils)
- Soft brush or condenser coil brush(Gentle bristles prevent coil damage)
- Microfiber cloths(Interior and gasket cleaning)
- Mild dish soap or appliance-safe cleaner(Avoid harsh abrasives)
- Digital thermometer or appliance thermometer(To verify temperature range)
- Gloves and safety glasses(Personal protection)
- Drain snake or plastic flexible rod(Only if drain is clogged and accessible)
- Level(Ensure unit sits evenly for proper drainage)
Steps
Estimated time: 60-90 minutes
- 1
Power down and access interior
Unplug the bar cooler and remove shelves to access all interior surfaces. This lets you inspect door gaskets, interior walls, and the drain area safely. If any panels are secured with screws, use the appropriate screwdriver or nut driver to avoid damaging the trim.
Tip: Take a photo of panel layouts before removal to ease reassembly. - 2
Check door seals and alignment
Examine the gasket for tears, gaps, or stiffness. Clean the gasket with a damp cloth and ensure it seals fully when the door closes. If the door doesn’t align properly, tighten hinges or adjust mounting points per the model manual.
Tip: A near-sealed door reduces warm air intrusion and improves cooling efficiency. - 3
Test thermostat and airflow
Verify the thermostat setting is appropriate for your environment. If the unit feels warm, test the control with the thermometer placed inside. Confirm the fan and vents are unobstructed; rearrange items as needed to allow free air movement.
Tip: Avoid overloading shelves on the cool side to prevent restricted airflow. - 4
Inspect condenser coils
Locate the condenser coils (back or below the unit). Use a vacuum with a brush attachment to remove dust and debris. Recheck for smooth airflow. Caked-on dust forces the compressor to work harder and wastes energy.
Tip: Do this routine every few months or when airflow seems reduced. - 5
Check evaporator and defrost components
If you notice frost buildup, inspect the defrost drain and timer if visible. Excess frost indicates a defrost issue or airflow problem. Follow the model manual for steps to safely thaw and address restricted airflow.
Tip: Never force defrost with heat tools; use manufacturer-approved methods. - 6
Inspect for leaks and level unit
Check for water pooling around the base; ensure the unit is level to promote proper drainage. If you see a leak from the refrigerant line, contact a pro—refrigerant handling requires licensed service.
Tip: Use a level and adjust feet slowly to avoid overtightening. - 7
Reassemble and test
Replace shelves, plug in the unit, and monitor interior temperature over several hours. Confirm stable readings and verify there are no unusual noises or leaks. Document any recurring issues for future reference.
Tip: Keep a simple maintenance log for temperature, cleaning dates, and observed issues. - 8
Plan regular maintenance
Create a routine that includes cleaning coils, inspecting seals, and documenting performance. Regular care prevents many common problems and extends the unit’s life.
Tip: Schedule reminders to stay consistent and avoid gaps in maintenance.
FAQ
Why is my bar cooler not cooling properly?
Not cooling can stem from a door left ajar, a faulty thermostat, dirty condenser coils, or a blocked fan. Start with simple checks: ensure a tight door seal and clear airflow, then inspect the coils and fan.
If your bar cooler isn’t cooling, check the door seal, thermostat, and airflow first, then inspect the coils and fan.
Can I clean the condenser coils myself?
Yes. Unplug the unit, access the coils, and remove dust with a soft brush or vacuum. Avoid bending fins and don’t use water directly on electrical components.
You can clean the coils safely by unplugging first and brushing away dust gently.
Is frost buildup a sign of defrost failure?
Frost buildup often indicates a defrost problem or restricted airflow. Check the drain and thermostat, and allow manual defrost if recommended by the model manual before testing again.
Frost usually means the defrost cycle or airflow is off; confirm the drain and thermostat settings.
Should I service refrigerant leaks myself?
No. Refrigerant work requires licensed technicians due to safety and environmental considerations. If you suspect a leak, stop using the unit and contact a pro.
Do not attempt refrigerant work yourself; contact a professional if you suspect a leak.
How can I improve energy efficiency in a bar cooler?
Maintain proper door seals, keep coils clean, avoid overloading, and place the unit where ambient temperatures are reasonable. Upgrades to models with better insulation can also help.
Keep seals tight, clean coils, and avoid crowding; upgrade if efficiency is a priority.
When is it time to replace a bar cooler instead of repairing it?
If recurring failures occur despite maintenance, or if energy costs rise significantly, consider replacement. Compare expected remaining lifespan, energy efficiency, and warranty terms.
If failures repeat after fixes, replacement may be more cost-effective and energy-efficient.
Watch Video
Top Takeaways
- Diagnose issues with a structured checklist.
- Keep door seals clean for energy efficiency.
- Clean condenser coils regularly to prevent overworking the compressor.
- Know when to DIY and when to call a pro.