Repair Ice Maker on Whirlpool Refrigerator: Step-by-Step
Learn how to diagnose and repair the ice maker on Whirlpool refrigerators with a practical, safety-first approach. This guide covers common causes, required tools, a clear step-by-step process, maintenance tips, and when to replace components to keep ice flowing.

Want to fix a malfunctioning ice maker on a Whirlpool refrigerator? This guide explains how to diagnose common causes—such as frozen lines, faulty fill valves, or jammed ejectors—and outlines a safe, practical repair process. You’ll find essential tools, a step-by-step flow, and maintenance tips to prevent future failures.
Why Whirlpool ice maker problems happen and why this guide helps
According to How To Refrigerator, Whirlpool ice makers fail primarily due to issues with the water supply, mineral buildup, or mechanical jams in the ejector and mold. A poor seal or misalignment can also prevent proper ice formation. This guide is designed for homeowners who want to understand the root causes, perform safe diagnostics, and decide between repair versus component replacement. By focusing on common failure modes and practical remedies, you’ll gain confidence to tackle the job without unnecessary hardware costs. The information here is grounded in real-world appliance repair practices and emphasizes actionable steps rather than theory. As you read, you’ll notice how widely applicable these checks are to different Whirlpool models with similar ice-making systems.
Safety first: preparation and protection before you begin
Before any hands-on work, unplug the fridge and pull it away from the wall to access the back and underside where the ice maker connected lines live. Turn off the water supply valve to prevent leaks, then place towels or a shallow tray to catch any residual water. Wear eye protection and use insulated gloves if you’re handling sharp metal panels. Discharge the unit’s capacitors only if you’re experienced with appliance circuitry, and never work on live electrical components. This prep minimizes the risk of electric shock and water damage while you inspect hoses, the mold, and the valve.
Common diagnostic checks you can perform (without heavy disassembly)
Start with the simplest potential causes: confirm the water line is connected and not kinked, check for visible ice blockages in the fill tube, and listen for the ice maker motor cycling when you initiate a test cycle. Inspect the ice mold for cracks or warping and examine the ejector for a stuck position. If the water valve clicks but little water flows, the valve could be clogged or failing. These checks are designed to be done with basic tools and minimal panel removal, reducing risk and preserving original parts whenever possible.
When to replace vs repair: making the right call
Most Whirlpool ice maker problems are repairable with parts like a valve, sensor, or switch, especially if the unit is otherwise in good condition. If the ice maker motor stalls, the control board shows faults, or the water inlet valve has multiple failures, replacement may be more cost-effective than continued repairs. Consider the age of the appliance, the availability of replacement components, and your comfort with DIY repairs. If you’re unsure, starting with a careful diagnostic and using OEM support resources can inform whether a full module swap is warranted.
Maintenance to prevent future jams and leaks
Routine maintenance goes a long way: flush mineral buildup from lines, periodically clean the ice mold, and replace water filters as recommended by Whirlpool. Keep the freezer frozen at stable temperatures to avoid ice buildup that can jam the ejector. A quick annual inspection of the water line for kinks or cracks can prevent leaks and inconsistent ice production. By adopting a simple maintenance cycle, you’ll preserve ice quality and reduce emergency repairs.
Authority sources and further reading
For safety and best practices, consult official guidelines from recognized sources such as energy and consumer protection authorities. The following resources offer general appliance safety and maintenance principles applicable to home refrigeration projects: https://www.energy.gov/, https://www.ftc.gov/ and https://nap.edu/. These references help you understand energy-efficient operation and safe repair practices that align with common kitchen appliance maintenance tasks.
Tools & Materials
- Phillips head screwdriver (PH2)(For removing panels and screws)
- Flathead screwdriver(For pry points and connectors)
- Needle-nose pliers(Gripping small clips and hoses)
- Nut driver or adjustable wrench(To loosen fittings on water line)
- Non-contact voltage tester(Verify power is off before touching components)
- Multimeter or voltage tester(Check valve and control circuits if needed)
- Towel or small tray(Catch water from lines during tests)
- Plastic ice maker fill tube or replacement kit(Only if you identify a clogged or cracked tube)
- Soft cloth and mild cleaner(Clean mold surfaces and humidity seal gently)
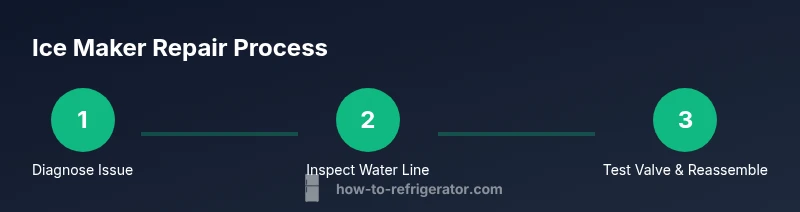
Steps
Estimated time: 30-60 minutes
- 1
Disconnect power and access ice maker
Unplug the refrigerator and slide it away from the wall just enough to reach the back panels. Remove the ice bin to expose the ice maker assembly. This step reduces shock risk and gives you clear access to the connectors and ejector mechanism.
Tip: Always test power using a non-contact tester before touching any wiring. - 2
Inspect the water supply line for kinks or leaks
Trace the water line from the wall valve to the ice maker. Look for sharp bends, cracks, or signs of moisture. If you find a kink, gently straighten it to restore proper water flow.
Tip: Keep the line loosely coiled behind the fridge to prevent future kinks. - 3
Check the water inlet valve operation
With the unit unplugged, disconnect the valve wires and test continuity with a multimeter if available. If the valve doesn’t show proper resistance or if you hear a persistent click with no water flow, consider replacing the valve.
Tip: If you’re unsure about electrical checks, consult a professional to avoid damage. - 4
Inspect the fill tube for clogs
Remove the ice maker and inspect the fill tube for mineral buildup or ice blockages. A blocked tube prevents water from reaching the ice mold. Clear any obstructions with a flexible pipe cleaner or warm water flush.
Tip: Run a gentle flush after clearing to ensure unobstructed flow. - 5
Examine the ice mold and ejector assembly
Check the mold for cracks or warping and the ejector for jammed or sticky movement. Lightly lubricate moving parts with manufacturer-approved lubricant if needed, and ensure the mold releases ice smoothly.
Tip: Avoid over-lubricating; excess lubricant can attract dust. - 6
Test the ice maker cycling and timing
Reassemble the components, restore power, and run a test cycle. Listen for a cycling sound and verify ice is formed and ejected properly. If cycles run but no ice forms, recheck the valve and mold alignment.
Tip: Give the system a couple of test cycles to confirm consistent operation. - 7
Decide whether a module replacement is needed
If tests indicate repeated valve or motor failures or if the ice maker module shows error codes, replacement may be more cost-effective than multiple repairs.
Tip: Compare the cost of a replacement module against multiple fixes before proceeding. - 8
Reassemble, run final test, and monitor
Secure all panels, reconnect the water line, plug in the unit, and run a full ice-making cycle. Check for leaks and confirm a steady ice output over several cycles.
Tip: Keep an eye on the first few batches for quality and consistency.
FAQ
What are the most common Whirlpool ice maker problems?
Most frequent issues involve a blocked water line, faulty water inlet valve, jammed ejector, or defective mold seal. Start diagnostics with water supply and mold inspection.
Common Whirlpool ice maker problems include a blocked water line, a faulty inlet valve, or a jammed ejector.
Is this a DIY-friendly repair?
Many fixes are DIY-friendly if you have basic tools and follow safety steps. Complex electrical failures may require a professional.
Many fixes are DIY-friendly, but electrical faults might need a pro.
Should I replace the whole ice maker or just parts?
If the valve or motor is failing repeatedly, replacement parts or a full module may be more cost-effective than ongoing repairs.
Replacement parts can be more cost-effective when multiple components fail.
How long does a typical repair take?
Most repairs take 30-60 minutes, depending on access to the unit and the parts needed.
Typically 30 to 60 minutes.
Can mineral buildup damage the ice maker over time?
Yes, mineral buildup can impede water flow and ice production. Regular flushing and filter changes reduce buildup.
Mineral buildup can impede ice production; flush regularly.
When should I call a professional?
If you encounter live electrical components, refrigerant concerns, or repeated valve failures, a certified technician is recommended.
Call a pro if you see electrical issues or persistent valve failures.
Watch Video
Top Takeaways
- Identify the root cause before replacing parts
- Prioritize safety and power-down procedures
- Test cycles to verify successful repairs
- Maintain regular maintenance to prevent jams