Ice Maker Repair Samsung Refrigerator: Step-by-Step Guide
Learn to diagnose and fix common ice maker problems in Samsung refrigerators with a practical, step-by-step approach from How To Refrigerator. Safe, at-home methods, plus maintenance tips to prevent future failures.

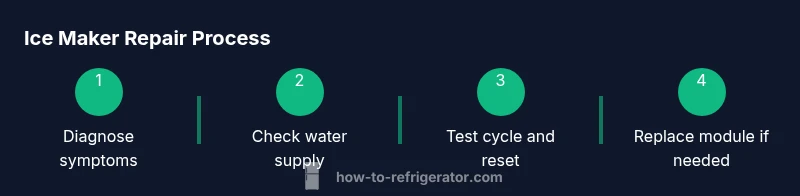
To fix an ice maker on a Samsung refrigerator, start with simple checks (water supply, filter, ice mold), then test the sensor and motor, clear jams, and reseat the ice maker module if needed. This quick guide provides safe, at-home steps and warns about electricity, water connections, and proper reassembly to prevent leaks.
Why ice maker troubleshooting matters
Ice makers in Samsung refrigerators are compact, highly integrated systems. When they fail, the impact is immediate: disrupted cold drinks, dependency on store ice, and potential water leaks. According to How To Refrigerator, most at-home fixes start with simple checks you can do without specialized tools. The How To Refrigerator team found that addressing water supply and mold issues fixes the majority of everyday ice-maker problems. This is why timely troubleshooting pays off: you save water, avoid unnecessary service calls, and extend the life of the ice maker by resolving root causes early.
Quick diagnostic checklist
Before diving into disassembly, run a quick diagnostic to narrow down the cause. Start by powering down the unit or turning off the ice-maker switch. Inspect the ice mold for cracks or ice jams and check the ice bin for obstructions. Verify the water supply line is connected, free of kinks, and delivering water. Check the water filter status—if it’s past its recommended life, replace it. Listen for the ice maker cycle and listen for unusual noises during operation. If no water is flowing, if the mold is blocked, or if the motor stalls, note the symptom for targeted fixes.
Common fixes for Samsung ice makers (at-home)
Many issues can be resolved without professional tools. Clean the ice mold and reseat the ice maker assembly. Perform a power cycle by unplugging the fridge for about 5 minutes, then reconnect and allow the system to reboot. If water fails to reach the ice maker, replace an old or clogged water filter and flush the line. Gently loosen any jammed ice from the mold and ensure the ice maker arm can move freely. If the issue persists, recheck the wiring harness connections and confirm the control panel responds to commands.
Diagnosing electrical issues and sensors
Electrical faults can stop ice production even when water is available. Check for a faulty sensor, a tripped breaker, or a loose control-board connection. Confirm that the ice maker’s arm switch is not stuck; a blocked sensor can prevent cycling. If a reset is needed, power down the unit for a minute and restore power to clear minor sensor glitches. For persistent electronic faults, consult the model-specific service manual and consider testing with a multimeter or seeking professional service.
Checking the water supply and water inlet valve
Water supply problems are among the top reasons for no ice. Inspect the water inlet valve at the back of the refrigerator for corrosion, stiffness, or leaks. Tighten fittings if needed and ensure the supply line is free of kinks. Test water flow by attempting a short ice cycle; if water does not reach the mold, the issue may be a faulty valve or a blocked line. Replacing the inlet valve is a common repair when flow is consistently absent.
Ice maker assembly and mold issues
The ice mold and related components can wear over time. Look for cracks, warped plastic, or loose fittings around the mold and drive mechanism. Debris and mineral buildup can impede ice release, so clean the mold with warm water and a mild detergent. Inspect the ejector blades and gears for wear, and replace any damaged parts. After reassembly, run several cycles to confirm smooth operation. If the mold is damaged beyond repair, replacement is typically the best option.
Defrost drain and ice buildup clearing
A blocked defrost drain can create condensation that refreezes into ice buildup around the ice maker. Locate the drain path under the freezer section and inspect for blockages. If a clog is present, flush the drain with warm water or use a small flexible brush to dislodge debris. After clearing, run the ice maker through a complete cycle to verify that water flows freely from the line into the mold and that the ice ejects correctly.
Replacing the ice maker module or motor
When diagnostics point to a defective module or motor, replacement is often the most reliable fix. Power down the unit, disconnect the wiring harness, remove mounting screws, and install the new module per the model’s service guide. Reconnect wiring, reseat all connectors, and test the cycle with attention to seal integrity and noise. If you’re uncomfortable with electronics work, seek professional help to avoid damage or voided warranties.
When to replace vs repair
Age and repeated failures influence the decision to repair or replace. If the ice maker is nearing the end of its expected life, or if repeated repairs have not resolved the issue, replacement may prove more cost-effective in the long run. Weigh labor, parts availability, and the potential for cascading issues (defrost drain, water line, or control board) before deciding.
Safety tips and precautions
Always unplug a fridge or switch off the circuit breaker before starting any repair. Do not work with exposed electrical connections if you’re unsure of the risks. Use a towel or small basin to catch water, and keep the area dry to prevent slips. If you smell burnt insulation or see scorch marks, stop and contact a professional immediately.
Maintenance to prevent future malfunctions
Regular maintenance minimizes ice-maker problems. Replace filters on schedule, clean the ice mold every few months, and inspect water lines for kinks or leaks. Keep the freezer at a stable temperature to maintain proper ice formation. Record maintenance dates to track when service is due and to catch wear before it becomes a failure.
DIY vs professional service: What to expect
Some fixes, such as cleaning the mold or replacing a water filter, are appropriate for DIY. Electrical work, valve replacement, or module changes require careful handling and sometimes specialized tools. If you’re uncertain about any step, consult the model’s service manual or contact a certified appliance technician. The decision to DIY or hire a pro should balance safety, time, and cost.
Tools & Materials
- Phillips screwdriver(Precision #2 or #1.5 depending on model)
- Torx screwdriver set(If used by your model)
- Multimeter(To test electrical continuity)
- Water supply valve wrench(For valve connections)
- Towel or small basin(Catch water leaks during tests)
- Gloves and safety glasses(Personal protection)
- Samsung ice maker kit (replacement module)(Only if diagnosis recommends replacement)
- User manual / service guide(Model-specific guidance)
- Bucket(Collect condensate or water from defrost drain)
Steps
Estimated time: 60-120 minutes
- 1
Power down and locate the ice maker
Unplug the fridge or switch off the ice-maker circuit to prevent electrical shock. Open the freezer or access panel to locate the ice maker housing. Confirm there are no signs of water leakage before proceeding.
Tip: Label any wires you disconnect to simplify reassembly. - 2
Check water line and shutoff valve
Trace the water line from the back of the fridge to the valve. Ensure the valve is fully open and not kinked or pinched. If water flow is restricted, gently straighten the line and clear any debris in the fitting.
Tip: If the line is clogged, do not force it; replace the segment. - 3
Inspect ice mold and bin
Remove the ice bin and inspect the mold cavity for cracks, mineral buildup, or stuck ice. Clean the mold with warm water and a mild detergent or vinegar solution; rinse thoroughly.
Tip: Dry the mold completely before reinserting to prevent new ice formation on residues. - 4
Reset the ice maker
Power down the unit for about 60 seconds, then restore power. Allow the ice maker to cycle and attempt a fresh ice formation. Listen for the motor engaging and observe the ejector cycle.
Tip: If the reset does not help, proceed to sensor/valve checks. - 5
Check the water filter and line flush
If the filter is overdue, replace it. After replacement, run water through the dispenser to purge air and flush the line towards the ice maker.
Tip: Bubbling or sputtering during cycle may indicate air in the line that needs flushing. - 6
Test electrical sensor and control
Access the ice maker sensor and verify it moves freely. If you have the skill, use a multimeter to check continuity on trigger points; otherwise rely on reset and reassembly.
Tip: Never force sensors; replacement may be necessary if resistance readings are outside specs. - 7
Address defrost drain and ice buildup
Inspect the defrost drain path for blockages. Clear debris and flush with warm water. Re-test cycle to ensure there is no water backup causing re-freeze.
Tip: Wear gloves when handling warm water to avoid burns. - 8
Consider replacing the ice maker module
If cycles fail despite checks, the module or motor may be faulty. Follow the service guide to detach and replace the module with a compatible Samsung part.
Tip: Keep screws organized and note wiring configuration to avoid miswiring. - 9
Reassemble and run multiple cycles
Reassemble components, plug in, and run several ice-making cycles. Confirm ice drops cleanly into the bin, and there are no leaks around the housing.
Tip: Allow a few cycles to stabilize before judging success. - 10
Document results and plan next steps
Record what you tested and the outcome. If issues persist, plan professional service and note warranty status.
Tip: Include model number and part numbers for quick reference when speaking with a technician.
FAQ
Why is my Samsung ice maker not triggering at all?
A non-responsive ice maker often indicates a sensor or electrical issue, a tripped breaker, or a blocked ice mold. Start with a power reset, check for water supply, and ensure the ice maker arm is free to move. If the problem persists, inspect the control board following the model’s service guide.
If your ice maker won’t trigger, reset the system, verify water supply, and check the sensor and control board as needed.
How do I reset the ice maker on a Samsung refrigerator?
Unplug the fridge or switch off the ice maker, wait about a minute, then restore power. Allow several cycles for the system to recalibrate. If reset fails, investigate water supply and sensor function.
Reset by powering down, waiting a minute, and powering back up; then observe several cycles to confirm operation.
Can a clogged water line cause no ice or slow production?
Yes. A clogged or kinked water line prevents water from reaching the ice mold, resulting in little or no ice. Inspect the line for kinks, replace clogged segments, and flush the line after any filter replacement.
A blocked water line stops ice production; check and clear it, then flush the system.
Is it safe to replace the ice maker module myself?
Module replacement involves electrical work and can affect safety and warranty. If you’re comfortable with appliance electrical components and follow the model guide, you can replace it; otherwise hire a professional.
If you’re not confident with electrical work, hire a tech to replace the module.
How long does a typical ice maker repair take?
A straightforward diagnosis and basic fixes can take 30-90 minutes. More complex module replacements or valve repairs may require 1-2 hours, plus potential parts delivery time.
Most simple fixes take under an hour; larger repairs may take a couple of hours.
Should I hire a professional for ice maker repair Samsung refrigerator?
If the issue involves electrical components, the water inlet valve, or the ice maker module, consider a certified appliance technician. Professional service helps protect your warranty and ensures safe handling.
For electrical or complex repairs, a professional is usually the best choice.
Watch Video
Top Takeaways
- Diagnose water and mold issues first to fix most problems
- Follow safe power-down practices before any inspection
- Regular maintenance prevents future ice-maker failures
- Decide between DIY fixes and professional service based on risk and model age