Samsung fridge ice maker troubleshooting and DIY guide
A comprehensive, step-by-step guide to diagnose and fix common Samsung fridge ice maker issues. Learn safe DIY fixes, essential tools, and maintenance tips to restore ice production.

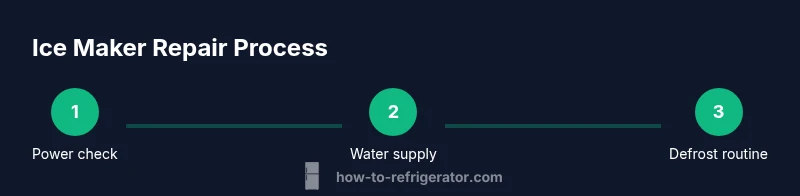
In this quick guide, you will learn how to diagnose a samsung fridge ice maker problem, verify power and water supply, detect jams or frozen lines, and perform a safe reset or basic fixes. You'll learn practical steps you can take before calling service, along with safety tips to protect yourself and your appliance.
Understanding the Samsung fridge ice maker system
The samsung fridge ice maker in modern Samsung refrigerators relies on an integrated ice maker module, water inlet valve, defrost system, and an ejector assembly. Homeowners often misjudge ice maker issues as a single fault, but root causes can be water supply, frost buildup, jammed mechanisms, or faulty sensors. According to How To Refrigerator, understanding the mechanism is the first step to a successful DIY fix. In this section, we break down the main components and how they interact, so you can spot abnormal signs quickly and decide whether to proceed with a DIY repair or call service. We'll discuss model variations (side-by-side, French-door) and which parts are most likely to wear out. The goal is to restore ice production while keeping safety in mind. Remember to unplug before any disassembly and to work in a dry area.
This section also introduces the typical failure points you’ll see across Samsung models, including jammed ejectors, clogged water lines, and sensor glitches. By recognizing these patterns early, you can avoid unnecessary disassembly and focus on the highest-leverage fixes. The How To Refrigerator team emphasizes a patient, methodical approach—start with the simplest checks and move toward component-level tests only when needed.
Common failure modes and symptoms
Ice makers fall into a few predictable categories. Recognizing the symptoms helps you triage quickly and decide whether DIY fixes are feasible or professional service is warranted. Common modes include: no ice production at all, very slow ice production, ice cubes that are hollow or misshapen, ice that smells or tastes off, water leaks around the ice maker, and frost buildup around the ice mold. A typical early indicator is a silent ice maker after a power interruption, which often points to a reset need or a sensor hiccup. In some Samsung models, defective water inlet valves or clogged filters can reduce flow enough to stall ice production. Throughout this guide, you’ll see practical checks tied to each symptom, with safety-first steps highlighted by the How To Refrigerator team.
Diagnostic flow: where to start
Begin with the simplest checks before taking apart any panels. 1) Ensure the fridge is powered and the ice maker is turned on. If there’s no water flow, move to the water supply valve and filter health. 2) Inspect for visible jams or frost around the ice mold, which indicates frost-free cycle or defrost drain issues. 3) Check the ice bucket alignment and ejector mechanism for binding. 4) If basic checks don’t resolve the issue, advance to power-cycle testing and sensor/board checks. This flow keeps you from chasing phantom faults and prioritizes fixes that deliver the quickest results. How To Refrigerator recommends documenting the model and fault symptoms as you proceed, which helps when seeking parts or professional service later.
Resetting and power-cycle steps
Power resets can clear many control-board hiccups without replacing parts. Start by unplugging the fridge for at least 60 seconds, then plug it back in and wait a few minutes for the ice maker to initialize. If your model includes a dedicated reset button, press and hold it for 5–10 seconds until you see a reset confirmation. After a reset, observe whether ice production resumes; if not, continue with diagnostic checks for water supply and frost buildup. Remember to keep the area dry and avoid touching exposed electrical components during the process. This step is often enough to restore normal operation on many Samsung ice makers.
Checking water supply and filters
A blocked or slow water supply is the most common reason for weak or missing ice production. Confirm the shut-off valve under the sink is fully open and the supply line is not kinked. Disconnect the line and run water to verify free flow at the inlet valve. Inspect and replace the home water filter if it’s clogged or past its recommended life. Some Samsung models require you to perform a filter reset after replacement; consult your user manual for the exact procedure. Keep a tray beneath to catch any drips during testing.
Defrost drain and ice maker mechanism issues
Frost buildup around the ice mold can block the ejector or jam the ice tray. Inspect the defrost drain for clogs and ensure the drain line is clear to prevent standing water that freezes around the ice maker. If frost is present, you may need to perform a controlled defrost procedure and re-test the ice maker after waiting 15–30 minutes. Check the ice mold for cracks or warping and ensure the ejector arm moves freely. A binding mechanism is a common cause of intermittent ice production and should be addressed before replacing major components.
This block emphasizes the importance of a clean, well-lubricated mechanism and a clear drain path. If you encounter persistent frost despite a clean drain, the root cause may extend to the defrost system or control board. In such cases, consider professional service to avoid further damage.
Replacing components vs professional service
Not every ice maker issue requires a full module replacement, but some problems do. If water flows correctly and the ejector is moving freely yet ice production remains absent, it may be a sensor or motor fault. Many models allow you to replace only the ice maker module or related sensors, which can be more cost-effective than replacing the entire unit. However, if you observe recurring electrical faults, abnormal noises, or signs of water leakage near electrical connections, professional service is advised. The How To Refrigerator team recommends a careful cost-benefit analysis and, when in doubt, a professional diagnosis to prevent unnecessary parts replacements.
Preventive maintenance and long-term care
Regular maintenance reduces the chance of ice maker failures and extends appliance life. Schedule a yearly inspection of water lines, filters, and seals. Clean the ice mold and ejector assembly every 3–6 months to prevent buildup, and replace filters as recommended by Samsung or Energy Star guidelines. Keep the freezer temperature stable, avoid placing heavy items on the ice maker, and periodically run a test cycle to confirm continued operation. This proactive approach is endorsed by How To Refrigerator and can save time and money in the long run.
Tools & Materials
- Phillips head screwdriver #2(For panel screws and access covers)
- Multimeter (digital)(For testing wiring continuity and sensor signals)
- Gloves (work gloves)(Protect hands during disassembly)
- Towel or catch tray(Catch water or frost during testing)
- Flat-head screwdriver(Helpful for prying plastic covers)
- Replacement ice maker kit or parts (if needed)(Only if diagnostics identify a faulty module)
- Clear hose or small pitcher(For flushing defrost drain if needed)
Steps
Estimated time: 60-90 minutes
- 1
Power down and access the ice maker
Unplug the refrigerator or switch off the circuit breaker to remove any risk of shock. Open the ice maker housing and visually inspect for obvious jams, loose wiring, or frost buildup. This initial check helps identify simple issues before you start testing components.
Tip: Always unplug first and keep the area dry to avoid slips or shorts. - 2
Check water line and valve
Trace the water supply line to the valve under the freezer section. If the line is kinked or blocked, straighten or replace it. Confirm the valve is fully open and there is water flow when the line is disconnected and touched to a container.
Tip: If you hear a hum but no water, the valve may be stuck or blocked. - 3
Reset or test the ice maker module
Reconnect power and perform a reset according to your model: either unplug for 60 seconds or press the reset button for 5–10 seconds. If your model lacks a reset button, use the power-cycle method and recheck ice production after initialization.
Tip: A reset can clear minor sensor or control-board glitches. - 4
Inspect defrost drain and frost buildup
Look for frost around the ice mold and check the defrost drain for clogs. If frost forms, run a brief defrost cycle if your model supports it, then wait for 15–30 minutes before testing again.
Tip: Clear any frost gently with a plastic tool to avoid damaging the mold. - 5
Test ejector and ice bucket alignment
Ensure the ejector arm moves freely and the ice bucket is correctly positioned. Misalignment can prevent ice from ejecting and filling the bucket correctly.
Tip: Double-check that nothing sits under the ejector path. - 6
Reassemble, run a test cycle, and observe
Reassemble any panels and run a test cycle. Listen for normal sounds and watch for ice production over the next 30–60 minutes. If no ice appears, proceed to more advanced diagnostics or consider a professional service.
Tip: Document any abnormal sounds or error codes for your service visit.
FAQ
Why is my Samsung fridge ice maker not producing ice?
Common causes include a blocked water line, a faulty water inlet valve, ice mold frost, or a control-board issue. Start by checking the water supply, then reset the ice maker and test again before replacing parts.
If your ice maker isn’t producing ice, check the water line and reset the unit before diagnosing more complex problems.
How do I reset the Samsung ice maker?
Unplug the fridge for 60 seconds or press and hold the reset button for 5–10 seconds if available. Reconnect power and wait a few minutes to see if ice production resumes.
Unplug for a minute, plug back in, then try a quick reset. If there’s a reset button, hold it briefly.
What should I do if ice tastes funny or smells?
This often indicates stale water or a clogged filter. Replace the water filter if needed and flush the system by running water through the line. Clean the ice maker housing to remove any residues.
If ice tastes off, replace the filter and run the system to flush any impurities.
When should I replace the ice maker module?
If electrical testing confirms a faulty module or sensors after ruling out water supply issues, replacement may be necessary. Compare part costs with a service call.
If tests point to the module and sensors failing, replacement may be needed.
Is DIY ice maker repair safe?
DIY repairs are safe if you follow safety steps: disconnect power, work dry, and avoid high-voltage components. If you’re unsure at any point, consult a professional.
Yes, DIY can be safe if you follow steps and know your limits; when in doubt, call a pro.
Watch Video
Top Takeaways
- Identify root cause before replacement.
- Start with power and water supply checks.
- Reset and test before diving into parts.
- Know when to call a professional.