How to Fix Refrigerator Ice Maker: A Homeowner's Guide
Learn how to fix refrigerator ice maker problems with a homeowner-friendly, step-by-step approach. Diagnose common faults, safely replace parts, and keep ice production flowing.

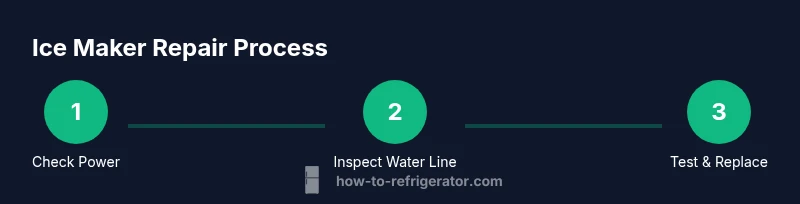
Goal: Fix refrigerator ice maker by diagnosing common faults, then performing safe, guided repairs. You’ll confirm power, water supply, and ice maker mechanism before trying parts replacement. Gather basic tools, a new ice maker kit or repair parts, and follow the steps below to restore ice production. This quick answer sets up essential checks before diving into the step-by-step repair process.
Safety First: Protect Yourself and Your Appliance
Working on a refrigerator ice maker involves electricity, water lines, and metal components that can have sharp edges. Before you touch anything, unplug the fridge at the wall outlet or switch off the circuit breaker that powers the unit. If you can’t reach the plug easily, shut off the water supply to the refrigerator to minimize leaks. Place towels, a shallow tray, or a mop nearby to manage any residual water. Wear safety glasses and keep kids and pets away from the work area. Keep track of screws and fasteners as you remove components so reassembly is smooth. This safety-first approach isn’t just common sense—it’s essential to prevent shocks, floods, or injuries. Once power is disconnected and water is shut, proceed with calm, deliberate checks to identify whether the issue is electrical, water-related, or mechanical. How To Refrigerator emphasizes safety as the foundation for any ice-maker repair.
Diagnosing Root Causes: Common Failure Modes
Ice maker problems fall into a few predictable categories. If there’s no ice, or ice is sparse, start by checking the power to the ice maker module and the house circuit. If the unit has power but makes ice slowly or stops mid-cycle, inspect the water supply line for kinks, leaks, or a frozen coil in the freezer compartment. A jammed ejector arm or a cracked ice mold can also prevent new ice from forming. For some models, a clogged defrost drain or blocked filter reduces the flow of water to the ice mold, resulting in little or no ice. The goal of this diagnostic block is to map symptoms to likely causes without jumping to conclusions. Document what you observe: sounds, timing, water flow, and any error codes from the display. According to How To Refrigerator Analysis, 2026, a systematic diagnosis improves repair success and reduces unnecessary parts replacement.
Accessing the Ice Maker: Removing Covers and Gaining Access
Most ice makers sit behind a front panel or inside a freezer wall. Start by removing the cover or ice-bin assembly to gain access to the ice mold and ejector mechanism. Keep track of screws and any small parts you remove. With the cover off, visually inspect for obvious signs of wear: a cracked ice mold, damaged ejector blades, or a misaligned mold. Gently move the mechanism to test its freedom of motion—if it binds, there may be a jam or a broken linkage. This access step is critical; many failures spring from parts that have shifted slightly or become obstructed by ice buildup. The How To Refrigerator team recommends taking clear photos during disassembly to guide reassembly and avoid misalignment later.
Water Supply, Hoses, and the Inlet Valve
Water access is often the culprit. Check the supply line from the valve to the ice maker for kinks, twists, or leaks. If your fridge sits on a cold surface, ensure the line isn’t pinched by shelving or ice buildup. Open the shutoff valve to confirm water is reaching the fridge; if there’s no flow, the valve or supply line may be blocked or frozen. For some models, the inlet valve can fail electronically or mechanically, cutting off water to the ice mold. When diagnosing water issues, isolate the freezer from the rest of the system to identify whether the problem is localized to the ice maker. The goal is to confirm a steady water supply before considering valve replacement or wiring checks.
Mechanical Checks: Mold, Ejector, and Ice Mold
Ice mold and ejector mechanisms can wear out or accumulate ice buildup, leading to jams or incomplete cycles. Inspect the ice mold for cracks and ensure the fill tube delivers water smoothly into the mold. If the ejector arm binds, clean any ice chips from the mold area and verify the cam or gear engages properly. A misaligned ejector can prevent ice from being expelled into the bin. If you notice warped or worn gears, a replacement ice-maker module may be required. Remember to handle plastic parts gently to avoid new cracks. In many cases, a simple cleaning and realignment restore function without replacing components.
Electrical Testing and Safe Measurements
Electrical tests should be performed only after you’ve isolated the power source. Use a multimeter to check for continuity across the ice-maker motor, solenoid, and wiring harness connections. Look for corroded terminals or loose connectors; reseat any suspect connections and re-test. If there’s no power reaching the ice maker despite a good supply, inspect the control board or wiring harness for damage or loose connections. Replace any damaged components only after verifying compatibility with your model. Following safe testing practices helps prevent short circuits and ensures you’re addressing the right fault.
Replacement Parts and Reassembly Basics
If diagnostics point to a faulty ice maker module, inlet valve, or a clogged water line, plan for a targeted replacement. Choose parts compatible with your refrigerator model and confirm any model numbers before purchasing. After installing replacement parts, reassemble the ice maker housing, reconnect the water line, and restore power. Run a short test cycle to observe ice formation and ejector action. If issues persist, re-check alignment and seals to prevent leaks. Regularly inspecting seals and fittings reduces the chance of recurring problems.
Maintenance and Preventive Care: Keeping Ice Fresh and Minimal Downtime
Once the ice maker is functioning, adopt a simple maintenance routine to reduce future issues. Clean the ice mold and bin every few months to prevent mineral buildup. Replace the water filter according to the manufacturer’s guidance, and flush the line if your model supports it. Check the defrost drain and clear any clogs that could back up water into the ice mold. Keep the freezer temperature consistent to avoid irregular ice quality. A small investment in preventive care goes a long way toward reliable ice production and fewer service calls. How To Refrigerator’s guidance emphasizes routine checks as a practical defense against common failures.
Tools & Materials
- Flat-head screwdriver(for removing covers and trim)
- Phillips screwdriver(for screws on ice maker housing)
- Nut driver / socket set(for mounting bolts)
- Multimeter(for checking electrical continuity)
- Pliers (needle-nose)(for gripping hoses and connectors)
- Small clean brush or towel(for removing ice chips and debris)
- Replacement ice maker kit or valve(only if diagnosis indicates fault)
- Bucket or shallow tray(to catch spills during inspection)
- Gloves and safety glasses(personal protection)
- Model-specific parts catalog(verify compatibility before purchase)
Steps
Estimated time: 60-90 minutes
- 1
Turn off power and locate ice maker
Unplug the refrigerator or switch off the dedicated circuit. Verify power is fully removed using a tester if available. Locate the ice maker housing and note the mounting screws.
Tip: Tag the power switch location so you remember where to re-connect later. - 2
Remove ice bin and ice maker cover
Carefully lift out the ice bin and set it aside. Remove the front cover or panel using the screwdriver, exposing the ice mold and ejector mechanism.
Tip: Take a photo of each connection before removal to simplify reassembly. - 3
Inspect water line and shutoff valve
Inspect the valve and line for kinks or leaks. If the line is frozen, thaw using a hair dryer on low heat while ensuring no contact with plastic parts.
Tip: Do not apply heat directly to the ice mold; focus on the line near the valve. - 4
Check ice mold and ejector
Look for cracks in the mold and any obstruction in the ejector arm. Gently move the ejector to ensure it engages without binding. Clean debris with a brush.
Tip: If ice blocks are present, use warm water to melt them away—do not force parts. - 5
Test water inlet valve and fill tube
With power off, check that the valve coil shows continuity and that the fill tube carries water when energized. If water flow is suppressed, replace the valve.
Tip: Always disconnect power before touching electrical components. - 6
Defrost frozen components if needed
If you observe frost buildup around the mold or line, allow a controlled defrost using room temperature air. Avoid using hot air or metal tools that could damage parts.
Tip: Defrost only for a few minutes at a time to prevent water damage. - 7
Replace faulty components
Install a new ice maker module or water inlet valve if diagnostics indicate a faulty part. Recheck all connections for proper seating and polarity.
Tip: Use manufacturer-recommended parts to ensure compatibility. - 8
Reassemble, power on, and test
Reattach the ice maker cover, reinsert the ice bin, restore power, and run a test cycle. Monitor for leaks and listen for normal ejector operation.
Tip: Allow the first cycle to complete before judging success; some models require a few cycles to settle.
FAQ
Why isn’t my ice maker making ice at all?
Common causes include a loss of power, a frozen ice mold, a clogged water line, or a faulty inlet valve. Start by confirming power, then inspect the water supply and the mold. Replace components only after confirming the fault.
If your ice maker isn’t making ice, check power, water supply, and the ice mold. Often a simple fix like thawing the mold or tightening a connection can restore function.
Why is ice not ejecting from the mold?
A jammed ejector arm or a warped mold can prevent ice from dropping into the bin. Clean the mold, ensure the ejector moves freely, and re-seat the mold if needed.
If ice doesn’t eject, inspect the ejector arm for obstruction and test that it moves smoothly after cleaning.
Can I repair an ice maker myself?
Many ice maker problems are solvable by homeowners with basic tools and careful steps. Always unplug first, use model-compatible parts, and consult the manual for wiring diagrams and safety notes.
Yes, many ice maker issues can be fixed at home, as long as you follow safety steps and use the right tools.
Is replacing the ice maker more effective than repair?
Replacement can be cost-effective when multiple components fail or the unit is old. If troubleshooting points to a single failed module and parts are readily available, repair may be preferable.
Sometimes a single failed module just needs replacement, but if several parts are worn, a full replacement could be better.
What if there is water leakage around the ice maker?
Leaking often stems from loose fittings or a cracked line. Tighten connections, replace damaged hoses, and check the cabinet seals. If leaks persist, inspect the defrost drain and nearby joints.
Leaks usually come from loose fittings or a damaged line; tighten or replace as needed and test again.
How long does a typical ice maker repair take?
A straightforward diagnosis and part replacement can take about an hour or two, depending on access and model specifics. If you need to source parts, allow extra time for ordering.
Most fixes take about an hour or two, with more time if parts must be ordered.
Should I defrost the freezer to fix ice maker issues?
Defrosting around the ice maker can help if frost buildup blocks water flow. Do not force components; use controlled defrosting and recheck after the ice has melted.
Defrost around the ice maker to clear frost, but don’t force parts; let it melt gently.
Top Takeaways
- Check power and water supply before disassembly
- Diagnose mechanical vs electrical faults to target parts
- Test and replace components safely with compatible parts
- Maintain ice maker with regular cleaning and filter changes