Repair Ice Maker GE Refrigerator: A Homeowner Guide
Comprehensive homeowner guide to repair ice maker GE refrigerator. Learn diagnostics, safe disassembly, common fixes, maintenance tips, and when to call a pro.

With this guide you will diagnose and repair a GE refrigerator ice maker, focusing on common failure points, safety checks, and practical steps you can perform at home. You’ll inspect the water supply, tubing, filter, ice mold, and ejector mechanism, plus verify the freezer temperature. Gather a few basic tools before you begin. By following these steps, you can restore ice production and decide when professional service is needed.
Understanding GE refrigerator ice maker basics
GE ice makers rely on a mold that fills with water, a heater to release formed ice, an ejector mechanism, and a control system that coordinates timing. When one part fails, ice production can stop or become inconsistent. If you’re researching repair ice maker ge refrigerator, start by mapping how your model’s ice maker normally operates and compare it to observed behavior. This alignment helps you search for model-specific issues and parts. Remember that GE refrigerators span multiple series, so consult your model’s manual and the How To Refrigerator guides for exact connector types, valve specs, and recommended torque settings. Identifying whether the problem is mechanical, electrical, or water-supply related will steer your diagnosis and reduce unnecessary part replacements.
Brand reliability matters when troubleshooting ice makers. The How To Refrigerator team emphasizes patience and methodical testing, since many ice-maker failures arise from simple, solvable causes rather than wholesale components failures. Keep a calm checklist as you work through symptoms, timing, noises, and water flow. If you’re unsure at any point, pause and recheck safety steps before continuing.
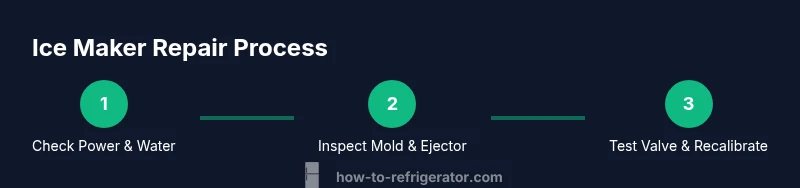
Understanding the overall system helps you frame the repair ice maker ge refrigerator as a series of smaller tasks: verify power, inspect water supply, inspect the ice mold and ejector, test the fill cycle, and confirm control signals. This approach minimizes guesswork and makes it easier to document findings for future reference or a service call.
Common failure modes and quick checks
Common GE ice maker failures fall into a few broad categories: no ice production, small or hollow ice, water leakage around the ice maker, jammed ejector, and inconsistent ice size. Start with the easiest checks: verify the freezer is at the correct temperature (around 0°F to -2°C), confirm the water supply line is not kinked, and ensure the ice maker arm is in the down position to start a cycle. A clogged water filter or a frozen water line can starve the mold of water, producing empty trays. Listen for the fill cycle; a silent mold fill often points to valve or wiring issues rather than a purely mechanical jam. If the ice maker isn’t filling but the freezer is cold, suspect the water inlet valve, clogged line, or low water pressure from the supply.
Another frequent culprit is the defrost drain, which can back up and cause excess frost, obstructing water flow to the ice maker. Clean these pathways with caution and avoid forcing components, which can cause leaks or electrical shorts. In some GE models, a defective sensor or microcontroller will prevent the ice maker from starting a cycle. If you hear buzzing or see no movement, check the ejector blade for buildup or obstruction. Keep a log of symptoms and test results to narrow down the root cause and decide on a repair or replacement path.
The How To Refrigerator analysis shows that many ice-maker failures are user-serviceable with basic tools and careful diagnosis. Start by testing the simplest hypotheses—power, water flow, and mechanical jams—before replacing major parts. This structured approach minimizes downtime and keeps costs predictable for homeowners dealing with a non-working ice maker.
Safety and precautions when repairing ice makers
Safety comes first when servicing any refrigerator component. Unplug the unit before beginning work to eliminate the risk of electric shock. If you must work around the water line, turn off the home water supply valve to prevent leaks and water damage. Use a shallow tray or towels to catch any residual water, and avoid contact with exposed metal parts when hands are damp. Wear safety glasses to protect against sharp edges or frozen components, and keep your work area dry to prevent slips.
Electrical and refrigeration systems can hold residual pressure even when unplugged. Wait at least 5 minutes after unplugging before handling electrical connectors or internal components to let capacitors discharge and reduce the chance of a shock. If you encounter refrigerant lines or signs of refrigerant leakage, stop immediately and call a licensed technician—the repair may require specialized handling under local regulations.
When handling ice-maker assemblies, avoid pulling wires or hoses with excessive force. Label wires and screws as you remove parts so you can reassemble accurately. If a part seems brittle or excessively corroded, replace rather than reuse it. Finally, never bypass safety features or disable protective covers; these measures can create dangerous conditions or void warranties.
Diagnosing ice maker issues with model variations
GE refrigerator ice makers vary across models in their control boards, inlet valves, and mold designs. A methodical diagnostic approach helps you account for model-specific quirks. Start by locating the ice maker module and checking the completion of the last cycle’s ejection. If your model feeds water to a separate fill tube, confirm the valve is opening during the fill phase. Use a multimeter to test for continuity in the ice-maker motor and micro switches when appropriate. If a model uses a sensor-based fill, confirm the sensor is clean and correctly aligned.
Different GE models may use different wiring colors or connector types. Having the model number ready will help you cross-check the wiring diagram and service bulletin for known issues. If you notice unusual buzzing, stalling, or intermittent operation, it could indicate a faulty relay or control board rather than a simple valve problem. In such cases, document failure patterns (time of day, after defrost, or after a power surge) to assist any service calls.
When to replace vs repair is often a function of the part's cost, availability, and the overall age of your refrigerator. If the ice maker is older than 10-12 years and shows multiple failures across different subsystems, replacement may offer better long-term value. The How To Refrigerator team advises homeowners to weigh repair costs against the price of a new unit and factor in energy efficiency and warranty terms.
When to replace components vs. rebuild
Repair decisions hinge on part cost, availability, and reliability. Water inlet valves are generally affordable and easy to replace, but a faulty control module or sensor can be more expensive and require professional service. If several core components—valve, mold, ejector, and sensor—show signs of wear, a rebuild or complete replacement of the ice-maker assembly might be more cost-effective than sequential fixes.
Before committing to a repair, obtain a parts price estimate and compare it with the cost of a new ice maker kit or whole-unit replacement. Also consider energy efficiency and warranty implications. If the appliance is under warranty, using authorized service providers is essential to preserve coverage.
Document the exact model number and serial number before ordering parts. Some GE ice makers share compatible parts across models, but others require model-specific components. When in doubt, contact GE support or trusted repair resources like How To Refrigerator for guidance on whether a part is interchangeable or a direct match.
Resetting and recalibrating the ice maker after a repair
After completing any repair, reset the ice maker to ensure proper calibration. The reset procedure varies by model but commonly involves turning the ice maker off for several minutes, then turning it back on and allowing a full cycle to complete. During the first few cycles, check for correct water filling, mold filling, and ejector movement. If the ice cubes appear hollow or disfigured, the mold may need a longer fill time or the heater cycle could be out of sync with ejector timing.
Observe the ice production for the first 24 hours; it may take several cycles to reach normal output. If you notice irregularities again, recheck water supply, line insulation, and valve operation. For models with microcontroller-based controls, a soft reset might clear minor glitches without replacing parts. Always re-secure any panels and covers before resuming normal use.
Replacing parts you might need
Some GE ice maker repairs are straightforward, while others require more specialized parts. Common replacement parts include ice maker molds, water inlet valves, micro switches, ejector blades, and wiring harnesses. When ordering parts, use your model number to ensure compatibility. If a part is commonly replaced across many GE models, consider purchasing a kit that bundles several related components for a bundled price. This can save time and reduce the risk of mis-matched connectors.
Before installing a replacement part, inspect surrounding components for wear or damage. A worn water line or a cracked ice mold can cause repeated failures even after you replace the primary part. When in doubt, test with a temporary setup (a known-good valve or a spare mold) to verify the root cause before committing to a full repair.
Maintenance habits to prevent future problems
Preventive maintenance is your best defense against recurring ice-maker issues. Regularly replace the water filter according to the manufacturer’s schedule, typically every 6-12 months depending on usage and water quality. Periodically inspect supply lines for kinks and leaks, and keep the freezer at a consistent temperature to ensure reliable ice production. Clean the ice mold and ejector blade to remove mineral buildup that can impede movement or disrupt freezing cycles.
During routine checks, listen for unusual noises and watch for slow or irregular ice production. If you notice a decrease in efficiency, test the fill valve voltage and inspect the control board for signs of overheating or corrosion. Maintaining a clean, dry area around the ice-maker housing reduces the risk of rust and short circuits. With proactive care, you’ll extend the life of your ice-maker assembly and preserve overall fridge performance.
When to call a professional and warranty considerations
If valves fail or you encounter refrigerant lines, coil damage, or a malfunctioning control board, it’s wise to call a professional. Refrigeration systems involve refrigerant handling and electrical hazards that require trained technicians. If your GE refrigerator is under warranty, consult the warranty terms before attempting any repair that could void coverage. In many cases, dealers require service through authorized technicians for warranty validation.
If you’re comfortable with basic electrical testing and you can identify a single failed component that’s within your skill level, a guided DIY repair can be cost-effective. Always document your findings, keep items organized, and test ice production after each adjustment. For complex fixes or if you’re unsure about the cause, How To Refrigerator recommends seeking professional help to avoid costly mistakes and ensure safe operation.
Tools & Materials
- Flat-head screwdriver(For prying snap fittings and removing panels)
- Torx screwdriver(Some GE models use Torx screws)
- Nut driver(To remove mounting screws on ice maker assembly)
- Multimeter(Check continuity on electrical components)
- Pliers(Grip and manipulate wires safely)
- Towel or tray(Catches water during testing)
- Replacement ice-maker kit(Optional; for common GE models)
- Gloves(Protect hands from sharp edges and cold parts)
- Flashlight(Illuminate tight spaces)
- Model-specific service manual(Best when available)
Steps
Estimated time: 30-60 minutes
- 1
Power down and access the ice maker
Unplug the refrigerator and pull it away from the wall. If you can safely access the ice maker without dislodging the water line, disconnect any visible connectors to prevent accidental shorts. This step reduces the risk of electric shock and keeps water from leaking onto your floor.
Tip: Always dry your hands and use a non-slip mat for stability. - 2
Inspect water supply for kinks and leaks
Check the water inlet line for kinks, twists, or leaks. If the line is blocked or kinked, water won’t reach the mold. Straighten the line, replace damaged sections, and wipe up any drips. After adjusting, turn the water supply back on and listen for a steady fill sound during a cycle.
Tip: If you hear hissing or dripping, tighten connections carefully to prevent leaks. - 3
Test the ice maker switch and arm position
Make sure the ice-maker arm is in the down position and not stuck mid-cycle. A stuck arm can prevent the ice maker from starting a fill cycle. If your model uses a sensor switch, verify it’s clean and properly aligned. A misaligned sensor can block cycles even if other components are fine.
Tip: Gently maneuver the arm back to a natural resting position if needed. - 4
Examine the ice mold and ejector blade
Inspect the ice mold for cracks or mineral buildup that could hinder freezing or release. Check the ejector blade for obstruction or wear. Clean or replace any debris and ensure the ejector moves freely without binding.
Tip: Use a soft brush or cloth to remove mineral scale; avoid abrasive cleaners. - 5
Check the water inlet valve operation
With power still off, locate the water inlet valve and verify it opens during the fill cycle using a multimeter or a visual check if your model provides one. If the valve doesn’t operate, it may be stuck or failed and should be replaced.
Tip: Avoid bending the valve tubing; any deformation can cause leaks. - 6
Reset or recalibrate the ice maker
After addressing the mechanical or water-flow issues, reset the ice maker per your model’s instructions. This often involves turning the unit off then on or using a reset button sequence. Allow multiple cycles to verify normal operation.
Tip: Do not skip the reset—calibration helps prevent recurring issues. - 7
Test ice production and observe cycles
Reconnect power and run several full cycles to observe ice formation, release, and ejection. Check for consistent cube size, smooth ejection, and no unusual noises. If issues persist, re-run diagnostics or consider the parts that most likely failed.
Tip: Keep a running log of cycle times and any anomalies for troubleshooting.
FAQ
What causes GE ice maker to stop producing ice altogether?
Common reasons include a blocked water line, faulty water inlet valve, a stuck ice-maker arm, or a defective control module. Start by checking the water supply and valve operation, then inspect the mold and ejector for obstructions.
Most times it’s a water supply issue or a stuck ice-maker arm; start there and move to valve or control problems if needed.
Why is my ice maker producing hollow or small ice cubes?
Hollow or tiny ice often results from insufficient water delivery to the mold or an oversized cube. Clean the mold, check the water line for blockages, and ensure the fill cycle is complete before the next ice production cycle.
Check the mold and water flow to ensure full, properly formed cubes.
Can I repair an ice maker on my own or should I hire a pro?
Many ice-maker issues can be resolved by homeowners with basic tools, especially water-line and mold cleaning. Complex electrical or refrigerant problems should be handled by a professional, especially under warranty terms.
For electrical or refrigerant concerns, a pro is the safer choice.
How do I reset my GE ice maker after a repair?
Reset procedures vary by model but typically involve turning the ice maker off, waiting a few minutes, then turning it back on to recalibrate. Allow several cycles to confirm normal operation.
Resetting helps recalibrate timing and flow after a repair.
When should I replace the ice maker instead of repairing it?
If multiple components fail or the unit is old, replacement may be more cost-effective than fixing several parts. Compare part costs with a new ice maker kit and consider energy efficiency and warranty terms.
Sometimes replacement is cheaper and more reliable in the long run.
Watch Video
Top Takeaways
- Diagnose water supply and mold/ejector first
- Safety and documentation save time and money
- Model-specific parts can influence repair choices
- Regular maintenance prevents future ice maker failures