Whirlpool Ice Maker Not Working? Troubleshooting Guide
Step-by-step troubleshooting for a Whirlpool ice maker that isn’t producing ice. Discover common causes, quick fixes, safety tips, and maintenance to restore ice production efficiently.

According to How To Refrigerator, the most common causes of a Whirlpool refrigerator ice machine not working are a jammed ice mold, a blocked water line, or a faulty fill valve. The How To Refrigerator team found that starting with the ice mold and water supply usually restores ice production within minutes; if not, progress to deeper checks.
Why the ice maker stops working in Whirlpool refrigerators
In many Whirlpool refrigerators, the ice machine failure stems from ice or frost jam in the mold, a blocked water line, or a failing fill valve. When ice cannot be formed or ejected, you may hear a faint motor hum but see no ice drop. Another common factor is a misaligned shut-off arm (the lever that detects full ice) which prevents new cycles from starting. Ice production is a multi-step process: water valve fills the mold, the water freezes, the ice is ejected, and the cycle restarts. How To Refrigerator notes that addressing the mold, line, and valve first resolves many ice-maker issues without replacing parts. This guide will help you diagnose the exact failure safely and efficiently, with homeowner-friendly steps designed for urgency and accuracy. If you’re dealing with a whirlpool refrigerator ice machine not working, stay with the methodical flow below to identify the root cause.
Start with the basics: power, settings, and user controls
First, verify power to the ice maker is uninterrupted. Confirm the ice maker switch is in the ON position and that the freezer temperature is cold enough (0–5 °F / -18 to -15 °C). A mis-set or malfunctioning freezer thermostat can stall ice production. Check the door switch to ensure the freezer doors close completely; a jogged door switch can trick the system into thinking the door is open. If the ice maker still won’t start, try a simple reset by cycling power to the unit and waiting a few minutes for a fresh cycle. If the ice machine is not working, remember that a whirlpool refrigerator ice machine not working can sometimes be traced to a simple user-control issue.
Diagnostic flow: symptom to solution (practical pathway)
When you notice a symptom, map it to a likely cause and a quick fix. For example, if no ice drops and you hear a motor, the cold cycle is attempting to run but something blocks water or mold formation. If you observe water leaking or frost around the mold, the problem is more likely a water line or valve issue. This approach avoids wasted parts replacement and focuses on the most common culprits first. How To Refrigerator analysis shows that the first checks should always involve the mold, line, and valve. If the whirlpool refrigerator ice machine not working persists after basic checks, you’ll continue through the diagnostic flow to more targeted fixes.
Most common fixes you can perform safely (quick wins)
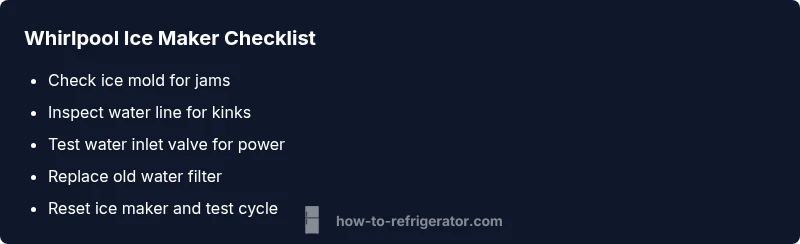
Start with water and ice parts that are easy to access. Clear any ice from the mold, then inspect and straighten the water line to remove kinks. If the line is blocked, flush it with a slow, steady flow of water. Check the water inlet valve for corrosion or debris and replace if needed. Replace a clogged or old water filter since restricted flow reduces ice production. Perform a reset after each fix and re-test to confirm whether ice production resumes.
Step-by-step safety-first approach you can rely on (homeowner-friendly)
This section expands on the steps below with practical tips and safety reminders. If you’ve tried the basics and the ice maker still won’t operate, moving to more involved parts may be necessary. Remember to unplug the refrigerator or switch off the dedicated circuit before reaching behind panels. Don’t attempt refrigerant work yourself. The goal is to restore ice production while preserving safety and warranty coverage. Regularly reviewing the ice maker’s operating cycle helps catch issues before they escalate.
Safety tips, warnings, and common mistakes to avoid
Safety is non-negotiable when troubleshooting an appliance. Never poke at live electrical components; use a non-contact tester if needed. Avoid tugging at water lines with force; gentle bending and inspection are enough. Do not ignore unusual noises or warm refrigerator compartments. If you smell gas or ammonia or see burnt components, stop immediately and contact a professional. Finally, do not attempt to repair sealed refrigerant systems yourself; this requires licensed technicians.
Steps
Estimated time: 1-2 hours
- 1
Power cycle the ice maker
Power the unit off for 60 seconds, then turn it back on or restore power to the circuit. Wait 3–5 minutes for the system to reset and start a new cycle. Listen for the motor hum and watch for ice production to resume.
Tip: Label the ice maker switch if unsure where to toggle. - 2
Check and clear the ice mold
Open the ice bin and remove all ice. Inspect the mold for frost or ice clumps. If you see a jam, gently melt or dislodge it with warm water and allow the mold to dry before reassembling.
Tip: Use a flashlight to spot small ice fragments. - 3
Inspect water supply line
Trace the line from the water valve to the ice maker. Look for kinks, crimps, or leaks. If the line is blocked, straighten it and ensure it’s fully connected to the valve.
Tip: Shut off the water supply before handling lines. - 4
Test the water inlet valve
With the ice maker cycling, check that the valve receives electrical power and opens to allow water. If no power is detected, replace the valve or energize the line from the control board as per the manual.
Tip: Consult the service manual for correct voltage specs. - 5
Check or replace the water filter
A clogged filter can restrict water flow and prevent ice production. Replace the filter if it’s old or clogged according to the manufacturer’s schedule. Rinse new filters before use and run water through the dispenser to clear air.
Tip: Use manufacturer-recommended filter model. - 6
Restart and test ice production
Set the ice maker to ON, and give it a few hours to produce ice. If no ice forms after multiple cycles, escalate to professional service or part replacement.
Tip: Document each step you take for service reference.
Diagnosis: Ice maker not producing ice
Possible Causes
- highFrozen or jammed ice mold
- highWater supply line kink or blockage
- mediumDefective water inlet valve
- lowFaulty ice maker assembly or thermostat
- lowDoor switch not sensing closed door
Fixes
- easyInspect and clear the ice mold; remove any jammed ice before restarting the cycle.
- easyInspect water line for kinks and straighten; ensure the supply valve is fully open.
- mediumTest the water inlet valve for power and replace if it’s not opening properly.
- hardReplace the ice maker assembly if the motor or thermostat is defective.
- easyConfirm the door switch closes properly; replace if it’s faulty.
FAQ
Why is my Whirlpool ice maker not working?
Common causes include a jammed ice mold, a blocked water line, or a faulty water inlet valve. Start with inspecting the mold and water line, then check the inlet valve if needed. If issues persist, consider deeper diagnostic steps.
Common causes include a jammed mold, a blocked water line, or a faulty inlet valve. Start with the mold and line, then check the valve if needed.
Why is no water entering the ice maker?
No water usually means a valve or supply line problem. Check that the supply valve is fully open and the line is free of kinks. Replace the valve if it doesn’t respond to the control signal.
No water usually means a valve or supply line problem. Check the valve and line, and replace the valve if needed.
Should I replace the ice maker or the water inlet valve first?
Start with the water inlet valve if water flow is inconsistent. If water flow is steady, but ice still won’t form, inspect the ice maker assembly and mold for jams before replacing the valve again.
Start with the water valve if water flow is inconsistent; if water is fine but no ice, inspect the mold and ice maker assembly first.
Is it safe to troubleshoot myself or should I call a pro?
Basic troubleshooting is safe if you follow safety steps, unplug power when opening panels, and avoid refrigerant work. For electrical or refrigerant issues, contact a licensed technician.
You can troubleshoot basic issues safely if you unplug first and avoid refrigerant work. For complex problems, call a pro.
How long does it take to see ice after fixes?
After a fix, it can take several hours for ice to form, depending on freezer temperature and system load. Don’t expect immediate ice production; allow time for the cycle to reset.
It can take several hours after a fix for ice to form. Be patient and keep the freezer cold.
Can a clogged filter cause no ice?
Yes, a clogged or old water filter can restrict flow and cause ice production to stall. Replace the filter according to the manufacturer’s schedule and flush the system.
A clogged filter can stop ice production. Replace it and flush the system.
Watch Video
Top Takeaways
- Inspect ice mold for jams and clear blockages.
- Verify water supply line and valve operation before replacements.
- Reset and test the ice maker after fixes to confirm results.
- The How To Refrigerator team recommends seeking professional help for complex issues.