Whirlpool Refrigerator Ice Maker Repair: DIY Home Guide
A comprehensive DIY guide to diagnose and repair a Whirlpool refrigerator ice maker. Learn safe steps, common fixes, tools needed, and preventive maintenance to keep ice flowing.

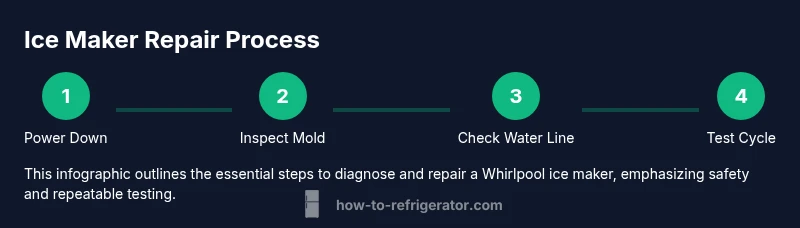
Goal: Diagnose and repair a Whirlpool refrigerator ice maker at home, restoring ice production without replacing the entire appliance. You’ll verify the water supply, inspect the ice maker module, and check the ejector mechanism using common household tools. Safety comes first: disconnect power, turn off the water, and wear eye protection.
Whirlpool Ice Maker Anatomy and Typical Failures
A Whirlpool ice maker relies on a few core components working in harmony: the water inlet valve, the fill tube, the ice mold, a heater to loosen the ice, an ejector blade, and a control module that times the cycle. When the freezer calls for ice, water is fed through the line and fills the mold. The mold freezes, the heater loosens the ice, and the ejector blade pushes the ice into the bin. Common failure points include a blocked water line, a faulty inlet valve, a stuck ejector, or a failed thermostat.
Observation matters: symptoms like slow or no ice production, hollow or cloudy ice, ice that sticks in the mold, or water leaking around the ice maker point to specific culprits. Understanding the architecture helps you target the right repair path without unnecessary part shopping. This guidance aligns with How To Refrigerator’s approach to practical, homeowner-friendly repair.
Safety and Prep for Ice Maker Work
Safety first. Before touching the appliance, unplug the fridge or switch off the dedicated circuit, and close the cold-water supply valve feeding the ice maker. Use a towel to catch drips and place a shallow tray under connections. Wear eye protection and avoid forcing any plastic parts or metal clips. If you see damaged insulation, frayed wires, or signs of water damage, pause and seek professional help. Keep a flashlight handy to inspect connectors in tight spaces. These precautions protect you and reduce the risk of additional damage to the appliance.
Diagnostic Flow: Symptoms to Root Causes
Start by validating the water supply: is the line fully open and free of kinks? If water isn’t reaching the ice maker, the valve or line may be blocked. Next, inspect the water inlet valve for leaks, stiffness, or electrical failure by listening for a buzzing sound when the ice maker should fill. If the mold fills with water and freezes properly but the ejector blade doesn’t push, the issue could be a stuck ejector or a faulty thermostat. If ice is produced but never dispenses, check the cam and micro-switch that signals the bin to release. These steps help you map symptoms to likely causes with a logical, repeatable process.
At-Home Fixes You Can Try (No Special Equipment)
Many Whirlpool ice maker issues respond to simple cleaning and adjustment. Start by disconnecting power and water, then remove the ice maker cover to inspect for ice buildup, mineral deposits, or small debris in the mold. Use warm (not hot) water and a soft brush to clean the mold and heater area. Check the fill tube for frost or mineral blockages and thaw with a gentle heat source or warm water. If the inlet valve sticks, a gentle tap while the system is powered down can help free it, but avoid forcing the valve. After cleaning, reconnect power and run a test cycle to observe changes.
When to Replace Components Versus the Whole Ice Maker
If cleaning and minor adjustments don’t restore function, test individual components. A stubborn inlet valve or faulty heater usually requires replacement of that part. If multiple symptoms persist—no ice, weak ice, and mis-timed cycles—a replacement of the ice maker module may be more cost-effective than replacing several parts. Compare parts cost, expected lifespan, and warranty coverage before deciding. In some Whirlpool models, updating the control board or thermostat fuse can resolve intermittent failures.
Preventive Maintenance for Consistent Ice Production
Regular maintenance helps prevent common failures. Periodically inspect the water line for kinks or leaks, replace the water filter per manufacturer recommendations, and keep the ice maker area clean and dry. Run a test cycle monthly to verify proper cycling. Address mineral buildup early by using a gentle, non-abrasive cleaner on the mold area. Keeping the ice maker area free of dust and debris reduces the chance of jams and keeps ice production steady.
Tools & Materials
- Phillips head screwdriver(For removing ice maker housing screws)
- Flathead screwdriver or pry tool(Pops panels without damage)
- Needle-nose pliers(Gently disconnect clips and fittings)
- Multimeter (optional)(Test electrical continuity on modules)
- Towel or cloth(Catches drips and keeps area clean)
- Bucket or shallow tray(Contain leaks during checks)
- Replacement ice maker module or valve kit(Only if diagnosed faulty part)
- Flashlight(Illuminates hard-to-see connectors)
- Gloves(Hand protection)
Steps
Estimated time: 45-60 minutes
- 1
Power down and shut water supply
Unplug the refrigerator or switch off the circuit. Close the cold-water valve feeding the ice maker to stop leaks. This prevents electrical shock and water leaks while you work.
Tip: Label cords and valves so reassembly is straightforward. - 2
Remove ice maker cover
Use a screwdriver to remove the cover and gain visual access to the mold, heater, and ejector. Inspect for ice buildup or mineral deposits that could impede movement.
Tip: Take a photo of wiring before disconnecting any connectors. - 3
Inspect mold, heater, and ejector
Check for cracks, frost buildup, and a jammed ejector blade. Wipe away mineral deposits with a soft brush and warm water—never use aggressive cleaners on plastic parts.
Tip: If the ejector blade is stiff, apply a tiny amount of non-corrosive lubricant recommended by Whirlpool (if present in your model’s manual). - 4
Check water inlet valve and fill tube
Visually inspect the inlet valve for cracks and ensure the fill tube isn’t frozen or blocked. Clear any debris and confirm water reaches the mold during a cycle.
Tip: If you hear a buzzing from the valve when testing, the valve may be electrically stuck. - 5
Test the ice maker module and micro-switch
With power off, test continuity between module connections using a multimeter if available. Ensure the micro-switch engages when the ice bin is cooled and ready to eject.
Tip: If you’re unsure, skip electrical tests and focus on mechanical movement first. - 6
Reassemble and run a test cycle
Reconnect all components, restore water supply, and power. Run a full ice-making cycle and observe the sequence: fill, freeze, eject, and bin transfer. Note any abnormal noises or failures.
Tip: If issues persist, log symptoms and seek professional help with your findings.
FAQ
What are the most common Whirlpool ice maker problems?
Typical problems include no ice, slow ice production, or ice that won’t eject. Start with checking the water supply, then inspect the inlet valve, mold, and ejector. If the issue is electrical, consult a pro.
Common Whirlpool ice maker problems are no ice, slow ice, or jammed ejector. Begin with the water supply and then inspect the mold and ejector; for electrical faults, seek professional help.
Why is my ice maker not filling with water?
Check the water supply line for kinks or blockages, ensure the valve is open, and verify the filter isn’t clogged. If the line is frozen, thaw it and confirm the heater and valve aren’t stuck.
If the ice maker isn’t filling, check the water line, valve, and filter for blockages and freezing. Thaw and test after reassembly.
Can I repair the ice maker myself?
Basic cleaning and inspection can be done safely by homeowners. Electrical faults or complex component failures may require a professional repair or replacement module.
Yes, you can handle basic cleaning and inspection. For electrical faults, consider professional service.
How long does Whirlpool ice maker repair take?
Simple fixes and cleaning typically take 30-60 minutes. Replacing a module or valve can take longer and may require removing parts to access the component.
Most repairs are about an hour, but replacements may extend the time a bit.
Should I replace the entire ice maker or individual parts?
If the module is repeatedly failing and many parts are old, replacing the ice maker can be more cost-effective. For isolated issues, swap the faulty valve or ejector first.
If many parts are worn, replacement might be better; otherwise, swap the faulty component first.
Is it safe to operate the fridge with the water line disconnected?
No. Do not operate the ice maker with a disconnected water line. Reconnect with a secure seal and check for leaks before testing.
No—never run it with the water line disconnected. Reconnect and check for leaks before use.
Watch Video
Top Takeaways
- Identify fault area before parts shopping
- Safety first: power and water off
- Simple cleaning can restore operation
- Know when to replace parts vs whole unit
- Practice preventive maintenance