Ice Maker for ge refrigerator: Troubleshooting Guide
Learn how to diagnose and fix common ice maker issues on GE refrigerators. This comprehensive guide covers symptoms, safety, tools, step-by-step troubleshooting, and preventive maintenance to keep your ice maker running smoothly in 2026.

This guide helps homeowners diagnose and fix a GE refrigerator ice maker. You’ll learn common symptoms, required tools, and a safe, step-by-step approach to restore ice production. Start by unplugging the unit, inspecting the ice maker arm, checking for jams, and verifying the water supply line isn’t kinked or blocked.
Understanding GE Ice Maker Basics
The GE ice maker system in many GE refrigerators relies on a compact ice mold, a drive motor with an ejector wheel, a micro-switch that detects full ice, and a water inlet valve that fills the mold. While GE models share core components, the exact layout can vary by series. For homeowners diagnosing an issue, it helps to know that most problems stem from water supply interruptions, a jammed ejector mechanism, or a failed micro-switch. If you own an ice maker for ge refrigerator, remember that model-specific differences exist, so consult your owner’s manual for a schematic of your unit. According to How To Refrigerator, most basic failures originate from water-line obstructions, valve jams, or electrical resets failing to take. This guide keeps the approach practical and grounded in common-sense checks while avoiding guesswork. The How To Refrigerator team emphasizes safety and methodical testing to prevent accidental damage while diagnosing ice production problems.
Common Symptoms of Ice Maker Problems
Ice makers on GE refrigerators present a few telltale signs when something is wrong. No ice production or very slow output is a frequent complaint, often tied to a blocked water line or a faulty fill valve. If the ice maker arm is stuck in the ON position or feels loose, you may experience mis-timed releases or jams. Cracked or cloudy ice can indicate water quality issues or a cooling problem at the mold. Unusual noises—buzzing, humming, or grinding—often point to a mechanical jam or a failing motor. For homeowners facing any of these symptoms, a structured check of the water supply, ice mold, and associated sensors is the fastest path to a resolution. How To Refrigerator analysis shows that addressing water supply and jammed components resolves the majority of common ice maker failures without major replacement, a principle we adopt here.
How the Ice Maker System Integrates with Your GE Fridge
In many GE configurations, the ice maker is fed by a dedicated water line connected to the house supply and a small filtration system. The ice mold fills with water, freezes, and a motor-driven ejector pushes ice cubes into a bin when a cycle completes. The control board coordinates filling, freezing, and ejecting; if the micro-switch or wiring has a fault, the entire cycle may stall. Regular maintenance—checking for leaks, ensuring the water line is free of kinks, and cleaning the mold—helps keep the process efficient. The collaboration between water supply, cooling, and control electronics is what makes the ice maker work reliably over time, and understanding this flow helps you diagnose root causes quickly.
Safety First: Precautions When Working On Appliances
Before touching any appliance, unplug the refrigerator to prevent electric shock. If you must work near water lines, shut off the home's water supply to avoid leaks or flooding. Wear eye protection and keep a dry workspace; never use metal tools that can nick or puncture refrigerant lines. If you notice refrigerant smells or hissing, stop work immediately and call a professional. Always follow GE’s service guidelines, and consult your model’s manual for any model-specific cautions. Remember, patient, systematic testing is safer and more effective than guesswork when diagnosing ice-maker problems.
Tools and Materials You’ll Need
- Phillips head screwdriver and flathead screwdriver (essential for panel access)
- Nut drivers (various sizes) to remove mounting screws
- Needle-nose pliers for releasing clips and wiggling hoses
- Multimeter for electrical testing (optional; only if you’re comfortable)
- Towels and a shallow pan for catching water
- Replacement ice maker kit or new ice mold (optional, based on diagnosis)
- Clean cloths or a soft brush for mold cleaning
- Water filter (if your unit uses one) and replacement cartridges
Note: Only perform electrical tests if you’re confident; otherwise contact a technician. The steps below include safety- and model-appropriate actions; always consult your GE manual for model-specific parts and wiring.
Step-by-Step Troubleshooting Overview
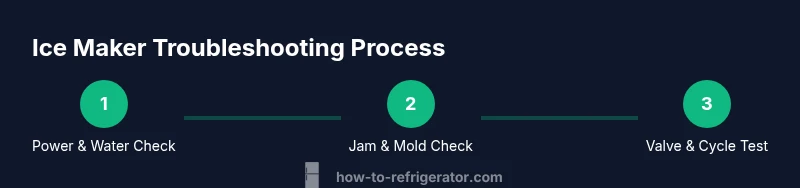
This section provides an overview of the core troubleshooting steps for an ice maker in a GE refrigerator. The following steps are designed to be performed in sequence, from safest to most involved. You’ll address power and water supply, mechanical jams, mold and bin cleanliness, and control-system checks. Each step supports a methodical assessment, helping you identify root causes without unnecessary part replacements. For the detailed, step-by-step actions with explicit actions and time estimates, refer to the dedicated STEP-BY-STEP section that follows. This overview is intended to give you a clear map of the process and illustrate how problem areas connect to common symptoms.
Step-by-Step Troubleshooting for GE Ice Makers (Overview with Practical Actions)
This section outlines the main problem areas and the high-impact checks to perform first. Start with power, water supply, and mechanical components, then progress to more advanced tests if needed. The goal is to either restore normal operation or clearly identify whether the issue requires a replacement part or professional service. Each action is described with the intended outcome, so you know what success looks like and when to proceed to the next step.
Maintenance to Prevent Future Ice Maker Issues
Prevention is the best cure for repetitive ice-maker problems. Regularly inspect the water line for kinks or leaks, replace the filter on schedule, and clean the ice mold and dispenser area to prevent mineral buildup. Keep the freezer at a stable temperature to avoid abnormal ice formation and ensure the arm can move freely. If your ice maker repeatedly malfunctions after cleaning and maintenance, you may be dealing with a failing motor, valve, or control board. In those cases, a professional assessment is recommended. Adopting a simple preventive routine—monthly visual checks, seasonal cleaning, and annual filter replacement—materially reduces the likelihood of sudden ice production failures.
Authority Sources
- How To Refrigerator Analysis, 2026
- U.S. Department of Energy: Refrigerators and energy efficiency guidance (https://www.energy.gov/eere/buildings/articles/choosing-energy-efficient-refrigerators)
- Consumer Product Safety Commission appliance safety information (https://www.cpsc.gov/)
- GE Appliances official owner resources for model-specific guidance (https://www.geappliances.com/)
Tools & Materials
- Phillips screwdriver(For access panels and screws)
- Flathead screwdriver(Useful for prying delicate clips)
- Nut drivers set(Removable mounting nuts for ice maker assembly)
- Needle-nose pliers(Release clips and pin connectors)
- Multimeter (optional)(Electrical testing if you’re comfortable)
- Towels and a shallow pan(Catch water and protect floor)
- Replacement ice maker kit or ice mold(Only if diagnosis indicates failure)
- Soft cloths or small brush(Mold and debris removal)
- Water filter (if applicable)(Have on hand if you’re due for replacement)
Steps
Estimated time: 60-90 minutes
- 1
Disconnect power and shut off water supply
Unplug the refrigerator at the outlet to prevent shock. If your model has a behind-the-appliance shutoff valve for the water line, close it before disconnecting. This initial safety step protects you while you inspect electrical and water components.
Tip: Label wires or take a quick photo before disconnecting any wiring. - 2
Inspect ice maker arm and bin for jams
Open the ice maker compartment and observe the arm and ejector mechanism. If the arm sticks or the ejector wheel binds, carefully dislodge any obstruction. Ensure the arm can return to its resting position freely.
Tip: Move the arm slowly through its full range to verify smooth operation. - 3
Check the water line for kinks or leaks
Trace the water line from the back of the fridge to the supply valve. Look for kinks, pinch points, or frost on the line that could restrict flow. Trace to the inlet valve and verify the line is connected securely.
Tip: If you see frost on the line, thaw slowly and re-seat the line with care. - 4
Reset the ice maker circuit
With power still disconnected, wait 60 seconds and then restore power. If your model supports a reset button, use it following the manual; otherwise a power cycle often resets the control board. Observe if the ice production resumes after the reset.
Tip: Avoid touching control boards directly; use the reset button if available. - 5
Inspect the ice mold and defrost if needed
Remove the ice mold and check for mineral buildup or cracks. Clean with a mild vinegar solution or manufacturer-approved cleaner, then dry completely before reassembly. Ensure the mold is firmly seated and that the fill tube is clear.
Tip: Never use abrasive cleaners that could scratch the mold. - 6
Replace the water filter if due or clogged
If your unit uses a water filter, replace it if it’s past its recommended interval or if flow seems weak. A clogged filter reduces water flow to the ice mold, resulting in little or no ice.
Tip: Keep a replacement filter on hand to minimize downtime. - 7
Test ice maker operation and run a full cycle
Reconnect power and water supply; run a full ice cycle to verify ice is produced, released, and stored correctly. Listen for normal operation and watch for consistent ice output. If cycles stall, recheck components or consult a pro.
Tip: Allow a few cycles to stabilize after reset or filter replacement.
FAQ
Why is my GE ice maker not producing ice?
Common causes include a blocked water line, a faulty fill valve, a stuck ice maker arm, or a failed motor. Start by checking the water supply and ice maker arm before moving to valve testing.
If your GE ice maker isn’t producing ice, check the water line and the ice maker arm first; a jam or valve issue is often the culprit.
Can a frozen water line cause no ice production?
Yes. A frozen or partially frozen line restricts water flow into the mold, preventing ice formation. Thaw the line by unplugging the unit and warming gently, then check for air gaps or leaks.
A frozen water line can stop ice production; thaw cautiously and verify the line isn’t kinked.
Is it safe to reset the ice maker?
Resetting the ice maker is generally safe and can clear minor control glitches. If you’re unsure about performing a reset, consult the GE manual or a technician.
Resetting can fix minor glitches; if unsure, check the manual or contact support.
How often should I replace the water filter in GE refrigerators?
Follow GE’s recommended schedule, typically every 6-12 months depending on usage and water quality. A clogged filter reduces ice quality and production.
Replace the water filter at the manufacturer’s recommended interval for best ice quality.
What if the ice dispenser still won’t discharge ice after fixes?
If ice remains stuck in the mold or dispenser after steps, there may be a mechanical jam or a faulty ejector motor. Inspect components and consider service if the issue persists.
If ice won’t dispense after fixes, there could be a jam or motor issue; consult a technician if needed.
Watch Video
Top Takeaways
- Verify power and water supply first before deeper checks
- Common failures stem from lines, jams, or valve issues
- Regular maintenance reduces future ice-maker problems
- Know when to call a pro for electrical or refrigerant concerns