How to Replace Whirlpool Refrigerator Water Filter
Learn how to replace a Whirlpool refrigerator water filter with a safe, repeatable method. This guide covers compatibility, tools, installation steps, troubleshooting, and maintenance to keep your water clean and your fridge performing at its best.

This guide answers whirlpool refrigerator water filter how to replace it safely and easily. You’ll gather the right Whirlpool-compatible filter, a clean towel, and basic tools. This quick answer outlines the key steps and safety tips for whirlpool refrigerator water filter how to replace so you can enjoy clean water and preserved cooling performance.
Understanding Why Filter Replacement Matters
Regularly replacing the water filter in a Whirlpool refrigerator is crucial for water quality, ice clarity, and appliance longevity. When a filter nears the end of its life, you may notice reduced water flow, a faint taste, or longer filtration times. In this guide, the How To Refrigerator team explains the practical reasons for changing your filter and how to do it safely. According to How To Refrigerator analysis, most whirlpool refrigerator water filter replacements are straightforward and can be completed in about 5-10 minutes with the right filter, which reduces sediment and chlorine taste. Key indicators your filter needs replacement include a warning light on the control panel, or diminished water pressure. Some Whirlpool models have an integrated taste and odor index that declines as particulates build up. If your water has a metallic or sulfur-like taste, it’s a strong sign to replace now. Note that using an expired or wrong-filter type can affect water quality and may void warranty in rare cases. Before you start, confirm model compatibility by checking the model and serial number tag inside the fridge, then verify the filter part number matches your unit. Always use a genuine Whirlpool filter to maintain optimized flow and filtration performance.
text_newline_after_heading":true},
Tools and Materials You’ll Need
Before you begin, gather the essential tools and supplies to ensure a smooth replacement. The exact filter is model-specific, so verify compatibility with your Whirlpool refrigerator. You'll need a Whirlpool-compatible water filter cartridge (required), a clean towel or microfiber cloth (required), a small tray or shallow bowl to catch drips (optional but helpful), and basic dish soap or mild cleaner for post-replacement cleanup (optional). If your model uses a filter wrench or a coin slot, include a small tool or a coin as a contingency. Having a timer can help you track flush time after installation. Pro tip: keep extra towels handy and work on a protected surface to minimize water damage. By preparing properly, you’ll reduce the risk of spills and ensure a clean working area.
text_newline_after_heading":true},
Choosing the Right Filter and Where to Buy
The first step is to confirm model compatibility before purchasing. Whirlpool refrigerators commonly use a specific family of filters, but exact part numbers vary by model. Check the inside of the fridge near the filter housing for model labeling or consult your user manual. Look for the filter’s label to confirm the intended refrigerator models and the thread size. Opt for a genuine Whirlpool filter to guarantee water quality, best flow, and warranty alignment. If you’re shopping online, use your model number to filter results and avoid third-party filters that aren’t certified for your unit. When in doubt, visit authorized retailers or Whirlpool’s official support pages for model-specific recommendations. By following these checks, you’ll avoid incorrect fitment that can cause leaks or subpar filtration and you’ll ensure access to fresh, clean water at optimal pressure.
text_newline_after_heading":true},
Installation Tips and Common Pitfalls
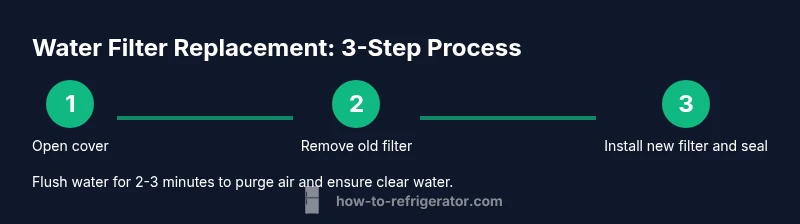
Installations often trip homeowners up on three fronts: correct alignment, proper seating, and avoiding overtightening. Ensure the new cartridge is oriented correctly, with alignment arrows matching the housing. Insert fully and turn clockwise until you hear or feel a click indicating a secure seat. If your model uses a twist-lock mechanism, rotate until snug but not forced. After installation, run water through the dispenser for 2-3 minutes to purge air and clear any loose carbon fines. Watch for leaks at the housing and beneath the door gasket. Common mistakes include installing a filter upside down, overtightening, or skipping the flushing step. Pro tip: if your filter is difficult to turn by hand, pause and re-check alignment rather than forcing it. A brief reset of the dispenser indicator may be required on some models.
text_newline_after_heading":true},
Post-Installation Maintenance and Verification
With the filter replaced, the next steps focus on verification and maintenance. Start by running cold water through the dispenser for 2-3 minutes (or per model instructions) to purge trapped air and new carbon fines. Inspect the filter housing for any signs of leakage for the first 24 hours, especially after the first few use cycles. Wipe down the exterior and the door seal as water may spray during flushing. If your model has a filter indicator light, reset it according to the manual to reflect the new cartridge life. Keep a note of the replacement date so you know when the next change is due. Routine maintenance also includes checking for unusual odors or tastes, and replacing the filter on a recommended schedule to maintain optimal filtration performance.
text_newline_after_heading":true},
Troubleshooting Quick Checks
If you notice reduced water flow after replacement or see a drip from the filter housing, recheck that the cartridge is fully seated and correctly oriented. A slow drip or dampness near the housing might indicate a loose connection or a small O-ring issue. If the indicator light remains on or the water continues to taste off, consult the user manual for model-specific reset instructions or contact support for a warranty-conscious assessment. Finally, never reuse old filters or substitutes not approved for Whirlpool units, as improper filtration can affect taste, safety, and appliance warranty. A well-executed replacement should deliver clear, cold water with normal pressure and no leaks.
text_newline_after_heading":true}
Tools & Materials
- Whirlpool-compatible water filter cartridge(Choose the correct filter for your model; check the label or manual.)
- Clean towel or microfiber cloth(For wiping spills and cleaning the housing exterior.)
- Small tray or bowl(Catches drips during replacement.)
- Mild soap or cleaner(Clean the housing exterior after replacement.)
- Gloves (optional)(Keeps hands clean during replacement.)
Steps
Estimated time: 8-12 minutes
- 1
Locate the filter compartment
Open the refrigerator door and find the filter housing. In many Whirlpool models, it sits either in the upper right interior, behind a labeled cover, or near the bottom grille. If you’re unsure, consult the model’s manual or the inside label for location details.
Tip: Take a photo of the housing before removing anything to avoid misplacement of parts later. - 2
Prepare the area and safety measures
Place a towel underneath the housing to catch drips. If you have a water line connected, be mindful of splashes. Ensure the area is well-lit and dry before proceeding.
Tip: Keep a small tray ready to catch any water leakage during removal. - 3
Remove the old filter
Twist the old cartridge counterclockwise (or unlock per your model) and gently pull it straight out. Some models require a quarter-turn, while others have a button release. Do not force the cartridge.
Tip: If it’s stubborn, pause and recheck alignment instead of applying excessive force. - 4
Prepare the new filter
Remove any protective caps or packaging from the new cartridge. Inspect the O-rings and ensure there are no cracks or debris that could impede a seal.
Tip: Rinse the new filter briefly under cold water if the manufacturer advises it before installation. - 5
Install the new filter
Insert the cartridge and rotate clockwise until it clicks or sits firmly. Make sure the arrows on the filter align with the housing indicators.
Tip: Do not overtighten; a snug fit is sufficient to form a proper seal. - 6
Flush and verify
Run cold water through the dispenser for 2-3 minutes to purge air and debris. Check for leaks at the housing and around the door. If your model has a reset button, use it to update the filter life.
Tip: If leaks occur, re-seat the filter and retry the flush process. - 7
Record and monitor
Note the replacement date and observe water taste and flow over the next few days. Replace on schedule per your model’s recommendations to maintain optimal performance.
Tip: Set a reminder for roughly every 6 months, or sooner if your water quality changes.
FAQ
Do I need to turn off the water supply when replacing the filter?
Most Whirlpool fridges don’t require shutting off the home water supply; just prepare the area to catch drips and follow the replacement steps. If your model has a dedicated shutoff valve, you can close it to minimize spills.
In most cases you don’t need to shut off your home water line; just be ready to catch drips and follow the steps carefully.
Can I use a third-party filter for Whirlpool?
It’s best to use a genuine Whirlpool filter to ensure proper filtration and avoid warranty issues. Non-certified filters may not seal correctly or work with your dispenser indicators.
Stick with genuine Whirlpool filters to keep water quality and warranty intact.
Why is the water flow reduced after replacement?
If flow remains slow, recheck that the filter is fully seated and oriented correctly. Flush longer if needed, and inspect for leaks that could indicate a seat issue or damaged O-rings.
If flow is slow, reseat the filter and flush longer to clear air and debris.
How often should I replace the filter?
Most models indicate replacement every 6 months or when flow or taste changes. Check the dispenser light and user manual for model-specific guidance.
Typically every 6 months, or when you notice changes in taste or flow.
What if the filter light won’t reset after replacement?
Model-specific reset steps vary. Check the manual for the exact procedure; some units require holding a button for several seconds or cycling power to the control panel.
If the light won’t reset, consult the manual for your model or contact support.
Is replacing the filter part of a warranty?
Filter replacements are generally covered as part of standard maintenance, but always verify terms with Whirlpool support or your retailer if you’re unsure. Use genuine filters to avoid warranty issues.
Warranty terms vary; use genuine Whirlpool filters and consult support if you’re unsure.
Watch Video
Top Takeaways
- Identify the correct filter model before purchase.
- Use a genuine Whirlpool filter for best results.
- Flush 2-3 minutes after installation to purge air.
- Reset the indicator if your model supports it.
- Inspect for leaks after installation.