When to Change Refrigerator Filter: Timing, Signs, and Steps
Learn the right timing for changing your fridge filter, signs to watch for, and a clear step-by-step approach to keep water fresh and ice clear.

Learn when to change your refrigerator filter by following a simple, proactive routine. In most homes, replacement occurs every 6 to 12 months, but indicators like filter indicator lights, water taste, ice clarity, and flow rate matter. This guide walks you through timing, signs, and a quick test to confirm your filter needs replacement.
Why Changing Refrigerator Filter Matters
Regularly changing your refrigerator filter is a simple, powerful way to protect the quality of your drinking water and the performance of your ice maker. A clean filter reduces sediment, chlorine taste, and odor that can accumulate as the filter captures particles from your water supply. When the filter becomes clogged, your fridge has to work harder, which can consume more energy and shorten the life of the cooling system. According to How To Refrigerator, homeowners who keep up with filter maintenance report crisper ice, better-tasting water, and fewer downstream issues in the dispenser and ice maker. By treating filter replacement as a routine task, you’ll avoid surprises and maintain consistently fresh-tasting water for your family without expensive repairs. This section explains why timing matters and how a routine schedule aligns with real-world usage.
How Often Should You Change Your Refrigerator Filter?
There isn’t a one-size-fits-all answer, but most households benefit from replacing the filter roughly every 6 to 12 months. The exact interval depends on several factors: water quality, how often you use the water dispenser or ice maker, and the type of filter your fridge uses. If your home has particularly hard or chlorinated water, or you rely heavily on filtered ice, you may need to replace closer to the 6-month end. Conversely, if water lines are long, if you rarely use the dispenser, or your municipality provides exceptionally clean water, you could lean toward the 12-month mark. The How To Refrigerator team recommends checking your owner’s manual for model-specific guidance and using real-world cues to adjust the schedule. In all cases, treating filter changes as part of seasonal maintenance helps keep your fridge performing at peak efficiency.
Signs It’s Time to Replace Your Filter
Watch for several telltale indicators that the filter is nearing its end of life. A visibly slower water flow from the dispenser, a change in water taste or odor, cloudy or white ice, or a filter indicator light showing low life are all strong signals. If you notice a slight gurgling sound from the filter housing when you dispense water, that can indicate air trapped in a new filter—flush it to remove air pockets. If you ever taste metal or sulfur or notice a persistent odd smell in the water or ice, replace the filter promptly. The presence of these signs means the filter may no longer be adequately removing contaminants, and continued use could compromise taste and appliance efficiency. Always err on the side of caution and replace when in doubt, especially if you rely on filtered water for children or guests.
How to Test Filter Condition with a Simple Flow Check
A quick, practical check helps confirm whether your filter needs replacement. Start by running water from the dispenser for about 30 seconds into a clean glass. If the flow seems reduced versus normal, or if you notice off-tastes after flushing, it’s time to consider a replacement. For many filters, you should flush the new unit for 2–3 minutes before using the water for drinking or ice, until the water runs clear and at a steady rate. If the water still tastes odd after flushing, recheck the seal and ensure the filter is properly seated. This test is a reliable, non-technical way to gauge whether the filter is doing its job effectively.
Choosing the Right Filter: Compatibility and Standards
Filters are not universal; each fridge model often requires a specific filter type, connector style, and micron rating. Start by locating your fridge’s model number (often on a label inside the fresh food compartment or on the door edge) and consult the owner’s manual or manufacturer website to confirm compatibility. Look for NSF/ANSI certifications (such as 42 for taste and odor, 53 for contaminants, or higher) to ensure your replacement meets recognized standards. If you’re unsure, consult a professional or refer to your retailer’s compatibility chart. Using an incorrect filter can reduce filtration efficiency or cause leaks, so confirm fit before purchasing a new unit.
Practical Tips for Long Filter Life and Reliable Performance
To maximize filter life, avoid frequent switching between cold and hot water taps if your fridge supports both, and keep the water line clean by flushing during each replacement. Store new filters in their original packaging until installation to prevent contamination. Record the replacement date somewhere visible (on the fridge deck, in a maintenance notebook, or in a digital reminder) to ensure you don’t miss future changes. If your household has an unusually high mineral content or sediment, consider filters with a higher micron rating or a pre-filter option to extend life. Remember that the filter’s job is to remove impurities; as it fills up, its effectiveness declines, which makes timely changes essential.
Common Myths and Realities About Refrigerator Filters
A frequent misconception is that you can clean a used filter and reuse it. Unfortunately, once sediments and contaminants have been trapped, cleaning doesn’t restore performance and can even reintroduce impurities. Some users think if the water looks clear, the filter is still effective; cloudy ice is a stronger signal of reduced filtration than appearance alone. Always rely on the manufacturer’s recommended replacement interval and indicators rather than visual cues alone. The most reliable indicators are taste/odor changes, reduced flow, and the filter life indicator if your model includes one.
Quick Troubleshooting After Replacement
If after replacement you notice leaks, unusual noises, or inconsistent water flow, first reseat the filter and confirm you used the correct part. Wipe away any stray water around the housing and inspect the O-ring for damage. If a leak persists, power down briefly and contact support or shut off the water supply to prevent flooding. In many models, an indicator light will reset only after a proper seating and a flush cycle; ensure the reset procedure in your manual or on the control panel has been completed. If you continue to encounter issues, it may be time to replace a malfunctioning filter housing or seek professional service.
Real-World Maintenance Plan You Can Start Today
Create a simple maintenance schedule: inspect the filter status every 3–6 months, and replace if the indicator shows low life or you notice a taste/odor change. If your municipality provides high-quality water, you might lean toward the longer end of the replacement window, but never skip the flush step after installation. Adopt a routine where you purchase filters in batches to avoid running out, and keep a small drain pan nearby when changing filters to catch any spills. Consistency is the key to ensuring water quality and appliance longevity.
Tools & Materials
- Compatible refrigerator water filter(Check model compatibility (manufacturer model number on inside label).)
- Clean cloth(Wipe up spills and dry the housing after replacement.)
- Small bucket or tray(Catch any drips during replacement.)
- Owner's manual or model-specific guide(Helpful for exact reset steps and seating orientation.)
- Glasses or safety goggles(Optional for eye protection during leaks or spills.)
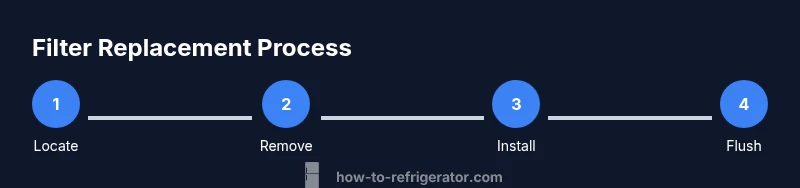
Steps
Estimated time: 10-15 minutes
- 1
Locate and prepare the fridge
Open the fridge and locate the filter housing, typically at the upper right corner of the fresh food compartment or inside the grille at the bottom. Read any model-specific orientation marks. Have a clean cloth ready and ensure the water supply is turned off if your system requires it.
Tip: Take a photo of the old filter orientation before removal to ensure correct seating of the new one. - 2
Remove the old filter
Twist the filter counterclockwise (or release with the depicted latch) and pull it straight out. Dispose of the old filter following local guidelines. If the housing is stiff, apply light, even pressure instead of forcing it.
Tip: Avoid touching the filter’s O-ring; oils on your fingers can affect the seal. - 3
Prepare the new filter
Unpack the new filter and remove any protective caps. Some filters require priming by running water for 10–15 seconds before installation. Inspect the O-ring for visible damage.
Tip: Prime the filter if your model requires it to prevent air pockets in the line. - 4
Install the new filter
Insert the new filter, then twist or click it into place according to your model’s instructions. Ensure it sits firmly with the alignment arrow or notches facing the correct direction.
Tip: Do not overtighten; hand-tight is usually sufficient to seal the housing. - 5
Flush and prime the system
Turn the water supply back on if you shut it off. Run water through the dispenser for 2–3 minutes or until the water runs clear with a steady flow. This clears air pockets and helps the new filter begin filtering effectively.
Tip: Collect and taste a sample water to confirm the water is clean and free of off-tastes. - 6
Check for leaks and reset the indicator
Wipe the housing and inspect for any drips around the filter. If your fridge features a filter life indicator, reset it according to the user manual after the flushing step.
Tip: If a leak appears, reseat the filter and recheck the O-ring. - 7
Document the replacement
Record the replacement date in your maintenance log and set a reminder for the next replacement window (e.g., 6–12 months from now). This creates a reliable maintenance habit.
Tip: Note any peculiarities you observed during the change (leaks, taste changes) for future reference.
FAQ
How do I know exactly when to change my refrigerator filter?
Refer to your owner’s manual for model-specific guidance. In general, watch for indicator lights, changes in water taste or odor, slower water flow, or cloudy ice. If any of these occur, replace the filter promptly and flush the system.
Check the manual for your model and watch for the indicator light, taste changes, and reduced flow. If in doubt, replace and flush.
Can I clean a used filter instead of replacing it?
No. Cleaning a filter doesn’t restore its filtering capacity. Replacement is the only reliable way to ensure contaminants are being removed effectively.
Cleaning a used filter isn’t reliable; replace it to ensure clean water.
What happens if I delay replacement?
Delaying replacement can lead to poorer taste and odor, reduced filtration efficiency, and possible contamination in water and ice. It may also put extra strain on the refrigerator’s water system.
Putting off replacement can let contaminants pass and affect taste.
Are all refrigerator filters the same?
No. Filters vary by model, micron rating, and certification. Always verify compatibility with your particular fridge model before purchase.
Filters aren’t universal; check compatibility with your model.
How do I reset the filter indicator after replacement?
Reset steps vary by model. Typically, press and hold the reset button or navigate through the settings menu to reset the filter life indicator after replacement.
Use your fridge panel to reset the filter indicator after replacement.
Watch Video
Top Takeaways
- Check filter status routinely and replace on schedule.
- Rely on indicator lights, taste, and flow to guide timing.
- Always confirm model compatibility before purchasing a filter.
- Flush and inspect for leaks after installation.
- Keep a replacement date log for consistent maintenance.