Refrigerator Maintenance: A Homeowner's Step-by-Step Guide
A practical, expert guide for homeowners. Learn a simple monthly refrigerator maintenance routine to keep your fridge efficient, safe, and reliable, with step-by-step tasks and practical tips.

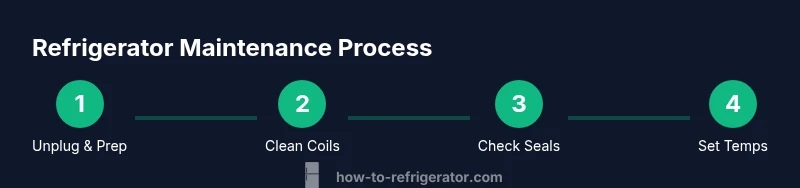
By following a simple, proactive refrigerator maintenance routine, you can keep your fridge efficient, extend its life, and prevent common malfunctions. This guide shows a practical monthly checklist: clean the condenser coils, inspect door gaskets, monitor temperatures, clean the drain, and organize the interior for optimal airflow. The goal is to reduce energy use and costly repairs while preserving food safety.
What refrigerator maintenance is and why it matters
Refrigerator maintenance is the routine care you give to your appliance to keep it running efficiently, safely, and for as long as possible. For homeowners, a simple maintenance habit can lower energy consumption, reduce the risk of spoilage, and prevent surprising breakdowns when you least expect them. The core idea is straightforward: remove dust and debris, verify seals, monitor and stabilize temperatures, and ensure proper airflow inside the cabinet. This practical approach applies to most standard household refrigerators, from top-freezer to French-door models.
Regular maintenance helps your compressor cycle less aggressively, which can extend motor life and minimize noisy operation. It also prevents frost buildup and clogs in the drainage path, both of which degrade cooling performance. By taking a few minutes a month to check seals, wipe shelves, and inspect the back coils, you’ll catch problems early and avoid costly repairs. The habit pays off with better food safety, fewer energy bills, and less food waste. Keep in mind that specific recommendations may vary by model, so consult your owner’s manual for model-specific cautions and service intervals.
Safety and prep before you start
Safety is the foundation of any maintenance task. Before you touch the appliance, unplug the fridge and remove perishable items from shelves. If you must move the unit, use proper lifting techniques and avoid pulling the power cord. Wear gloves to protect your hands from sharp edges and from any moisture that may be on coil housings or shelves. Work in a dry area, and keep the floor clear of spills to prevent slips. Never use metal tools on plastic shelves or gaskets, as they can cause damage. Finally, review the user manual for model-specific cautions and avoid bypassing safety features.
Cleaning and inspecting the condenser coils
Condenser coils release heat from the refrigerator to the surrounding air. Over time, they collect dust and pet hair, which impairs cooling efficiency. Locate the coils (usually on the back or underneath the unit) and use a soft brush or a vacuum with a brush attachment to remove loose debris. For stubborn buildup, wipe gently with a damp microfiber cloth and a mild detergent solution. Never spray water directly into electrical components. After cleaning, reconnect and run the fridge to ensure it’s cooling appropriately and the compressor isn’t overworked. Regular coil care improves efficiency and reduces energy costs.
Checking door seals and gaskets
Door seals (gaskets) keep cold air inside and warm air out. A loose or cracked gasket allows energy to escape and may cause uneven cooling. Inspect the gasket for tears, stiffness, or gaps. A quick test is the dollar-bill test: place a bill between the door and seal and close; if you can easily pull the bill out with resistance, the seal is likely fine. If the bill slides out easily or there are visible gaps, the gasket may need replacement. Replacing a gasket is typically straightforward and can restore energy efficiency and temperature stability.
Temperature settings and airflow
Consistent temperatures are critical for food safety and performance. Most refrigerators perform best around 37°F (3°C) with the freezer at 0°F (-18°C). Use an appliance thermometer placed in the main compartment to verify accuracy. Avoid frequent door openings, especially during peak cooling periods, and ensure vents inside the fridge aren’t blocked by groceries. Proper airflow prevents warm pockets and helps the compressor operate efficiently. If temperatures drift, adjust the thermostat gradually and monitor for stabilization over 24–48 hours.
Drain system, defrost drain, and water lines
A blocked defrost drain or a clogged drain pan can cause water pooling inside or outside the fridge and contribute to mold growth. Locate the defrost drain tube and flush it with warm water mixed with a small amount of baking soda if needed. Inspect the drain pan under the refrigerator for standing water or signs of mold; wipe clean as necessary and ensure the pan is properly positioned to drain away from the compressor. If your fridge has an ice maker or water dispenser, inspect supply lines for kinks, leaks, or frost that may impede flow and clean the filter if applicable.
Maintenance schedule and seasonal checks
Consistency beats intensity. Create a simple calendar reminder to perform the routine maintenance once a month and a deeper inspection every 3–6 months depending on usage. Track tasks completed, parts replaced, and any unusual noises or temperature changes. A quick yearly check with a qualified technician is advisable if you notice persistent issues such as unusual warm spots, excessive condensation, or refrigerant smell. A steady schedule helps extend appliance life and protects food quality.
Troubleshooting common issues and when to call a pro
If temperature readings remain outside safe ranges after adjustments, or you hear unusual noises persisting after cleaning, document the symptoms. Check for frost buildup, airflow blockages, or condenser coil dust, then retest. If issues persist beyond basic maintenance steps, or you suspect a refrigerant leak, electrical fault, or damaged compressor, it’s time to consult a professional. Early professional intervention can prevent further damage and higher repair costs.
Tools & Materials
- Gloves(Washable work gloves for grip and protection)
- Vacuum with brush attachment(Back-of-coil and vent cleaning)
- Soft brush(Gently remove dust from coils)
- Microfiber cloths(Wipe surfaces; avoid scratches)
- Mild dish soap or detergent(Gentle cleaning solution)
- Bucket or small tub(Rinse and wring cloths)
- Thermometer (appliance)(Verify fridge and freezer temperatures)
- Replacement door gasket (optional)(Only if tearing is observed)
- Screwdriver set (Phillips/flathead)(If removing panels or handles)
- Old towels or towels for catching spills(Contain moisture when cleaning near the floor)
- Plumbers' tape or sealant (optional)(For minor gasket sealing if directed by manual)
Steps
Estimated time: Estimated total time: 60-90 minutes
- 1
Power down and prep
Unplug the refrigerator and remove all perishable items from shelves. Move items to a cooler if you need to work around the interior. This prevents electrical hazards and keeps you dry as you perform cleaning.
Tip: Always unplug before touching electrical components. Keep cords away from water. - 2
Empty and clean shelves
Take out shelves and drawers, wash them with mild soap, rinse, and dry thoroughly before reinserting. Wipe the interior walls with a damp cloth to remove spills and sticky residues.
Tip: Dry shelves completely to prevent moisture buildup and slipping shelves back into place. - 3
Clean condenser coils
Locate the coils (back or bottom front); use a vacuum with a brush attachment to remove dust and debris. For stubborn buildup, use a soft brush and a damp cloth to wipe gently. Allow coils to dry before reconnecting power.
Tip: Never use metal tools on coils; avoid bending delicate fins. - 4
Inspect door seals
Check gaskets for cracks, stiffness, or gaps. Perform a seal test with a dollar bill: if the bill pulls out easily, the seal may need replacement. Replace or repair as needed following the manufacturer’s instructions.
Tip: Replace a worn gasket promptly to regain efficiency and prevent leaks. - 5
Check temperature settings
Verify the thermostat and use an appliance thermometer to confirm fridge around 37°F (3°C) and freezer at 0°F (-18°C). Adjust gradually if readings vary, and recheck after 24–48 hours.
Tip: Avoid frequent thermostat changes; aim for stable temperatures to reduce compressor cycling. - 6
Clean drain and defrost line
If your model has a defrost drain, flush it with warm water mixed with a pinch of baking soda and inspect the drain pan for moisture or mold. Ensure the line isn’t blocked and that the pan is correctly positioned.
Tip: Unplug before handling drain components and avoid forced chemicals into the line. - 7
Organize for airflow
Arrange interior items to avoid blocking vents. Keep food in the right zones and ensure air can circulate freely around stored items. This helps maintain even cooling throughout the cabinet.
Tip: Don’t overfill; leave space around containers to optimize airflow. - 8
Log and schedule maintenance
Record the date, observations, and any parts replaced. Schedule the next check in a few months and set reminders. This creates a repeatable process and helps catch issues early.
Tip: Keep a simple notebook or digital log for quick reference.
FAQ
How often should I clean my refrigerator coils?
Clean coils whenever you notice dust buildup or every 6–12 months as a general guideline. Regular cleaning improves cooling efficiency and reduces energy use.
Clean the coils when you notice dust or at least twice a year to keep cooling efficient.
What temperature should my refrigerator be set to?
Aim for about 37°F (3°C) in the fridge and 0°F (-18°C) in the freezer. Use a thermometer to confirm and adjust gradually if readings drift.
Keep the fridge around 37 degrees and the freezer at 0 degrees; verify with a thermometer.
How can I tell if a door seal needs replacement?
Look for cracks, stiffness, or gaps in the gasket. A failed seal may show air leaks or frost buildup. Replace if you notice persistent gaps.
Cracks or loose seals mean you should consider replacement.
Is defrosting necessary for all refrigerators?
Defrosting needs depend on the model. Manual-defrost units require regular defrosting, while frost-free models handle it automatically.
Only manual-defrost fridges need frequent defrosting; frost-free models manage it automatically.
What should I do if the fridge isn’t cooling properly?
Check airflow, vents, and door seals first. If temperatures persist outside safe ranges after these checks, consider a professional inspection.
If it still isn’t cooling after checking vents and seals, call a pro.
Watch Video
Top Takeaways
- Establish a monthly refrigerator maintenance routine.
- Regularly clean coils and inspect seals for efficiency.
- Keep temperatures steady to ensure safety and energy savings.
- Document maintenance and set reminders for checks.
- Know when to call a professional for persistent issues.