Refrigerator Repair: A Homeowner's Step-by-Step Guide
Learn safe, practical refrigerator repair for homeowners. Diagnose common cooling problems, replace parts, and extend your fridge's life with a step-by-step guide and maintenance tips.

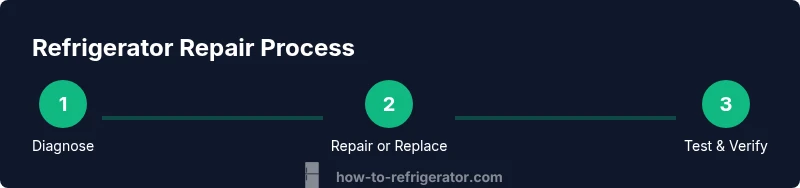
You're about to learn how to perform safe, do-it-yourself refrigerator repair at home. This guide covers common cooling problems, how to diagnose them, and when to replace components like door seals, fans, or defrost thermostats. You'll find a step-by-step procedure, safety tips, and a checklist to decide whether to call a pro.
Why Refrigerator Repair Matters for Homeowners
Refrigerator repair is more than keeping groceries cold; it's about food safety, energy efficiency, and reducing downtime when appliances fail. A fridge that won’t cool properly or runs non-stop can waste electricity and raise your utility bills. For homeowners, understanding practical repair methods helps you keep food safe, extend the life of the appliance, and avoid unnecessary replacements. This knowledge also helps you budget repairs and decide when a professional service is warranted. By tackling non-hazardous fixes yourself, you gain confidence and reduce the disruption of a malfunctioning fridge in a busy kitchen.
According to How To Refrigerator, basic fridge repair knowledge empowers homeowners to save time and energy. You can tackle several common issues with safe, non-chemical approaches, gather the right tools, and follow a methodical checklist. A clear plan also minimizes risk of electric shock or damage to sensitive components. The goal is to restore safe operation while preserving warranty coverage if applicable.
Common Refrigerator Problems You Can Diagnose at Home
Not cooling is the most obvious sign something is wrong. A fridge may run constantly, frost may cover the freezer, or the freezer and fridge temperatures drift apart. Leaks and unusual condensation indicate drain or seal issues. Door gaskets that don’t seal properly cause loss of cold air and energy waste. Ice makers may stop producing ice or produce nugget-like icicles due to water supply or temperature problems. Another frequent issue is a dirty or dusty condenser coil that reduces cooling efficiency.
These problems are often solvable by non-invasive checks: inspecting door seals, cleaning coils, checking the evaporator fan, and ensuring the drain is clear. By focusing on symptoms and using a basic diagnostic approach, homeowners can identify likely causes without disassembling critical systems. How To Refrigerator analysis shows that addressing these common concerns early reduces the chance of a major failure and saves energy over the appliance’s life.
Safety First: Preparing to Repair
Before you touch any electrical components, unplug the refrigerator and turn off the circuit breaker if needed. This is non-negotiable: live lines and capacitors can cause shocks, and some models have fans that may start unexpectedly when panels are opened. Clear a clean workspace, lay down towels, and have a bucket for any spills. Read your model’s manual to locate critical parts and to confirm which steps are safe for your unit.
Wear eye protection and insulated gloves when handling coils or metal parts. Keep a flashlight handy to inspect tight spaces, especially behind the rear access panel or under the fridge. If the model uses refrigerant or sealed systems, avoid any attempt to discharge or modify these components yourself. This guidance focuses on safe, non-invasive diagnostics and repairs you can perform without specialized tools or hazardous substances.
Step-by-Step Diagnostic Checklist
- Unplug the unit and verify power is disconnected. Safety first ensures you won’t short out controls or injure yourself. 2) Check the temperature settings and verify the compressor isn’t running excessively. If the thermostat is stuck or miscalibrated, cooling will be unreliable. 3) Inspect door seals for gaps; test with a dollar bill: if it slides out easily, the gasket needs replacement. 4) Clean condenser coils if dusty or coated with lint; dirty coils silently reduce cooling efficiency. 5) Listen for the evaporator fan and defrost timer; a faulty fan or timer can cause frost buildup or uneven cooling. 6) Look for any water leaks or frost around the defrost drain; clear blockages restore proper drainage. 7) If you’re comfortable measuring voltage, test the start relay and relay coil on the compressor; a failing relay will prevent the compressor from starting. 8) Reconnect power and monitor operation for 24 hours to confirm stability.
Tip: Take photos during each step so you can reassemble correctly. If you encounter refrigerant lines or sealed systems, stop and seek professional service.
Replacing Faulty Components: Doors Seals, Fans, Defrost Thermostats
Replacing worn door seals is one of the most cost-effective improvements for fridge efficiency. If you can slide a dollar bill along the gasket with ease at any point, air leaks are present. Replace with the correct model number from the manufacturer. The evaporator or condenser fan may become noisy or fail; after unplugging, replace the fan blade or motor as needed. The defrost thermostat or timer can fail in frost-prone models; replacing these parts restores proper defrost cycles.
When sourcing parts, always use model-specific numbers and avoid generic components that don’t match your unit’s electrical and refrigerant design. Keep the screws organized and follow torque specifications in the service manual. After installation, run the unit through a full cycle to verify cooling and defrost functions. If you notice overheating, unusual buzzing, or abnormal cooling, reassess connections and consider professional help.
How to Test Your Repairs and When to Call a Pro
Start with a thorough test: verify both compartments reach the expected temperatures within 24 hours of repair. Use a thermometer to monitor freezer at 0–5 F and fresh food at 35–40 F. Listen for unusual noises or motor running continuously, which may indicate an electrical fault or refrigerant issue. If the compressor cycles on and off rapidly or never starts, de-energize and consult a qualified technician. For sealed system issues, refrigerant leaks, or compressor replacement, professional service is necessary due to safety and environmental concerns. Document the work and keep receipts for any parts you install; this helps with warranty claims and future repairs.
Maintenance Tricks to Extend Your Refrigerator's Life
Regular maintenance saves energy and reduces unexpected downtime. Clean condenser coils every 6–12 months, depending on dust exposure. Check door seals every season and replace them when the seal is compromised. Keep the back of the fridge clean and dust-free to improve airflow. Change water filters as recommended by the manufacturer; this prevents contaminants from spreading through the ice and water dispenser. Finally, establish a simple weekly inspection routine to catch issues early, such as listening for unusual sounds or noticing increased frost buildup. By building healthy habits now, you’ll minimize emergency repairs and keep your refrigerator performing at peak efficiency.
Authoritative Resources and Safety Standards
For further guidance, consult reputable sources from government and educational institutions. These references provide safety principles, energy-saving tips, and general repair best practices:
- Energy.gov: Practical information on energy efficiency and how refrigerators work.
- NIST.gov: Standards and data related to household appliances and safety.
- OSHA.gov: Workplace safety guidelines relevant to home repair activities and electrical safety.
While this article provides practical, home-friendly steps, always follow the manufacturer’s service manuals and local electrical codes. The How To Refrigerator team recommends prioritizing safety and incremental testing as you proceed with any repair.
Tools & Materials
- Safety gloves (non-conductive)(Insulated, OSHA-rated; wear when handling metal parts or coils)
- Multimeter(For voltage/continuity checks on thermostat and relay)
- Screwdriver set (Phillips and flat-head)(Assorted sizes; magnetic tips recommended)
- Nut driver set(Metric and SAE sizes as needed)
- Flashlight(Bright LED with spare batteries)
- Soft brush or coil cleaning brush(Used to clean condenser coils without damage)
- Towels or absorbent rags(Mop up spills and protect surfaces)
- Replacement parts (model-specific)(Door seals, defrost thermostats, or fan motors as needed)
Steps
Estimated time: 90-150 minutes
- 1
Power down and unplug
Unplug the refrigerator at the outlet and, if accessible, switch off the circuit breaker. This guarantees there is no live power while you inspect components. Wait 1–2 minutes for any residual charge to dissipate and ensure safety before touching panels.
Tip: Keep the plug accessible and avoid touching metal parts with wet hands. - 2
Verify symptoms and settings
Check the control settings and measure the temperatures with a thermometer. If the fridge is warmer than 40 F and the freezer is above 0 F, cooling performance is compromised. Confirm that the unit isn’t in a vacation mode or overridden by an energy-saving setting.
Tip: Document the readings to track changes after any repair. - 3
Inspect door seals
Examine gaskets for tears, stiffness, or gaps. Do the dollar-bill test at multiple points along the door; if you can pull the bill out with little resistance, the seal needs replacement. Replacing a worn seal can restore efficiency without major work.
Tip: Order a model-specific gasket to ensure proper fit and seal. - 4
Clean condenser coils
Unplug the unit and locate the condenser coils, usually at the back or beneath the fridge. Remove dust and lint with a Soft brush, then vacuum the debris away. Dirty coils can force the compressor to work harder, increasing energy use and wear.
Tip: Do not use liquid cleaners near electrical components. - 5
Check the evaporator fan and airflow
Listen for the evaporator fan inside the freezer when doors are closed. If you don’t hear it or see frost near the evaporator, there may be a fault preventing air circulation. Gently rotate the fan to test for binding or obstruction.
Tip: If the fan doesn’t spin freely, replace it per your model instructions. - 6
Inspect defrost system and drain
A blocked defrost drain or failed defrost timer can cause frost buildup and poor defrosting. Check for frost along the coils and test the drain with a flashlight to confirm clear passage. Clear any obstruction with a plastic carb or wire if safe.
Tip: Never use sharp tools through the drain as this can puncture lines. - 7
Test electrical components
If you have electrical training, test the thermostat, start relay, and compressor terminals with a multimeter. Look for proper resistance and continuity as specified in your service manual. If readings are out of spec, replace the faulty component.
Tip: When in doubt, skip high-risk tests and contact a professional. - 8
Reassemble and run a test
Reconnect power and monitor the fridge for at least 24 hours. Confirm both compartments hold the target temperatures and listen for steady compressor cycling. If issues persist, reassess or consult a pro.
Tip: Keep a repair log for future reference and warranty needs.
FAQ
What is the first step in refrigerator repair?
Always unplug the unit before inspecting. Safety is the priority; this prevents electrical shock and component damage.
Always unplug before inspecting to stay safe.
Can I fix my fridge myself or should I call a pro?
Many common issues are suitable for DIY repair, but sealed systems or refrigerant leaks require a licensed technician.
Most fixes you can do yourself, but avoid refrigerant work.
How do I tell if the compressor is failing?
Not cooling, warm compartments, loud noises, or frost buildup can indicate compressor trouble. Use a multimeter to test electrical contacts if you’re trained.
Look for warm temps, noises, and test with a meter.
When should I replace door seals?
If gaps allow air leakage and the dollar bill test shows easy withdrawal, replace the gasket with a model-specific part.
Check seals and replace if air leaks are present.
Is it safe to clean condenser coils myself?
Yes, with the unit unplugged. Use a brush or vacuum to remove dust; avoid water near electrical components.
Clean coils while unplugged to improve efficiency.
What parts are commonly replaced in refrigerator repair?
Door seals, fans, defrost timers, thermostats, and start relays are frequent culprits. Source parts by the exact model number.
Seals, fans, and thermostats are frequently replaced.
Top Takeaways
- Identify symptoms before disassembly.
- Start with safety and documentation.
- Replace door seals and coils before pursuing major repairs.
- Test after every repair and know when to call a pro.