GE XWFE Refrigerator Water Filter Replacement Guide
Learn how to replace the ge xwfe refrigerator water filter safely and efficiently. This comprehensive guide covers identification, tools, step-by-step replacement, and maintenance for clean, great-tasting water.

Goal: replace the ge xwfe refrigerator water filter quickly and safely. You’ll identify the correct cartridge, prepare simple tools, perform the swap, and flush the line to reset water flow. This quick guide emphasizes safety, proper seating, and verifying no leaks, so you can enjoy clean, great-tasting water in minutes.
What is the ge xwfe refrigerator water filter and how it works
The ge xwfe refrigerator water filter is a cartridge designed to remove contaminants from incoming water before it reaches your ice maker and dispenser. When installed correctly, it improves taste and odor while helping reduce particulates that can affect water quality. The filter sits in a dedicated housing behind the grille or inside the refrigerator, depending on the model. Over time, minerals and sediment can accumulate in the cartridge, which is why periodic replacement matters for ongoing water quality. By understanding the role of this filter, you’ll see why a proper swap matters for your family’s daily hydration and health. How To Refrigerator emphasizes using certified replacements and following the installation steps to maintain appliance efficiency and water quality.
Signs your ge xwfe refrigerator water filter needs replacement
Knowing when to replace your filter prevents stale taste, slow dispensing, or reduced flow. Common indicators include an off-taste or odor in water, slower water flow from the dispenser, and a filter indicator light on the fridge’s control panel. If you notice particles in your ice or a general decline in water quality, it’s a strong sign to inspect the cartridge. Even if a light isn’t lit, mineral buildup over time can reduce performance, so plan replacements on a regular schedule. Remember that water quality may vary with usage, household size, and water source. Regular maintenance helps sustain peak performance and keeps your ice and drinking water clean.
Choosing the right cartridge for ge xwfe refrigerator water filter
Selecting the correct cartridge is essential for optimal performance. Look for cartridges labeled compatible with the GE XWFE family and certified for residential use. Avoid generic claims that aren’t clearly labeled as compatible with your model, as mismatches can lead to poor fit or compromised filtration. Always verify the packaging lists model compatibility and follow the manufacturer’s guidelines. When in doubt, consult your user manual or How To Refrigerator’s guidance to ensure you’re selecting a cartridge that maintains water quality while preserving your appliance warranty.
Safety considerations before you replace the filter
Before you begin, ensure you have a clean workspace and dry hands. If your refrigerator has a water shut-off valve or a service valve nearby, consider closing it to minimize drips. Do not force fittings or cross-thread the cartridge, as this can cause leaks. Use a soft towel to catch spills and protect surfaces from water damage. If you detect a leak after installation, pause and recheck the cartridge orientation, seating, and seals. Following these safety steps minimizes risk and helps guarantee a successful, leak-free replacement.
What to expect during the replacement process
A typical ge xwfe replacement involves locating the filter housing, removing the old cartridge, installing the new cartridge with proper orientation, and flushing the line to clear air and residual sediment. Most replacements take about 5–7 minutes, depending on access to the housing. Expect a brief burst of water as the system refills, followed by a steady, clean flow. Having the right tools and a dry workspace makes the swap smoother and helps prevent accidental spills.
Common replacement mistakes and how to avoid them
Common mistakes include overtightening the cartridge, seating it incorrectly, or neglecting a thorough flush after installation. Avoid using force; align the cartridge with the housing grooves and a gentle twist is usually sufficient. Do not skip flushing, which can leave air pockets that cause sputtering or discolored water. Finally, verify that the indicator light has reset if your model includes a filter status reminder. Taking time to double-check these details saves headaches and ensures continued water quality.
Post-installation flushing and confirming water quality
After installation, run water for several minutes to flush the system and remove any trapped air. Collect water in a clean container to inspect clarity and taste. If water remains cloudy or tastes odd, continue flushing until it runs clear and neutral in flavor. At this stage, check all seals for leaks and wipe down the housing to maintain a clean, safe fridge interior. Regular flushing helps preserve the cartridge’s effectiveness and ensures fresh water downstream.
Maintenance schedule and tips for best results
Create a simple schedule to replace the ge xwfe refrigerator water filter every 6 months under typical usage, or sooner if your water quality changes or the indicator prompts. Keep a note of replacement dates near the appliance so you don’t miss maintenance. Use certified replacement cartridges to protect your family’s health and the fridge’s warranty. Periodic checks for leaks and a quick wipe-down of the housing keep the area tidy and functional.
Troubleshooting common issues after replacement
If you notice leaks after installation, first power down and recheck the cartridge seating and O-rings. A misaligned cartridge or damaged seal is a frequent cause of leaks. If water flow remains slow, ensure the housing is fully sealed and that the new cartridge isn’t blocked or defective. In cases of persistent issues, consult the manual or contact a qualified technician. Keeping records of replacements helps with warranty inquiries and future maintenance.
Tools & Materials
- ge xwfe refrigerator water filter cartridge (replacement)(Ensure it matches the exact model and is certified for residential use)
- clean, lint-free towel(For catching drips and drying surfaces)
- small container or bowl(To collect residual water during removal)
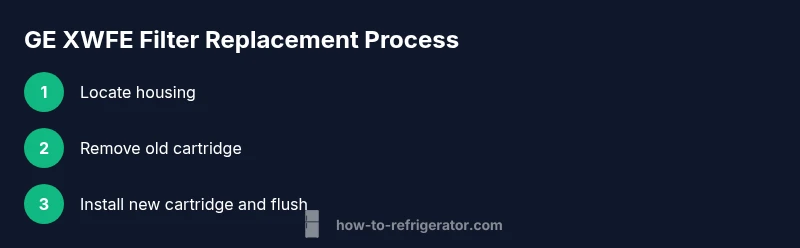
Steps
Estimated time: 5-7 minutes
- 1
Locate the filter housing
Identify where the GE XWFE filter sits—usually behind the lower grille on the refrigerator or inside the fresh food compartment. Confirm you have the correct model by checking the label on the cartridge or packaging. This step ensures you’re replacing the right filter and prevents accidental damage to the housing.
Tip: If access is tight, remove any decorative grille carefully to avoid bending or snapping fasteners. - 2
Prepare the workspace
Clear the area around the filter housing and place a towel to catch drips. Have a clean container handy for the old cartridge disposal and a soft cloth for wiping the housing. Dry hands help you avoid slips and misthreads during removal.
Tip: Do not use harsh cleaners on the housing; a damp cloth is sufficient to remove dust and grime. - 3
Remove the old cartridge
Twist the old filter counterclockwise to unlock it from the housing. Gently pull it straight out without forcing. If the cartridge is difficult to remove, rotate a bit more slowly and ensure you’re twisting in the correct direction.
Tip: Keep the old cartridge upright to avoid spills. - 4
Inspect the housing
Check the O-rings and grooves for wear, cracks, or damage. If you notice any damage, replace the housing or consult a professional. A damaged seal can cause leaks even with a new filter.
Tip: Lightly lubricate a dry O-ring with a small amount of water to ease seating. - 5
Install the new cartridge
Align the new ge xwfe filter with the housing’s notches and insert. Turn clockwise until it clicks into place or is snug, depending on your model. Ensure the cartridge is seated evenly to prevent gaps that could allow leaks.
Tip: Avoid over-tightening; a firm, snug fit is enough. - 6
Secure and seal
Reattach the housing cover or grille as required. Wipe away any residual water from the exterior. Make sure all fasteners are secure and the cover sits flush with the surface.
Tip: Double-check that no tools or debris are left in the housing area. - 7
Flush the system
Run cold water from the dispenser for 2–3 gallons or 5–7 minutes, whichever comes first. This clears air and any loose particles from the new cartridge. Expect a brief initial surge of water as the lines fill again.
Tip: Using cold water ensures proper flushing without heating the contents. - 8
Reset indicator and verify
If your fridge has a filter indicator, reset it according to the manual. Check for leaks around the housing after flushing. Confirm the water flow is steady and the water appears clear and tastes normal before resuming regular use.
Tip: Record the replacement date for future maintenance reminders.
FAQ
Is the ge xwfe refrigerator water filter compatible with aftermarket filters?
OEM filters are generally recommended to ensure fit, filtration performance, and warranty protection. Some certified aftermarket options may fit, but verify certifications and model compatibility before use.
OEM filters are usually best for fit and warranty; some certified aftermarket options may work, but check compatibility first.
Do I need to shut off the water supply before replacing the filter?
Yes. If your fridge has an accessible shut-off valve, close it to minimize drips during replacement. Open a nearby faucet briefly after to relieve pressure before starting.
Turn off the water supply if you have a valve, then relieve pressure before you begin.
Why is there still sediment or taste after replacement?
Flush the new cartridge for several minutes and check for proper seating. Air pockets or micro-particles can cause temporary taste or clarity issues that improve with continued flushing.
Flush for several minutes to clear air and residues; taste should improve with time.
How often should I replace the ge xwfe filter?
Typically every 6 months under normal use, or sooner if taste, odor, or flow declines. High usage may require more frequent changes.
Most people replace every six months, sooner if you notice changes in taste or flow.
What if a leak appears after replacement?
Power down, re-seat the cartridge, inspect O-rings, and ensure the housing is sealed. If leaks persist, consult a technician or refer to the manual for warranty guidance.
If a leak shows up, recheck seating and seals; contact a technician if it continues.
Does replacing the filter affect my refrigerator warranty?
Replacing a filter with an OEM or certified compatible cartridge generally does not void warranty. Always verify warranty terms and keep replacement receipts.
Typically, using certified replacements keeps warranty intact; save receipts.
Watch Video
Top Takeaways
- Identify the correct cartridge before purchase.
- Shut off water and protect surfaces during replacement.
- Install the filter correctly and tighten just enough.
- Flush the system and verify water quality before use.
- Record replacement date and maintain regular maintenance.