Why is Refrigerator Not Dispensing Water: Urgent Troubleshooting for Homeowners
Urgent troubleshooting guide for why your refrigerator isn't dispensing water. Learn quick checks, diagnostic flow, and step-by-step fixes to restore safe water flow.

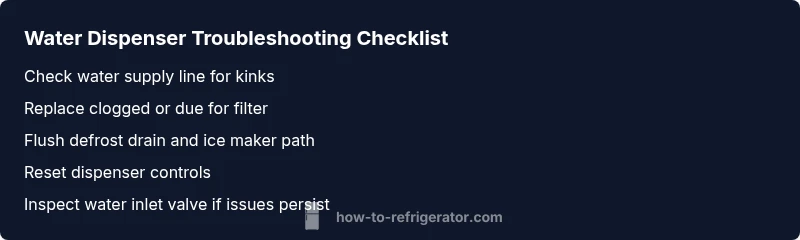
If your refrigerator isn’t dispensing water, the most likely culprits are a blocked water line, a frozen defrost drain, or a dirty filter. Start with the simplest checks: inspect the water filter, confirm the supply line is kink-free, and reset the dispenser controls. If the issue persists, consider professional service to avoid leaks or further damage.
why is refrigerator not dispensing water
If you’re asking why is refrigerator not dispensing water, you’re not alone. In most homes this problem comes down to three root causes: problems with the water supply, a blocked or frozen drainage path, and control or sensor issues in the dispenser system. The goal is to verify quick, safe fixes before getting into more involved repairs. This guide is written for homeowners and uses practical, low-risk steps to restore normal water flow. Remember that even simple fixes can involve water lines and electrical components, so proceed with caution and use the safety tips outlined later in this article.
Check the Water Supply and Filter
Begin with the simplest checks. Ensure the household water supply to the fridge is fully on and that the service valve is open. Inspect the external water line for kinks, bulges, or visible leaks. If your fridge uses a replaceable water filter, locate the filter compartment, remove the old cartridge, and install a new one following the model’s instructions. A clogged or old filter reduces water pressure and can stop dispensing altogether. After replacing the filter, run water through the dispenser for several seconds to clear air pockets. If your model has a filter indicator, reset it according to the manual.
Inspect the Defrost Drain and Ice Maker
A common hidden culprit is a blocked defrost drain. When the drain is clogged with ice or residue, the dispenser can fail to supply water. Check the back panel or bottom of the fridge for signs of ice buildup or pooling water. If you suspect a blockage, use warm (not hot) water to melt it away and flush the drain with a gentle stream. Also inspect the ice maker if your model shares the same water line. Ice maker issues can mirror dispenser problems—ensure the ice maker is not jammed and is cycling normally. If you see ice buildup around the ice maker, perform a cautious defrost and clear the ice chute.
Examine the Dispenser Controls and Lock
Dispenser control panels can be locked or stuck. Look for a “Lock” or “Child Lock” indicator and disable it if active. On many models, there's a separate dispenser switch that could have been turned off by accident. If your panel feels unresponsive, try a soft reset: unplug the fridge for 5–10 minutes or switch the circuit breaker off and back on. After power restoration, test the dispenser with a brief press rather than a full hold to confirm proper operation. If the panel remains unresponsive, the issue may lie with the control board or sensor, which typically requires professional assessment.
Safe Reset and System Diagnostics
Resetting can clear minor glitches in many refrigerator water systems. Start by turning off the fridge (or unplugging) for 5–10 minutes, then power it back on. Check the dispenser again; if you still don’t get water, proceed to a more detailed check of the water inlet valve (behind the grille at the bottom or the back) and the wiring harness. A multimeter can test the valve’s coil resistance, but if you’re not comfortable with electrical testing, this step is best left to a technician. While testing, watch for any buzzing sounds or heat near the valve—these can indicate a failing component.
Preventive Maintenance and Quick Fixes
Regular maintenance goes a long way toward preventing dispenser failures. Schedule periodic replacement of the water filter per manufacturer recommendations, and clean the filter housing to reduce mineral buildup. Inspect the water supply line for wear and replace any brittle tubing. Keep the defrost drain clear by performing a light defrost cycle if you notice pooling. Finally, maintain a simple log of any dispenser oddities—this helps you spot patterns before a fault escalates. By addressing small issues promptly, you minimize hazardous leaks and costly repairs.
When to Call a Professional and What to Expect
If you complete the above steps and still have no water flow, it’s time to call a professional. A trained technician can safely test the water inlet valve, defrost drain, and control board with the right tools. When you schedule service, have your model number, serial number, and a brief history of symptoms ready. This makes diagnostics faster and helps avoid unnecessary parts replacement. The How To Refrigerator team recommends documenting any error codes from the display and noting whether the issue coincides with defrost cycles or ice production, as patterns guide accurate repairs.
Steps
Estimated time: 30-45 minutes
- 1
Check water supply and filter
Verify the home water supply to the fridge is on and the dedicated shutoff valve is open. Inspect the external line for kinks or damage. If a filter is installed, replace it or clean the housing according to the manufacturer’s instructions.
Tip: Always shut off the water supply before handling lines to avoid sprays. - 2
Inspect the dispenser lock and control
Look for a child lock or dispenser lock indicator. If present, disable it and test the lever or button again. If the panel is unresponsive, perform a soft reset by powering the unit off for a few minutes and then back on.
Tip: A quick reset can clear many minor electronic glitches. - 3
Examine the defrost drain and ice maker
Check for ice buildup around the defrost drain; melt any blockage with warm water and clear the drain path. If your ice maker shares the same line, ensure it’s not jammed and that ice production is normal.
Tip: Don’t use sharp objects to clear ice; this can damage components. - 4
Test the water inlet valve
Access the valve behind the grille or at the back of the fridge and check for continuity with a multimeter if you’re comfortable. Look for signs of corrosion or corrosion on terminals. Replace if testing indicates a fault.
Tip: If you’re unsure about electrical testing, skip to professional help. - 5
Reset and power cycle the unit
Power down the fridge for 5–10 minutes, then restore power and re-test the dispenser. Listen for valve operation and ensure water begins flowing after reset.
Tip: Some models require a specific reset sequence in the user manual. - 6
Know when to call a professional
If leaks occur, if the valve shows no continuity, or you still have no water after checks, contact a qualified technician. Document symptoms, model, and any error codes for faster service.
Tip: Keep your warranty info handy if applicable.
Diagnosis: Dispenser won’t release water
Possible Causes
- highBlocked or kinked water supply line
- highFrozen defrost drain leading to drainage blockage
- highClogged or expired water filter
- mediumFaulty water inlet valve or dispenser valve
- lowDispenser lock/controls engaged or control board fault
Fixes
- easyInspect line for kinks, leaks, and proper attachment at both ends; straighten if needed.
- easyReplace the water filter if it’s due or clogged
- easyDefrost and flush the defrost drain to remove ice or debris
- mediumTest or replace the water inlet valve and verify power to the valve
- easyReset dispenser controls and perform a power cycle of the fridge
FAQ
What is the most common reason a water dispenser stops working?
The most common causes are a clogged filter, a kinked water line, or a frozen defrost drain. Start with these simple checks before exploring more complex parts.
The most common causes are a clogged filter, a kinked line, or a frozen drain. Start with these checks first.
Can I fix the dispenser myself, or do I need a technician?
Many fixes are doable for homeowners, such as replacing the filter, straightening lines, and resetting the controls. If you find leaks, valve testing, or electrical concerns, contact a professional.
Many fixes are DIY-friendly, but call a pro if you see leaks or suspect electrical issues.
Why does the dispenser stop after I replace the filter?
After replacing the filter, run water through the dispenser to purge air. Some models require a reset of the filter indicator to reflect the new cartridge.
Run water to purge air after a filter change, and reset the indicator if needed.
Why is there no water even though ice is making?
Ice makers sharing the same line can affect water flow. Check the ice maker for jams and ensure the line isn’t blocked. If ice is forming abnormally, defrost may be needed.
If ice is forming abnormally or the line is blocked, the water flow can be affected. Check both ice maker and line.
Is it safe to drink water after doing these checks?
Yes, as long as the dispenser is functioning correctly and there are no leaks. If you’re unsure about any step, err on the side of caution and have a professional check.
Yes, drinkable as long as there are no leaks and the dispenser works normally.
What information should I have ready when I call a technician?
Have your fridge model number, serial number, symptoms, and any recent maintenance on hand. Also note error codes from the display if available.
Have the model and symptoms ready when you call a technician.
Watch Video
Top Takeaways
- Inspect water supply, valve, and filter first
- Defrost drain and ice maker are common hidden causes
- Reset dispenser controls before more invasive steps
- Know when to call a professional for safety and warranty
- Prevent issues with regular filter changes and line checks