Whirlpool Gold Refrigerator: Repair & Maintenance Guide
Comprehensive repair and maintenance guide for Whirlpool Gold refrigerators. Learn diagnostics, safety, step-by-step maintenance, parts when to DIY, and how to find reliable help. From coil cleaning to door seals, this expert How To Refrigerator guide helps homeowners maximize cooling efficiency and appliance lifespan.

This guide helps homeowners diagnose common Whirlpool Gold refrigerator problems, verify model-compatible parts, and perform safe, practical maintenance steps. You’ll check cooling performance, frost buildup, door seals, condenser coils, and drainage, then apply fixes or plan professional service if needed. The goal is reliable cooling, energy efficiency, and a longer appliance life.
About Whirlpool Gold Refrigerators
Whirlpool Gold refrigerators are designed to balance performance with energy efficiency, offering features like adjustable temperature control, advanced defrost systems, and access to fresh-food storage options. According to How To Refrigerator, these models often deliver dependable cooling when properly maintained, but like any appliance they can develop issues over time. Common concerns include uneven cooling, frost buildup in the freezer, condenser coil dust, and door seals that fail to seal properly. Understanding the typical components—compressor, condenser coils, evaporator, thermostat, defrost heater, and drainage system—helps homeowners diagnose problems accurately and avoid unnecessary service calls. As you read, keep in mind model-specific differences; Whirlpool Gold lines span several configurations, and some parts or layouts may vary slightly between freestanding and French-door variants. With the right approach, most routine maintenance tasks are safe for DIY enthusiasts and can significantly improve efficiency and longevity.
In practical terms, a Whirlpool Gold refrigerator relies on a steady interior temperature, clean coils, and intact seals. If you notice warm air at the door, unusual frost patterns, or water pooling, start with the basics: power, seals, coils, and drainage. The How To Refrigerator team emphasizes that simple inspections and cleanings can recapture cooling performance and reduce energy waste. By following a structured process, homeowners can quickly determine whether a problem is user-fixable or requires professional service. This article provides a practical roadmap to help you work confidently on your Whirlpool Gold model while minimizing risk.
Common Symptoms You Might See
Many homeowners first notice symptoms when a Whirlpool Gold refrigerator starts behaving differently from its usual quiet operation. Common signs include inconsistent cooling between the fridge and freezer sections, excessive frost buildup in the freezer compartment, moisture or puddling around the base or interior, and doors that fail to seal tightly, leading to energy waste and uneven temperatures. Another frequent clue is an unusually high electrical bill without a clear reason, suggesting the unit is running longer than necessary to maintain set temperatures. Pay attention to noises from the condenser fan, motor, or ice maker, as unusual buzzing or rattling can indicate loose components, a failing fan, or restricted airflow. By documenting when symptoms occur, you can map potential causes to specific subsystems, making diagnostics more efficient and less stressful. This approach also helps when communicating with a technician, should you need professional support.
Safety First: Before You Start
Before performing any maintenance or troubleshooting on a Whirlpool Gold refrigerator, safety must come first. Start by unplugging the unit to eliminate the risk of electrical shock, then switch off the main power at the circuit breaker if you’re comfortable doing so. Keep children and pets away from the work area. Use a non-slip mat and ensure you have adequate lighting to clearly view all components. When inspecting coils or removing panels, take photos or make notes to preserve wiring and component orientation. Do not use water to rinse electrical components, and avoid using sharp tools that could puncture refrigerant lines or damage metal panels. If you must handle heavy parts such as doors or hinges, enlist a helper or use proper lifting techniques to avoid strain or injury. If you smell gas or notice refrigerant odors, leave the area immediately and contact a professional.
Quick Diagnostics: Is It Cooling, Not Cooling, Frost, Leaks?
Start with a simple temperature check: set the refrigerator to the manufacturer’s recommended temperature (usually around 37-40°F / 3-4°C for the fridge and 0°F / -18°C for the freezer). If cooling is weak, confirm that the evaporator fan is running and that air can circulate from the freezer to the fresh food compartment. Look for frost buildup on the evaporator coil inside the freezer; heavy frost can indicate a defrost system issue. Check for water under the unit or around the drain pan, which may signal a clogged defrost drain or a cracked drain tube. Inspect door gaskets for tears or gaps that could let warm air in, causing the compressor to run excessively. If the coils are dusty or blocked, airflow is compromised and efficiency drops. These diagnostic steps lay the groundwork for targeted fixes.
In Whirlpool Gold models, a common fault is a blocked defrost drain leading to ice blockages that impede proper drainage. Quick tests include pouring a small amount of warm water at the defrost drain to see if it clears; do not force anything that could damage the tube. If the evaporator fan is silent or you hear irregular sounds when the door is opened, this can point to fan or control board issues. Document any abnormal noises, temperatures, or frost patterns to guide repairs and ensure you select the correct replacement parts.
Maintenance You Can Do: Cleaning and Inspections
Routine maintenance can dramatically improve performance and energy efficiency. Begin with a clean, dust-free exterior and interior. Remove shelves and wipe down with mild soap and water to prevent cross-contamination. Vacuum or brush condenser coils every 6-12 months, depending on dust levels, to maximize airflow and cooling efficiency. Inspect door seals by closing a dollar bill (or a thin sheet of paper) in the door; if you can pull it out easily with resistance, the seal may be worn and require replacement. Clean the interior surfaces, check for mold, and ensure the drainage tube is clear. Flush the defrost drain with warm water and a mild cleaner if you notice slow drainage or frost accumulation along the rear wall. Finally, verify that the ice maker and water dispenser lines (if equipped) are free of leaks and properly secured. Maintenance after these steps keeps your Whirlpool Gold running smoothly and helps prevent future issues.
Proactive maintenance reduces strain on the compressor and helps maintain energy efficiency. The goal is to maintain a steady interior climate while avoiding moisture buildup that can lead to mold or corrosion. Implement a simple routine: quarterly coil checks, semi-annual seal inspections, and an annual interior wipe-down. By staying consistent, you’ll catch wear before it becomes a costly repair.
Maintaining your Whirlpool Gold refrigerator also means using proper cleaning agents. Avoid harsh chemicals that can degrade gaskets or interior finishes. Use a solution of mild dish soap and warm water for most surfaces, and a non-abrasive cleaner for chrome handles or stainless-steel surfaces. Dry thoroughly to prevent streaks and water spots. If your model has a crisper humidity control or multi-use drawer, keep the humidity settings as recommended by the manual to preserve produce efficiently.
Replacing Parts: When to DIY vs. Call a Pro
Replacing critical components like the thermistor, thermostat, defrost heater, or sealed refrigeration system parts can be risky if you’re not experienced. For minor items like worn door seals, end-user gaskets, or a defective ice maker with basic wiring, a confident DIY approach is often feasible with proper safety precautions. If you’re uncertain about the refrigerant system, sealed lines, or soldering on copper tubing, it’s safer to call a professional. In many regions, a certified technician can diagnose and replace defrost components, temperature sensors, or control boards with proper handling and warranty coverage. When attempting DIY repairs, always disconnect power, discharge capacitors where applicable, and consult the service manual for model-specific guidance. If you do replace parts yourself, document the date and part numbers for future maintenance and warranty records. A cautious approach saves time and reduces the risk of further damage.
Troubleshooting Step-by-Step Scenarios
Scenario A: Weak cooling after a defrost cycle
- Step 1: Ensure the evaporator fan is running and air is circulating inside the fridge and freezer. Step 2: Check the defrost drain for blockages and clear any frost buildup. Step 3: Inspect coil cleanliness and clean as needed. If temperatures stabilize after these steps, monitor for 24 hours to confirm improvement.
Scenario B: Frosted evaporator and water leaks
- Step 1: Defrost the freezer fully by unplugging for 2-4 hours or using a manual defrost cycle if available. Step 2: Inspect the defrost heater and thermostat for faults; replace if necessary. Step 3: Clear the drain line and verify proper drainage to prevent future frost. If frost returns, this may indicate a faulty defrost timer or control board that requires professional service.
Seasonal Maintenance Schedule
Adopt a simple seasonal schedule to keep your Whirlpool Gold refrigerator performing at its best. Spring: clean coils, inspect door seals, and test thermostat accuracy. Summer: verify air circulation, adjust door alignment, and reassess gasket wear due to more frequent door openings. Fall: reseal gaskets if needed, inspect drain lines and condensate pans, and check humidity controls in crisper drawers. Winter: verify that the unit maintains safe temperatures when ambient temperatures drop; check for ice buildup around the defrost region and clear condensate lines as necessary. A consistent schedule helps catch problems early and minimizes energy costs over the season.
How To Find Reliable Help and Parts
When reliability matters, sourcing authentic parts and certified technicians is essential. Start by checking Whirlpool’s official parts store or authorized service centers for model-specific components such as door seals, thermostats, defrost heaters, and condenser coils. Compare pricing from reputable retailers, and note warranty options on replacement parts to protect your investment. For hands-on maintenance, many homeowners find value in local appliance repair specialists with good reviews and transparent pricing. Always confirm that any technician is licensed or insured where required by your area. Keeping a digital log of repairs, part numbers, and service dates helps with ongoing maintenance and resale value.
Tools & Materials
- Phillips head screwdriver(for control panel and access screws)
- Flathead screwdriver(for prying panels safely)
- Nut driver set(for hinge removal if needed)
- Multimeter(for voltage checks on sensors (if comfortable))
- Soft brush or coil cleaning brush(to clean condenser coils)
- Vacuum with narrow nozzle(to remove dust from tight spaces)
- Flashlight(to inspect coils and evaporator area)
- Bucket and towels(for defrost drainage spills)
Steps
Estimated time: 60-90 minutes
- 1
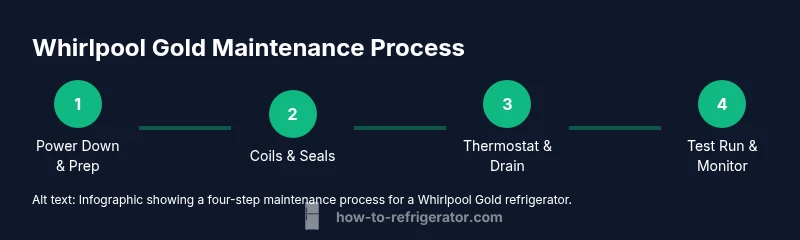
Power down safely
Unplug the refrigerator from the wall outlet and switch off the circuit breaker if you’ll be touching wired components. This reduces the risk of electric shock while you inspect panels, coils, and sensors.
Tip: Double-check the unit is completely de-energized with a tester before touching any internal parts. - 2
Access panels and document
Remove the upper or rear panels to access the condenser coils and evaporator. Take clear photos or label wires to preserve orientation for reassembly.
Tip: Label wires with tape and use a magnetic tray for screws to avoid losing small parts. - 3
Clean condenser coils
Gently brush away dust from coils and use a vacuum to remove stubborn debris. Clean coils improve airflow and reduce compressor workload.
Tip: Do not use liquid cleaners on exposed coils; moisture can damage electrical components. - 4
Inspect door seals
Close the door with a dollar bill test to check seal integrity. Replace gaskets if there are torn edges or air leaks that allow warm room air inside.
Tip: Carry a spare gasket and replace only if you confirm the leak path by the bill test. - 5
Test thermostat and temperature
Set the thermostat to the recommended range and measure interior temperatures with a thermometer. If readings stay off after several hours, the thermostat or sensor may need replacement.
Tip: Document temperature readings at several points in the fridge and freezer for accuracy. - 6
Check defrost drain and frost
Inspect the defrost drain for blockages and clear frost buildup around the evaporator using warm water. Ensure the drain pan is in place and not overflowing.
Tip: Avoid using sharp objects to unblock drains; use a flexible pipe cleaner instead. - 7
Interior and moisture control
Wipe interior surfaces with mild soap and water. Dry thoroughly and ensure humidity controls are set to recommended levels for produce storage.
Tip: Keep the interior dry to prevent mold growth and odors. - 8
Run test cycle and monitor
Plug back in and run a test cycle for several hours. Monitor for consistent temperatures, noise levels, and drainage behavior to verify repairs.
Tip: If issues persist, record readings and plan professional service with your notes.
FAQ
Why is my Whirlpool Gold refrigerator not cooling as expected?
Most cooling issues stem from airflow problems, dirty condenser coils, a faulty thermostat, or an interrupted defrost cycle. Start with coil cleaning, door seal inspection, and thermostat checks. If temperatures don’t stabilize after these steps, professional assessment may be required.
Common causes are airflow issues, dirty coils, or thermostat faults. Start with cleaning the coils and inspecting seals, then check the thermostat before seeking professional help.
How often should I clean the condenser coils on a Whirlpool Gold?
Clean coils at least every 6 to 12 months, more often in dusty environments. Regular cleaning improves airflow and reduces energy consumption.
Aim to clean the condenser coils every 6 to 12 months, more often if you have a dusty kitchen.
Can I defrost frost buildup with a hair dryer on a Whirlpool Gold model?
No. Avoid heat guns or hair dryers directly on coils or evaporator; they can damage components or cause electrical hazards. Use natural defrost or follow the model-specific defrost procedure in the manual.
Don’t use a hair dryer on the coils. Use the manual defrost method and let the unit defrost safely.
What tools do I need for DIY maintenance on Whirlpool Gold?
A basic toolkit including screwdrivers, a multimeter, a soft brush for coils, a vacuum attachment, and towels is sufficient for most routine checks and cleaning. For safety, confirm you can safely work around electrical components.
A screwdriver set, a multimeter, coil brush, vacuum attachment, and towels cover most DIY tasks.
When should I replace the water filter on a Whirlpool Gold refrigerator?
Replace the filter according to the manufacturer’s schedule, typically every 6 to 12 months, or sooner if you notice decreased flow or strange tastes in water.
Replace the filter every 6 to 12 months or when flow seems reduced.
Is it safe to unplug a running fridge for maintenance?
Yes, as long as you follow safety steps: unplug the unit, turn off the circuit, and ensure the interior remains closed to preserve cold. Do not unplug during active defrost or if you’re unsure about wiring.
Unplug safely, turn off power at the circuit, and keep doors closed to retain cold while you work.
Watch Video
Top Takeaways
- Identify root causes with a structured diagnostic routine
- Keep coils clean to restore efficiency
- Check seals and drainage to prevent frost and leaks
- Know when to DIY and when to call a pro
- Document maintenance for future reference