When to Replace Refrigerator Water Line: A Practical Guide
Learn how to identify signs that your refrigerator water line needs replacement, choose the right line, and follow a safe, step-by-step replacement process to prevent leaks and water damage.

You can determine when to replace the refrigerator water line by recognizing signs such as leaks, cracks, persistent kinks, or worn fittings. Plan inspections every few months and replace the line if you notice cracking, stiff deformation, or mold near the connections. This proactive approach helps prevent water damage and costly emergencies, especially around ice makers.
Why replacing the refrigerator water line matters
A worn or damaged water line is not just about a soggy kitchen—it can lead to mold, water damage, and higher utility costs if leaks go undetected. The ice maker and water dispenser rely on a clean, secure connection to supply a steady flow. When the line shows signs of aging, or if your fridge has started to leak at the back or underneath, replacing it can prevent costly repairs down the line. According to How To Refrigerator Team, proactive monitoring and timely replacement are more effective than waiting for a flood. Start by inspecting the visible portion of the line and the fittings for cracks, corrosion, or kinks. Even if you don’t see a puddle, hidden leaks behind cabinetry are common and can cause hidden rot and mildew. The goal is to replace worn segments before they fail completely, ideally during a routine maintenance window rather than during a crisis. Regular checks not only protect your home’s interior but also ensure your family has dependable access to clean, filtered water and ice. Remember, a small leak can escalate quickly, so treating the line as a maintenance item is smart home upkeep.
In addition to safety, replacing aging lines can improve water pressure and reduce the chance of mineral buildup inside your fridge. Over time, mineral deposits can accumulate and narrow the line, causing sluggish ice production or weak water flow. If your ice maker stops producing consistently or you notice air bubbles in the water stream, it may be time to evaluate the line’s condition. The How To Refrigerator approach emphasizes practical, non-technical steps homeowners can perform without professional help when the situation is clearly contained. If you’re ever unsure, start with a visual inspection and a simple leak test before committing to a replacement.
Signs the water line wears out or fails
Look for any damp spots, water pooling at the base of the refrigerator, or mold growth near the back panel where the line runs. Cracks, splits, or cracks in the clear tubing indicate imminent failure. A line that feels stiff, brittle, or easily kinks when you move the fridge is often past its prime. If you notice reduced water pressure from the dispenser or ice maker, or hear a faint dripping sound even when the valve is closed, that’s a warning sign. Inspect both ends of the line—the connection to the shut-off valve and the connection to the fridge—because a failing seal can be the root cause even if the line itself looks OK. Finally, check for corrosion or rust around metal fittings, which can indicate hidden leaks. If any of these signs appear, plan a replacement before a full leak occurs. By catching wear early, you can prevent water damage to cabinetry, flooring, and electronics in your kitchen.
Understanding line options and compatibility
Refrigerator water lines come in several materials and configurations. Braided stainless steel lines with 1/4-inch compression fittings are common for durability and ease of installation, while older vinyl or rigid plastic lines may still be in use on some models. When choosing a replacement, measure the distance from the shut-off valve to the fridge neck with the door closed, allowing a little slack for movement. Confirm that the new line’s fittings match your fridge’s inlet and the shut-off valve outlet. It’s also useful to check your refrigerator’s manual or manufacturer’s website for the recommended line type and length. If your setup includes a dual dispenser or an ice maker with a filtration system, you may need a longer run or a line with additional fittings. Compatibility isn’t just about length; it’s about matching the thread size, compression type, and assurance that there are no sharp bends that could restrict flow. For most households, a braided stainless steel line with standard 1/4-inch fittings provides reliability and a straightforward installation path.
Safety first: planning and precautions
Before touching any plumbing or electrical components, prioritize safety. Start by unplugging the fridge or turning off the circuit breaker to remove the risk of shock while you work near water. Shut off the main water supply or the dedicated shut-off valve feeding the refrigerator line, then release pressure from the line by opening the door dispenser for a few seconds. Prepare the area with towels or a bucket to catch any residual water, and ensure the floor is dry to prevent slips. Keep a flashlight handy to inspect tight spots behind the fridge. If there’s visible mold or you encounter signs of a leak that pools behind cabinetry, consider calling a licensed plumber, especially if the home uses galvanized piping or you’re unsure where the shut-off valve is located. Maintaining dry hands and clean connections will help you avoid cross-threading fittings. A well-planned replacement minimizes risk and keeps your kitchen safe throughout the process.
How climate and usage affect line wear
Humidity, temperature fluctuations, and heavy usage can accelerate wear on a refrigerator water line. In humid kitchens, condensation can form around connections, which over time may encourage corrosion or leaks. Fridges with frequent ice production or long periods of heavy use may experience more rapid wear at the fittings. If your kitchen is near a heat source or in an area with frequent temperature swings, inspect the line more often—aim for a quick visual check every few months. If the line is routed through tight spaces or around sharp corners, the risk of kinking or fatigue increases. When you replace a line, choose a more flexible, longer option with gentler bends and avoid routing the line through tightly constrained channels. Regular maintenance reduces the likelihood of sudden leaks and the associated water damage, which is especially important in homes with basements or wood flooring prone to moisture damage.
Common mistakes to avoid during replacement
Many homeowners make avoidable errors that lead to leaks or line failure. Do not over-tighten fittings; this can strip threads or damage compression rings. Avoid cutting lines with rough edges or using damaged tools that can nick the tubing, which becomes a leak point. Ensure you use the correct line diameter and compatibility with your shut-off valve and fridge inlet—mismatched fittings are a frequent cause of leaks. Don’t skip test leaks after installation; run water through the dispenser for several minutes and inspect both ends for moisture. Never reuse old compression ferrules if they look damaged. Lastly, store the old line safely and dispose of any salvageable parts properly. Taking attention to every connection and performing a thorough leak test helps you avoid a soggy kitchen and potential electrical hazards.
Maintenance habits to extend line life
Establish a simple maintenance routine that includes a visual inspection of the entire run at least twice a year. Look for cracks, discoloration, or signs of moisture near connectors. Replace aging lines proactively when you see wear or if the line is more than a few years old. Keep the shut-off valve accessible and label it clearly so future homeowners can quickly isolate water in case of a leak. Use a high-quality replacement line with corrosion-resistant fittings and avoid reusing worn components. When reinstalling, apply gentle, even pressure and confirm the path of the line is free of sharp bends. A planned approach to maintenance can dramatically reduce emergency plumbing calls and protect your home from water damage.
Quick maintenance checklist after replacement
- Inspect both ends for moisture after first run
- Run ice maker and dispenser for 2–3 minutes to flush the line
- Look for damp spots within 2–3 hours of testing
- Re-check the area after 24 hours for any slow leaks
- Store spare fittings and a small towel set in the utility area for future use
Tools & Materials
- Braided stainless steel refrigerator water line (1/4 inch compression fittings)(Choose length with 2–4 inches of slack; avoid tight bends that pinch the line)
- Adjustable wrench(One or two wrenches may be needed; ensure clean jaws to avoid rounding nuts)
- Bucket or shallow pan(Catch residual water; position under connections)
- Towels or rags(Dry the area and absorb any spills during work)
- Scissors or utility knife(Trim line ends square and remove any damaged sections)
- Measuring tape(Measure distance accurately from valve to fridge inlet)
- Safety gloves(Protect hands when handling metal lines and tools)
- Flashlight(Illuminate tight spaces behind the fridge)
Steps
Estimated time: 45-60 minutes
- 1
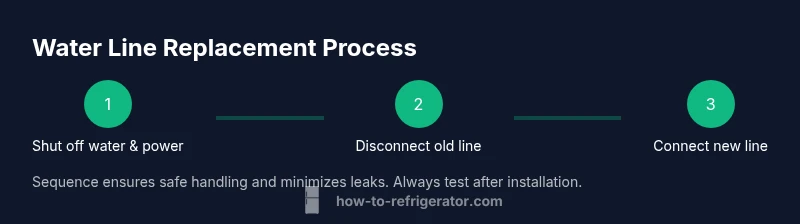
Shut off water and power
Unplug the refrigerator and close the dedicated shut-off valve feeding the line. Relieve pressure by briefly running the dispenser, then place a towel under the connection to catch drips.
Tip: Have a second person nearby to help stabilize the fridge while you work. - 2
Disconnect the old line
Carefully loosen fittings at the valve and fridge inlet using an adjustable wrench. Detach the line and inspect the ends for wear or damage. Keep the bucket ready to catch any remaining water.
Tip: Take a photo of the old setup to reference alignment and thread direction. - 3
Prepare the new line
Inspect the new line for defects and measure to confirm length. Trim if needed and ensure the ends are clean and straight before installation.
Tip: Never reuse ferrules from a damaged line. - 4
Connect the new line
Attach the line to the shut-off valve first, ensuring a snug fit without overtightening. Connect the other end to the fridge inlet, keeping the line routed away from heat sources and sharp edges.
Tip: Hand-tighten first, then snug with the wrench, but stop if you feel resistance beyond normal tightening. - 5
Test for leaks
Turn the water back on and run water through the dispenser for several minutes. Check every joint for moisture and wipe dry; re-tighten if you see a slow drip.
Tip: Perform the test on a dry surface and watch closely for a few minutes after turning on.
FAQ
Can I replace the water line myself?
Yes, if you are comfortable with basic plumbing and follow safety steps. For complex piping or uncertain valve locations, consider a licensed professional.
Yes, you can replace it if you’re comfortable with basic plumbing and safety steps; otherwise, hire a pro.
What signs indicate the line needs replacement?
Look for damp spots, visible cracks, kinks, or reduced water flow from the dispenser. Any mold near fittings is a warning sign to replace and sanitize the area.
Damp spots, cracks, kinks, reduced water flow, or mold near fittings indicate replacement.
How long should a fridge water line last?
Lifespan varies with use and material. If you notice wear or are nearing the end of the expected service window, plan a replacement to avoid leaks.
Lifespan varies; replace if you see wear to avoid leaks.
Is it necessary to replace both ends of the line?
If both ends show signs of wear or corrosion, replace them; otherwise replacing the line may be sufficient if fittings are intact.
Replace line if both fittings show wear; otherwise check individually.
Do I need to hire a plumber for this?
Most homeowners can handle a standard 1/4-inch line replacement, but seek professional help if you encounter gas lines nearby, structural damage, or uncertain valve locations.
Most can DIY, but call a pro if you run into gas lines or uncertain valves.
Watch Video
Top Takeaways
- Inspect lines regularly for wear and leaks.
- Choose braided stainless steel lines for durability.
- Test connections thoroughly to prevent water damage.
- Shut off power and water before starting.
- Proper routing avoids kinks and heat exposure.