Water Inlet Valve for Whirlpool Refrigerators: Diagnosis and Replacement
Learn how to diagnose and replace the water inlet valve on Whirlpool refrigerators with clear, step-by-step instructions and safety tips for a DIY repair. Perfect for homeowners troubleshooting water-dispenser and ice-maker issues.

This guide helps homeowners diagnose and replace the water inlet valve for Whirlpool refrigerator models. Learn to identify symptoms such as no water, leaks, or irregular ice production, gather the right tools, and follow safe, step-by-step instructions to complete the repair confidently. Correct valve replacement restores ice maker and dispenser function while reducing the risk of leaks and water damage.
Introduction to the water inlet valve for Whirlpool refrigerators
The water inlet valve for Whirlpool refrigerator models sits at the back of the unit and acts as the gatekeeper for the ice maker and water dispenser. When it fails, you may experience no water flow, a leaky valve area, or ice that won’t fill properly. According to How To Refrigerator, understanding the valve’s role helps homeowners diagnose problems quickly and decide whether a DIY replacement is appropriate. The How To Refrigerator team found that many valve failures stem from mineral buildup, loose electrical connectors, or a clogged supply line. If you notice puddling near the base of the fridge or hear a faint hissing when you use the dispenser, you’re likely dealing with valve issues that merit closer inspection. The water inlet valve for Whirlpool refrigerator models is a common target for repair and maintenance, and the steps below will walk you through a safe replacement.
How a Whirlpool water inlet valve works
Whirlpool refrigerators use a solenoid-operated water inlet valve to control water flow to the ice maker and dispenser. When power is sent to the valve, the solenoid pulls a plunger that opens the water inlet port. The diaphragm or seat then regulates the amount of water that enters the fill tube. If the valve diaphragm is cracked, the solenoid sticks, or mineral buildup blocks the inlet, water flow can stop or become erratic. A faulty valve may also leak because seals wear out over time. Understanding this mechanism helps you diagnose symptoms and choose the correct replacement for your model.
Common symptoms indicating valve failure
- No water to the dispenser or ice maker
- Water leaks around the valve area or from tubing connections
- Ice maker stops filling or produces incomplete ice
- Frost build-up near the valve or unusual humidity around the back panel
- Slow or inconsistent water flow when the dispenser is used
These signs point to the valve as a likely culprit, but it’s wise to rule out other causes such as a blocked filter, kinked water line, or a faulty water filter before replacing the valve.
Tools and safety precautions before you replace
- Power off: unplug the refrigerator before starting any repair.
- Shut off the water supply to the fridge at the shutoff valve or main supply.
- Prepare a catch basin and towels to manage remaining water in the line.
- Work in a well-lit area with a flashlight to see back-panel fittings clearly.
- Clean the work area and lay out screws and small parts so nothing gets lost.
Safety note: This repair involves electrical components near water. If you are unsure about electricity or refrigeration wiring, consider contacting a professional. How To Refrigerator recommends careful, stepwise work and double-checking model-specific instructions for your Whirlpool unit.
Replacement overview: what to expect
Replacing the water inlet valve is a mid-difficulty DIY task for homeowners with basic hand tools. Expect to spend roughly 30–60 minutes for most Whirlpool models, depending on access to the valve and any model-specific variations. Before purchasing parts, verify compatibility with your refrigerator’s model number and review your manual for valve orientation. After installation, you’ll need to purge air from the line and test for leaks. A correctly installed valve should restore consistent water flow and eliminate leaks at the connection points when the dispenser is activated.
Replacement variations by model
Whirlpool models differ in valve mounting orientation and the location of the service panel. Some units place the valve behind a rear access panel, while others require partial disassembly of the kick plate or lower rear panel. The valve type may differ by inlet size or connector style. Always consult your model’s service guide for exact part numbers and connector configurations, and ensure your replacement valve matches the electrical connector and inlet size of your Whirlpool refrigerator. If your model uses a direct-connect copper line, you may need additional fittings to secure the new valve properly.
Post-replacement testing and maintenance tips
After installing the new water inlet valve, reattach any panels, reconnect the power, and slowly turn on the water supply. Listen for leaks, observe the dispenser while running a glass of water, and verify ice maker filling. Run several cycles to purge air and confirm stable operation. To reduce future valve issues, replace mineral-heavy filters on schedule, keep the water line free of kinks, and occasionally inspect the valve area for signs of wear or moisture buildup. A well-maintained inlet valve extends the life of your Whirlpool refrigerator and minimizes emergency calls.
Tools & Materials
- Replacement water inlet valve (Whirlpool-compatible)(Verify compatibility with your exact model number before purchasing)
- Torx or Phillips screwdriver set(Whirlpool units vary by model)
- Nut driver or socket set (1/4 or 5/16 inch)(To remove valve mounting hardware)
- Needle-nose pliers(For disconnecting small fittings and clamps)
- Multimeter (optional)(Test valve coil resistance if present)
- Dish towels or towels(Catch water and keep area dry)
- Flashlight(Illuminate back-panel area)
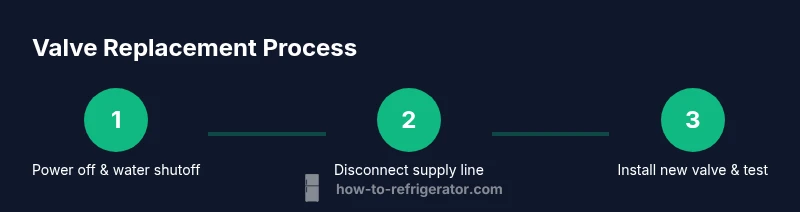
Steps
Estimated time: 30-60 minutes
- 1
Power down and shut off water
Unplug the refrigerator and close the home water valve feeding the fridge. This prevents electrical shock and minimizes water spills when you disconnect lines. Have a towel ready to catch residual water.
Tip: Keep the plug within reach and avoid touching metal parts with wet hands. - 2
Access the valve area
Carefully move the fridge away from the wall to access the rear panel or lower kick plate. Remove the access cover as needed to expose the water inlet valve and its connections.
Tip: A flashlight helps you see fittings and clips without forcing components. - 3
Disconnect water line from valve
Place a towel under the valve, then loosen and detach the supply line from the valve outlet. Allow any trapped water to drain into the basin or towel.
Tip: Be prepared for a small drip moment; use a container if necessary. - 4
Disconnect electrical connector and remove valve
Carefully unplug the electrical harness from the valve and remove the mounting screws or clip holding the valve in place. Set the old valve aside. Check for damaged seals or cracks.
Tip: Note the orientation of the valve so you can install the new one correctly. - 5
Install the new valve and reconnect
Mount the new valve in the same orientation as the old one, reconnect the water line and the electrical connector, and secure all mounting hardware. Ensure seals are snug but not over-tightened.
Tip: Do not twist hoses or bend connectors; align fittings straight to avoid leaks. - 6
Restore power and test for leaks
Reconnect the fridge to power, open the water valve slowly, and run ice maker and water dispenser to purge air. Inspect all connections for leaks and listen for any hissing sounds.
Tip: If you detect a leak, tighten fittings a touch more and recheck after a few minutes.
FAQ
What are the common signs that the water inlet valve needs replacement in a Whirlpool refrigerator?
Common signs include no water to the dispenser or ice maker, leaks around the valve, and intermittent water flow. If you notice frost near the rear or loud hissing when the dispenser is used, inspect the valve area for damage.
Look for no water, leaks, or unusual noises around the valve area—the valve is often the culprit.
Can I test the water inlet valve without replacing it?
Yes, you can test the valve by measuring coil resistance with a multimeter if your model provides a coil access. Also observe if applying power opens the valve for short bursts. If the coil shows open or burnt resistance, replace the valve.
You can test with a multimeter if your model supports it; otherwise, rely on symptoms and professional testing.
Is replacing the valve a DIY-friendly task?
For many homeowners, replacing the water inlet valve is a doable DIYproject with basic tools and careful handling of water lines and electrical connections. If you’re unsure, consult your manual or a professional.
It’s usually doable with basic tools, but proceed carefully and follow the model specific instructions.
Will replacing the valve fix leaks from the valve area?
If the leak comes from a worn gasket or cracked valve body, replacing the valve often resolves it. If leaks persist at fittings, recheck seal connections and hoses.
Replacing the valve commonly stops leaks caused by a worn valve, but check fittings as well.
Should I replace other components at the same time?
If you’ve had ongoing issues, consider replacing the water line or clamps along with the valve to ensure a secure seal and prevent future leaks. Check the filter status as well.
If there are multiple issues, replacing related parts can save you time and effort later.
What safety steps are essential during this repair?
Always unplug the fridge and shut off the water supply before starting. Work in a dry area with proper lighting and use towels to catch spills. If you’re unsure about wiring, seek professional help.
Unplug, shut off water, and work carefully with dry hands to avoid shocks.
Watch Video
Top Takeaways
- Identify valve symptoms early
- Shut off water and power before starting
- Verify compatibility before buying parts
- Test thoroughly for leaks after replacement
- Maintain a clean workspace to prevent lost parts