Refrigerator Won't Dispense Water: Fix Guide
Diagnose and fix a fridge that won't dispense water with a clear, step-by-step guide. Learn safe checks, filter replacement, line inspections, valve testing, and maintenance to restore reliable water flow.

Goal: Restore water dispensing by following a safe, methodical checklist. Start by powering down, then inspect the water supply line for kinks, test the water inlet valve, replace a clogged filter, and confirm the dispenser mechanism functions. If the problem persists, escalate with professional service. This quick-start approach saves time and avoids unnecessary component replacements.
Why refrigerator won't dispense water
In many homes, a refrigerator that won't dispense water is a solvable problem rather than a failing unit. A common culprit is a clogged water filter or a kinked water line, but other components such as the water inlet valve or dispenser switch can also fail. The key is to approach the diagnosis in a safe, systematic way. According to How To Refrigerator, most dispenser issues stem from simple, fixable causes rather than a full replacement. Start with the easiest checks and work your way to electrical tests only if the basic steps don't restore function. The goal is to restore consistent water flow from the door dispenser without creating leaks or electrical hazards.
How the water dispensing system works
Understanding the path water takes helps you locate the failure point quickly. Water travels from the house supply through a shut-off valve, along a flexible line to the fridge, then into the door dispenser or ice maker. The dispenser is controlled by a switch and an electromagnetic valve (solenoid) that opens the flow when you press the lever. A clogged filter or frozen line can block flow before it reaches the dispenser. Regular maintenance keeps the cycle smooth and reduces the chance of leaks.
Common failure modes and symptoms
Dispenser no longer releases water when you press the lever can indicate several issues: a clogged or old water filter, a kinked or frozen water line, a faulty water inlet valve, a defective dispenser switch, or an ice maker that blocks the line. You might also notice a leak behind the fridge, reduced water pressure, or unusual noises when attempting to dispense. Documenting symptoms helps you choose the right fix and decide if a pro is needed.
Safety first: unplug, shut off water, and prepare
Before you touch anything, unplug the fridge and turn off the water supply to prevent leaks. Have a towel or bucket handy for spills. If you must access the back panel, use a properly rated screwdriver and avoid touching exposed wires. Work in a well-lit area and keep a small container for removed parts. Safety ensures you don’t accidentally create an electrical or water hazard while diagnosing the problem.
Check and replace the water filter
Filters remove minerals and sediment that can hamper flow. A clogged filter is one of the most common reasons for a water dispenser to stop working. Locate the filter (often inside the fresh-food compartment or at the rear), remove it per the manual, and inspect for dirt or calcification. If it looks dark or discolored, replace it with the same type. After installation, run the dispenser for a few minutes to clear air and check for steady flow.
Inspecting the water supply line and connections
Check the supply line for visible kinks, crimps, or leaks behind the refrigerator. Gently tug on the line to ensure it’s fully seated at the valve and at the dispenser inlet. If you see grime or mineral deposits around fittings, clean with a damp cloth and reconnect. If the line is pinched by the hinge or a poorly placed cable, rearrange to restore proper clearance. A loose or damaged line is a frequent cause of reduced or blocked flow.
Testing the water inlet valve and dispenser switch
The inlet valve controls water flow into the fridge and can fail with age. Use a multimeter to check continuity across the valve coils and verify the valve opens when the dispenser is pressed. If it reads open or closed in an unexpected state, replace the valve. The dispenser switch is a separate component that tells the control board to open the valve; test with a continuity checker and replace if needed. If you’re uncomfortable with electrical testing, stop and consult a technician.
Ice maker interference and defrost drain considerations
Sometimes the ice maker or defrost drain can cause downstream water issues. Ice buildup can restrict water flow to the dispenser, and a blocked defrost drain can create frost conditions that affect the entire system. If you suspect ice buildup, manually harvest ice and watch for restored flow after a short cycle. If the defrost drain is blocked, clear it using the recommended method in your manual, ensuring you don’t damage interior components.
When to replace parts vs. DIY fixes
Not every problem benefits from a full replacement, but some failures are more economical to swap than repeatedly troubleshooting. If the water inlet valve or dispenser module shows signs of electrical failure, or if the line is permanently kinked, a replacement is often the most cost-effective solution. If you’re comfortable with basic tools and have a good manual, you can perform most checks and simple replacements yourself, reducing downtime and repair costs.
Preventive maintenance and authority sources
To minimize future issues, replace filters on schedule, inspect lines for wear, and keep the dispenser area clean and dry. How To Refrigerator analysis indicates that routine maintenance reduces downtime and extends appliance life. For further guidance and verified references, consult authoritative resources such as Energy.gov and the Consumer Product Safety Commission. Keeping up with these practices helps maintain a reliable water dispenser and prevents small problems from becoming bigger headaches.
Tools & Materials
- Phillips head screwdriver(Use size #2 Phillips for most screws on dispenser panels)
- Flat-head screwdriver(Helpful for delicate prying near grills)
- Multimeter(Check continuity on valve coils)
- Pliers(Grip clamps and gently pull lines)
- Replacement water filter(Use the exact filter type specified for your model)
- Replacement water inlet valve(Only if testing shows valve failure)
- Towels or absorbent cloth(Prepare for leaks and spills)
- Safety gloves and goggles(Personal protection during disassembly)
- Bucket or tray(Contain any residual water)
Steps
Estimated time: 45-90 minutes
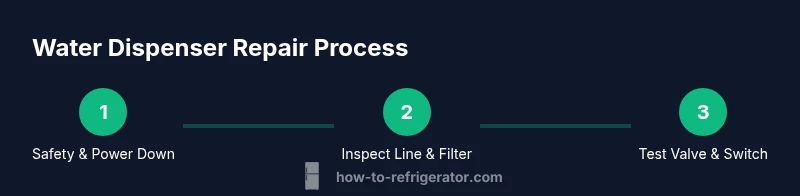
- 1
Power down and isolate
Unplug the refrigerator and close the home water shut-off valve. This prevents shocks and leaks while you work. Keep a towel handy for drips.
Tip: If you can't locate the shut-off valve, turn off the home main valve to stop water supply. - 2
Access the dispenser area
Remove dispenser panel or ice-maker cover using the screwdriver. Keep track of screws and note their locations for reassembly.
Tip: Work slowly to avoid snapping plastic clips. - 3
Inspect the water filter
Locate and remove the filter. Check for discoloration or visible clogs. If dirty, replace with an identical model.
Tip: Prime a new filter by flushing it with water before testing. - 4
Check the water supply line
Inspect the line for kinks, crimps, or leaks. Ensure it’s fully seated at both ends and not pinched by doors or hinges.
Tip: Gently straighten any bends without forcing the line. - 5
Test the water inlet valve
With the dispenser engaged, use the multimeter to verify continuity across the valve coils. Replace if readings are inconsistent with specs.
Tip: If you're unsure of specs, consult the manual or a professional. - 6
Check the dispenser switch and ice maker interaction
Test the dispenser switch with a continuity tester. If the switch is OK but the valve fails when activated, target the valve for replacement.
Tip: Verify control board responses with an external test if available. - 7
Reassemble and test
Reconnect all panels, power the unit, and restore the water supply. Run the dispenser for several cycles to confirm steady flow and no leaks.
Tip: Have a towel ready to catch any residual water during the first test. - 8
Assess ice maker and defrost drain
If a previous ice buildup or drain blockage existed, clear and monitor the dispenser for a return of normal flow.
Tip: Limit force when clearing ice to avoid damaging the freezer tubes.
FAQ
What should I check first when the fridge won't dispense water?
Begin with safety: unplug the unit and shut off the water supply. Then inspect the water line and filter for kinks or clogs. If those checks don’t restore flow, move on to testing the water inlet valve and dispenser switch.
Start with safety checks, then inspect the line and filter. If water still won’t dispense, test the valve and switch.
Can a clogged filter cause no water from the dispenser?
Yes. A clogged or saturated filter can drastically reduce or stop water flow. Replace the filter if it’s discolored or overdue based on your model’s guidelines.
Absolutely. A clogged filter is a common cause and often resolved by replacement.
Is it safe to use the dispenser if there’s a leak?
No. If you detect a leak, shut off water and unplug the unit to prevent flooding and potential electrical hazards. Repair or replace the faulty component before using again.
No—put safety first and fix the leak before using the dispenser.
How often should I replace the water filter?
Most manufacturers recommend replacing the water filter every 6-12 months, depending on usage and water quality. Follow your user manual for model-specific guidance.
Usually every 6 to 12 months, depending on how much you use it.
When should I call a professional?
If you’ve completed the basic checks and the dispenser still won’t work, or you suspect an electrical component failure, contact a qualified technician. Don’t risk electrical shock or water damage.
If basic checks fail or you suspect an electrical fault, it’s time to call a pro.
What parts are most likely to fail in the dispenser?
The common culprits are the water inlet valve, dispenser switch, and the water line. Ice maker interaction can also affect flow. Replacements should be guided by testing results.
Water inlet valve and dispenser switch are frequent culprits, along with the line and ice maker interactions.
Watch Video
Top Takeaways
- Test safety first and protect yourself from leaks.
- Start with the filter and line checks before electrical parts.
- Replace a failing valve or dispenser module rather than chasing multiple symptoms.
- Regular maintenance prevents future water-dispense failures.