Fixing a Refrigerator Without Ice Maker
Learn how to diagnose, repair, and manage a refrigerator without ice maker. Safe DIY steps, common culprits, and practical alternatives to keep ice flowing.

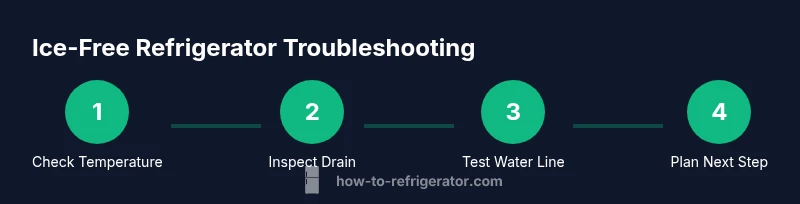
You’re going to learn how to diagnose a refrigerator without ice maker, identify the likely causes, and choose safe DIY fixes or professional service. This quick guide covers common culprits (defrost drain, water line, thermostat), practical tests, and practical workarounds like manual ice and external ice options. Follow the steps carefully, unplug the unit before inspections, and reseat any push-fit connectors to avoid misreads.
Diagnosing a refrigerator without ice maker
A refrigerator without ice maker can still keep your groceries safely cold, but the absence of ice may indicate a cooling or frost-related issue rather than a failure of a separate ice-producing unit. First, confirm the freezer temperature is within the recommended range (usually around -18°C / 0°F). If the freezer isn’t cold enough, ice production won’t start reliably, even if there is a dedicated ice-making circuit elsewhere. Next, inspect basic airflow: ensure doors seal properly and vents aren’t blocked by stored items. Poor airflow can lead to uneven temperatures and affect ice formation. Finally, review the ice-maker status on your control panel and any model-specific settings that might have disabled the ice feature. Throughout this guide we reference the topic refrigerator without ice maker to help homeowners troubleshoot effectively and safely.
Common maintenance basics
Before you jump into components, perform quick checks:
- Confirm the door seals are intact and clean; a worn gasket can allow warm room air to mix with cold air.
- Check that the freezer’s interior walls aren’t excessively frosted, which can block airflow.
- Listen for unusual noises or hums that might indicate a blocked condenser or fan issue affecting cooling.
If these checks don’t reveal the cause, you’ll want to examine the ice-making pathway in more detail. Keep in mind that even if the unit lacks an ice maker, some fridges still carry a water line or dispenser line that may affect performance if blocked or frozen.
Why the phrase refrigerator without ice maker matters
For homeowners troubleshooting appliance issues, this phrase helps focus on the root cause—whether the cooling system itself is compromised or the ice production path is blocked. By isolating cooling from ice production concerns, you can decide whether a DIY repair is appropriate or if professional service is warranted. In many cases, the ice-maker circuit is independent, so a fridge can stay cold while the ice-making function is nonfunctional. This distinction is essential when planning repairs or ordering replacement parts.
Quick checks you can perform safely
Work with the unit unplugged when inspecting electrical components. Look for obvious signs like loose connectors, corroded terminals, or kinked water lines. If you discover a frozen defrost drain, carefully thaw it and flush with warm water. Document any symptoms (no ice, partial ice, slow ice production) to guide future steps and to inform a technician if needed. Remember to recheck connections after tests and plug the unit back in, monitoring for normal operation.
Tools & Materials
- Screwdriver set (Phillips and flathead)(Essential for panel removal or hose clamps)
- Multimeter (voltage tester)(Use if you suspect electrical faults)
- Torx or hex drivers (model-dependent)(Optional for specific models)
- Flashlight(Inspect dark corners and vents)
- Towels or absorbent cloths(Clean spills and protect surfaces)
- Bowls and a pitcher for water tests(Collect water during defrost drain clearing)
- Replacement ice-maker kit or related parts (if upgrading)(Only if you confirm compatibility and need an upgrade)
- Cleaning brush or small vacuum(Clear dust from coils and vents)
- Owner’s manual or model-specific guide(Helpful for model-specific steps)
Steps
Estimated time: 45-75 minutes
- 1
Power down and access the ice-area
Unplug the refrigerator and locate the ice-maker area or frozen-food compartment where ice should form. If an external ice maker or dispenser line exists, inspect those connections for signs of wear or disconnection. Confirm that you are not working with a live electrical circuit to avoid shocks.
Tip: Always unplug before touching any electrical components. - 2
Verify freezer temperature
Use an interior digital thermometer or the built-in display to confirm the freezer is at or around -18°C. A higher temperature can stop ice production even if the fridge is otherwise cooling well. If the reading is off, adjust settings and recheck after 24 hours.
Tip: If you adjust temperature, wait at least 6–12 hours to see impact on ice formation. - 3
Inspect defrost drain and frost buildup
Check for a blocked defrost drain. A blocked drain causes water to pool and refreeze, which can mimic an ice-maker failure. Thaw any ice block carefully with a hair dryer on a low setting and flush with warm water to restore drainage.
Tip: Never use sharp tools to unblock a drain; you can damage wiring or the drain tube. - 4
Check water line and filter (if present)
If your refrigerator has any water line feeding an ice-maker or water dispenser, inspect for kinks, leaks, or freezing. Replace or straighten lines as needed and ensure the filter is not clogged, which can reduce water pressure to the ice-maker.
Tip: Run water through the line to verify flow after any adjustments. - 5
Review ice-maker wiring and control settings
Look for loose connectors, damaged insulation, or a disabled ice-maker setting on the control panel. If the unit lacks an ice-maker, ensure no residual wiring or settings are causing a false alarm.
Tip: Consult the model’s manual to identify the correct harness and connector orientation. - 6
Clean coils and air pathways
Dusty condenser coils can impair cooling efficiency, indirectly affecting ice production. Use a soft brush or vacuum to remove dust; ensure air can circulate freely around the coils and vents.
Tip: Never spray water directly onto electrical components. - 7
Decide on next steps
If readings improve after checks but ice still doesn’t form, you may have a faulty ice-maker assembly or a control module. Consider replacing the ice-maker kit if compatible, or planning a professional diagnostic for more complex issues.
Tip: Keep a record of tests and outcomes to share with a technician if needed.
FAQ
What causes a refrigerator to stop producing ice?
Ice production can stop due to a blocked defrost drain, frozen water line, clogged water filter, or incorrect freezer temperature. Electrical or control panel issues can also disable the ice-making function. By testing each area, you can pinpoint the root cause without replacing unrelated parts.
Ice can stop forming because of a blocked drain, frozen water line, or wrong freezer temperature. Electrical faults or panel settings can also disable ice making.
Can a refrigerator work without an ice maker?
Yes. Many refrigerators were designed to operate without an ice-maker and will still keep foods cold. The absence of ice simply means you lose ice production, but cooling performance can remain normal with proper maintenance.
Yes, it can keep things cold even without an ice-maker.
Is it safe to attempt DIY repairs on an ice-maker?
DIY repairs can be safe for basic maintenance if you follow the manual and unplug the unit before handling parts. Avoid electrical testing on live components and consult a professional for complex repairs or uncertain wiring.
DIY can be safe for simple fixes if you unplug first and follow the manual.
Should I install an ice maker kit in a fridge that didn’t come with one?
Installing an ice-maker kit is not guaranteed to be compatible with all models. Check the appliance’s capacity, outlet options, and warranty terms before purchasing. If in doubt, seek professional advice.
Only if it’s compatible with your fridge; otherwise, get expert help.
What maintenance helps prevent future ice issues?
Regularly clean condenser coils, replace the water filter as recommended, and ensure the defrost drain remains clear. Keep doors sealed and vents unobstructed to maintain steady temperatures and reliable ice formation.
Keep coils clean, change filters, and check for blocked drains to prevent future ice issues.
When is professional service warranted?
If basic troubleshooting doesn’t restore ice production or if you notice refrigerant smells, unusual noises, or electrical concerns, it’s wise to schedule a professional diagnostic. A tech can test sensors, wiring, and the ice-maker assembly safely.
Call a tech if DIY doesn’t fix it or you sense electrical issues.
Watch Video
Top Takeaways
- Identify core cooling vs ice-production issues first
- Check defrost drain, water line, and wiring for blockages or damage
- Decide between DIY fixes or professional service based on comfort level
- Consider manual ice or external ice options as interim solutions