Refrigerator Drip Noise: Quick Fix Guide 2026 Edition
Discover why your refrigerator sounds like water dripping on something hot and learn practical, safe fixes with a clear diagnostic flow, step-by-step guidance, and prevention tips.

Most often, a dripping sound from a fridge points to the defrost drain or water line. Start by inspecting and clearing the defrost drain, checking the pan, and reseating any loose hoses. If the noise persists after these basics, move to the diagnostic flow or call a professional. Document any sounds with a video before you start.
Understanding Dripping Noises in Refrigerators
In many homes, odd noises are mistaken for a serious leak or a failing compressor. However, the first step in troubleshooting is to recognize what sounds are normal versus warning signs. Refrigerator sounds like water dripping on something hot is a common description you may hear during the defrost cycle or when condensate flows through a drain hose. Understanding these processes helps you separate routine maintenance from actual problems. When you listen closely, you’ll find that most dripping noises originate from moisture management components rather than a failed coolant system. This section explains why those sounds occur, what noises to expect, and how your fridge’s design handles moisture. Homeowners who act quickly can often prevent bigger issues and avoid unnecessary service calls. According to How To Refrigerator analysis, many dripping noises are resolved with a simple drain check or hose reseating. Keeping an eye on the defrost cycle and the drain pan can save time and money.
The phrase refrigerator sounds like water dripping on something hot is commonly heard by people during defrost cycles or when condensate is routed to the defrost drain. It’s not unusual for this to occur in frost-free models that manage moisture via automatic defrost. The key is to distinguish normal cyclic noises from a persistent drip that suggests a blockage or misalignment. In most cases, basic DIY checks are enough to confirm the source and either fix it or guide you toward professional help without delay. Remember, your goal is to reduce moisture path friction and ensure water reaches the pan rather than pooling inside the evaporator tray.
If you’re hearing these sounds late at night or right after a defrost cycle, stay calm—often the noise is a normal part of moisture management. However, if you notice standing water on the floor, a damp fridge interior, or frost buildup that doesn’t melt after a cycle, that’s a sign you should escalate the inspection. In any case, safety comes first: unplug the unit when you’re inspecting drain tubes or panels, and never use sharp tools to poke around tight spaces. By understanding how these systems work and following a methodical approach, you can quickly determine whether the drip is benign or needs a professional assessment.
descriptionLanguageTagBeneathHeadingForSEO Amsterdam
Steps
Estimated time: 60-90 minutes
- 1
Power off and access the drain area
Unplug the refrigerator to avoid electric shock while you inspect the drain tube and nearby components. Move any obstructing items away, remove the lower kick plate or back panel as needed to access the defrost drain line.
Tip: Use a workspace light and wear gloves to protect your hands from sharp edges. - 2
Locate the defrost drain and drain pan
Follow the drain tube from the evaporator area to where it empties into the drain pan. Check for visible blockages, cracks, or kinks that could redirect water to areas that create a dripping noise.
Tip: Take a quick photo before moving parts so you can reassemble correctly. - 3
Clear blockages safely
Floss the drain tube with a flexible pipe cleaner or flush with warm water. Avoid forcing material through the line; if flow is slow, repeat the flush after a few minutes and restart the unit to test.
Tip: Never use hot water with a metal object to avoid scalding or damage. - 4
Inspect the drain pan and surroundings
Ensure the drain pan is properly seated and not cracked. A misaligned pan can cause condensation and dripping sounds as water splashes or travels along the bottom panel.
Tip: Check that the pan has airflow around it to dissipate heat. - 5
Check ice-maker and water line connections
Examine hoses and fittings for wear, cracks, or loose clamps. Tighten connections gently and validate that there are no leaks when water is flowing.
Tip: Only tighten snugly; overtightening can cause damage to plastic fittings. - 6
Run a test cycle and observe
Plug back in and run a short defrost or cooling cycle while listening closely for the drip sound. If the noise stops after flush and reconnection, you’ve likely resolved the issue.
Tip: Monitor for a full cycle of 20-30 minutes to ensure stability.
Diagnosis: Machine produces a dripping-like noise in normal operation
Possible Causes
- highClogged defrost drain causing water to pool and drip into the drain pan
- mediumExpanding/contracting water line or drain tube during cooling cycles
- lowDefective ice-maker or water inlet valve causing intermittent dripping
Fixes
- easyClear the defrost drain and ensure proper drainage by flushing with warm water and a flexible brush.
- easyInspect water line connections for kinks, leaks, or loose fittings and reseat as needed.
- mediumIf the ice-maker or water inlet valve is suspected, replace the valve or have a professional inspect the line installation.
FAQ
Why does my fridge drip sound happen only during defrost cycles?
Many fridges drain condensate during the defrost cycle. You may hear a drip or splash as warm condensate exits the evaporator and travels through the defrost drain to the pan. If it’s intermittent but not loud, it’s often normal.
Drips during defrost cycles are usually normal as condensate drains away.
Is a dripping noise dangerous?
A drip noise is not inherently dangerous, but persistent dripping can mask a leak or frost buildup. If you notice pooling or frost that won’t melt, inspect drainage and water lines or call a professional.
Drips aren’t usually dangerous, but persistent leaks need attention.
Can I fix a defrost drain clog myself?
Yes, many defrost drain clogs can be cleared with cautious flushing and a flexible cleaning tool. Do not force materials through the tube; use warm water and gentle brushes.
You can often fix it yourself by flushing carefully and checking the drain.
What signs mean I should call a professional?
If you smell burning insulation, see refrigerant slickness, or can’t locate the source after a thorough drain flush, stop and seek professional help. Complex electrical or refrigerant issues require licensed service.
Call a pro if you suspect refrigerant leaks or electrical problems.
How long does a drain inspection and flush usually take?
A typical drain flush with inspection can take 30-60 minutes, depending on accessibility and whether parts need replacement. Plan for a longer session if you need panel removal.
Expect about half an hour to an hour for a drain flush and basic checks.
Watch Video
Top Takeaways
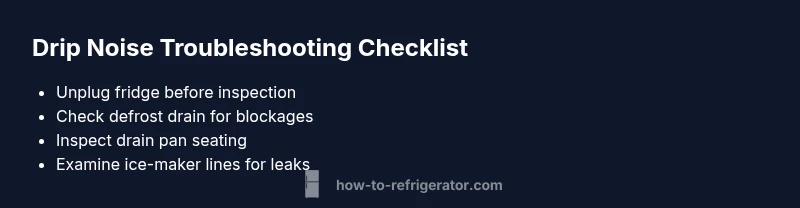
- Identify the defrost drain as a common noise source
- Unplug before inspection and avoid hot liquids
- Clear blockages and reseat drain components to stop drips
- Regular maintenance prevents future drip noises
- Call a professional if you smell burning or suspect refrigerant issues