Why Is Your Refrigerator Making Sound? Troubleshooting Guide
Diagnose and fix common fridge noises with safe, step-by-step guidance from How To Refrigerator. Learn quick DIY fixes and when to call a professional.

The most likely cause is a compressor or fan operation generating interference, especially if you hear buzzing, clicking, or rattling. Quick fixes start with safety checks: unplug, clean condenser coils, and inspect door seals. If the noise persists after these simple steps, professional inspection is advised. This approach helps identify the source quickly and avoids unnecessary disassembly.
Why is the refrigerator making sound?
If you’re wondering why is refrigerator making sound, you’re not alone. According to How To Refrigerator, most noises come from standard operation or simple faults you can fix without special tools. In this guide we explain how to identify the source, what it means, and the safe steps you can take to quiet a noisy fridge. Start with the basics: verify the appliance is level, airflow is not blocked, and seals are intact. Many homeowners discover the culprit is something as simple as a loose shelf or a dusty condenser coil. By following these steps, you reduce the risk of bigger problems and keep your food safely cooled. Remember: persistent sounds should be treated seriously, especially if they correlate with rising temperatures or frost formation.
Signals to listen for and what they imply
Different noises point to different parts. A soft buzzing often means the compressor or evaporator fan is running normally, while a harsh buzz or rattle could indicate loose panels or items vibrating inside the cabinet. A rhythmic clicking may come from the defrost timer or relay, and a persistent humming may indicate airflow restriction or a failing fan motor. Hissing sounds can be normal when the door seals are cooling, but if the hiss is continuous, it may indicate duct or gasket issues. Understanding which sound maps to which component helps you target the right fixes without guesswork.
Safety and prep before you start
Before you touch any part of the fridge, unplug the appliance and, if needed, move it away from the wall to access the rear and underside. Keep children and pets away, and never attempt refrigerant handling or compressor repair yourself. Gather a flashlight, a soft cloth, a vacuum or brush for dust, and a spare screwdriver. If you regularly notice refrigerant-like hissing, or a crackling or burning smell, stop immediately and call a professional—these can indicate serious problems.
Quick checks you can perform safely
- Ensure the fridge is level and stable; adjust the feet on the bottom if needed. A tilted unit can cause vibration and unusual noises.
- Check for items vibrating on shelves or against the interior panels; rearrange or remove loose objects.
- Inspect the condenser coils (usually on the back or beneath) and gently vacuum away dust. Clogged coils force the compressor to work harder and louder.
- Look at the door seals for cracks or gaps; clean the gasket and replace if stubborn leaks are present. A poor seal can cause the compressor to cycle more aggressively, increasing noise.
- Verify there’s adequate ventilation around the appliance; air flow helps keep noise down and efficiency up.
Diagnosing sound sources inside the appliance
To pinpoint the source, silence the fridge temporarily by opening and closing the door to hear which area changes the sound. Place a hand near the back to feel for vibration, then near the top and bottom to locate the specific component. If the noise originates from the fan, the blade may be obstructed or worn; if it comes from the compressor, the issue may be more serious and require service. If the defrost timer is cycling noisily, it could be a warning sign that defrost components need service or replacement.
Common fixes for the most frequent causes
- Loose shelves or interior panels: tighten mounting screws and reposition items.
- Dusty condenser coils: carefully vacuum or brush off dust; ensure there is at least a few inches of clearance around the back of the unit.
- Faulty door gasket: clean or replace the gasket to restore a proper seal and reduce compressor cycling.
- Obstructed or worn fans: remove debris, lubricate bearings if applicable, or replace a worn fan blade.
- Noise from the defrost timer: this may require professional replacement if it continues after basic checks.
When to call a professional and safety reminders
If you hear hissing that sounds like a leak, a persistent loud hum with rising temperatures, or you suspect a refrigerant issue, contact a certified technician immediately. Refrigerants and high-voltage components pose safety risks for DIY attempts. Regular maintenance by a pro can extend your fridge’s life and catch issues early, preventing costly breakdowns.
Prevention tips to minimize future noises
- Schedule regular coil cleaning and vacuuming every 6–12 months depending on dust exposure. Clean coils improve efficiency and reduce noise from the compressor.
- Keep the fridge level and ensure there’s adequate space for air circulation around the sides and back.
- Inspect seals seasonally; replace worn gaskets to prevent air leaks and reduce compressor strain.
- Monitor for abnormal sounds after major door openings or when you adjust shelves; recheck alignment and vent paths.
Testing and verification after fixes
After performing any fix, replug the fridge and allow it to return to normal cooling. Listen for sustained, reduced, or eliminated sounds over a 24–48 hour period while monitoring interior temperatures. If noises persist or temperature drifts, re-check the observed sources and consider scheduling a professional inspection.
Quick reference flow: identify → verify → fix → verify
By following the steps above, you can quickly identify the source, perform safe checks, apply recommended fixes, and re-test to confirm improvement. If uncertainty remains at any point, err on the side of caution and seek professional help to avoid potential safety hazards.
Steps
Estimated time: 60-90 minutes
- 1
Power off safely
Unplug the fridge and move it slightly away from the wall. This reduces the risk of electric shock and lets you inspect with both hands free. Wait a full minute to discharge any residual capacitors if you’re comfortable doing so.
Tip: Always unplug before touching any components. - 2
Isolate the noise
Close the doors and listen carefully to determine whether the sound comes from the back, bottom, or interior. This helps you target the source, such as the condenser fan or shelves.
Tip: Use a flashlight to spot dust and loose screws. - 3
Check level and airflow
Make sure the fridge sits level on all feet. Verify there is at least 2-3 inches of clearance at the back and sides for air circulation, which reduces loud compressor operation.
Tip: Adjust feet gradually and re-check with a spirit level. - 4
Inspect condenser coils
Access the coils (usually behind or underneath). If dusty, carefully vacuum or brush away debris. Reconnect and test the unit; a clean coil reduces noise and improves efficiency.
Tip: Do not use a wet wipe on coils. - 5
Inspect door seals and shelves
Check gasket integrity and replace if cracked or loose. Tighten any loose shelves or crisper doors that might vibrate against panels.
Tip: Wipe gaskets with warm, soapy water to restore a snug seal. - 6
Test the fan and fan motor
If you hear a continuous fan hum, the blade or motor might be worn or obstructed. Remove dust and test without items obstructing the fan. If it’s noisy, the motor may need replacement.
Tip: Never run the unit with an obvious fan obstruction. - 7
Defrost and test
If you suspect defrost issues, check the defrost timer and heater. A stuck timer can cause unusual cycles and noise. Allow the unit to go through a full cycle to observe behavior.
Tip: Defrost issues can lead to frost build-up; clear frost during thaw. - 8
Seek professional help if needed
If the noise persists after all basic checks, avoid DIY refrigerant work. Schedule a technician to diagnose compressor or refrigerant problems safely.
Tip: Document symptoms for the technician to speed up diagnosis.
Diagnosis: Loud buzzing, clicking, or rattling from refrigerator
Possible Causes
- highCompressor cycling or fan operation
- mediumFan blade obstructions or worn bearings
- mediumCondenser coils dirty or blocked airflow
- lowDoor gasket leaks causing compressor strain
Fixes
- easyCheck for obvious obstructions near the fan or vents; ensure nothing is vibrating against panels
- easyClean condenser coils and ensure proper airflow; vacuum dust
- easyInspect door seals and tighten or replace if damaged
- hardSchedule professional service for refrigerant issues or compressor faults
FAQ
What does a buzzing fridge mean?
A buzzing sound often indicates the compressor or evaporator fan is running. If it’s continuous or louder than usual, inspect the fan area and coils for obstructions or dirt. If the noise persists, consider professional service.
Buzzing usually means the compressor or a fan is active; check the fan and coils, and seek help if it continues.
Why does my fridge click constantly?
Constant clicking is commonly related to the defrost timer or relay cycling. If it occurs after startup or cycles frequently, the timer may be failing. If the clicking continues, a technician should inspect electrical components.
Constant clicking is often the defrost timer or relay; if it keeps happening, have a pro check the timer and electrical parts.
Is rattling from shelves dangerous?
Rattling is usually caused by loose items or panels, not a safety hazard. Secure loose shelves and remove items that may vibrate against the walls. If rattling persists after tightening, inspect the door gasket.
Rattling is typically just loose items or panels—check shelves and tighten things up, and see if it stops.
Can dirty coils cause noises?
Yes, dirty condenser coils can cause the compressor to work harder, producing louder operation. Clean coils using a vacuum or brush and ensure airflow is unobstructed.
Dirty coils can make the compressor louder; clean them and improve airflow.
When should I call a professional?
If you suspect refrigerant leaks, a faulty compressor, or electrical faults, contact a technician promptly. Persistent noises after basic checks also warrant professional assessment.
Call a pro if you think refrigerant or compressor issues are involved or noises persist after checks.
Are noises normal after a defrost?
Defrost cycles can produce sounds, but persistent noise after defrost may indicate a timer or heater issue. If the noise continues, inspect the defrost system or consult a technician.
Defrost noises can happen, but ongoing noise after defrost may mean a part needs service.
Watch Video
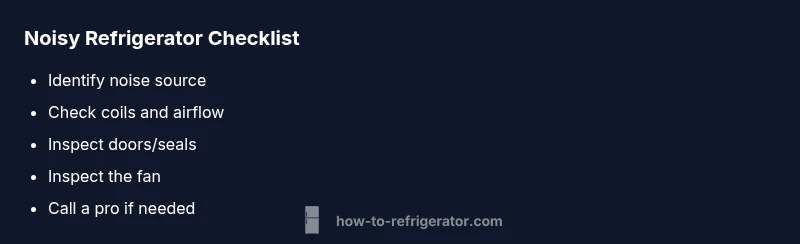
Top Takeaways
- Identify the noise source before attempting repairs
- Clean condenser coils to improve airflow and quietness
- Check door seals for leaks and drafts
- Call a professional for refrigerant or compressor issues