LG 4-Door Refrigerator Troubleshooting and Maintenance
Learn how to diagnose and repair an LG 4-door refrigerator with clear, step-by-step guidance. Safety tips, routine maintenance, and when to call a professional in 2026.

Learn how to diagnose and fix common problems with an LG 4-door refrigerator, from not cooling to door-seal leaks and frost buildup. This guide gives safe unplugging steps, essential tools, and a clear, step-by-step plan so homeowners can troubleshoot before calling a technician. By the end, you’ll know when to replace parts, how to clean the defrost drain, and how to verify temperatures for food safety.
Understanding the LG 4-Door Refrigerator: design and common failure modes
An LG 4-door refrigerator typically uses a four-door layout with a separate freezing compartment and dual doors for the main refrigerator chamber. This design provides flexible storage but introduces multiple potential failure points: door gaskets that wear with time, condenser coils that accumulate dust, defrost components that can fail, and water lines that may develop leaks. The How To Refrigerator team emphasizes understanding the basics of how the system is supposed to work so you can detect anomalies early. Key subsystems include the thermostat and temperature sensors, the evaporator and condenser coils, the fan, and the defrost mechanism. When any one component drifts from its nominal setting, you’ll notice symptoms like uneven cooling, frost buildup, or condensation around seals. In practice, you don’t need to replace an entire unit to restore function—start with simple checks, maintain clean coils, and verify door alignment. Throughout this guide, we’ll point out safe, low-cost fixes you can perform yourself and provide a clear path to professional service if the issue goes beyond routine maintenance. According to How To Refrigerator, grasping the fundamentals helps homeowners save time and frustration while reducing the chance of accidental damage.
Diagnosing common problems in LG 4-door configurations: not cooling, frost, leaks
A common first step is to confirm the unit is receiving power and that the thermostat is set correctly. If the compressor runs constantly or temperatures drift, inspect the condenser coils for dust, ensure vents aren’t blocked, and check the door gaskets for tears or gaps. Frost buildup in the freezer often signals a defrost drain blockage or a failing defrost heater. Water leaks may originate from the ice-maker line, a cracked water dispenser hose, or a misaligned drain pan. For the LG 4-door refrigerator, it’s crucial to differentiate between symptoms that point to the cooling system versus the door seal or drainage pathway. By narrowing the scope—refrigerator compartment, freezer, ice maker, or drainage—you can target the most likely causes with minimal disassembly. Remember to unplug before inspecting electrical components and use a flashlight to inspect hidden crevices. This section provides a practical framework for rapid diagnosis and safe, incremental testing that homeowners can perform before scheduling service. How To Refrigerator’s analysis shows that most fixes begin with clean coils, reseating wiring connections, and confirming correct temperature readings.
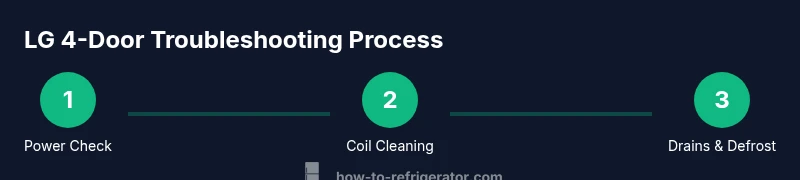
A safe, methodical troubleshooting workflow for homeowners
Start with safety and a baseline: unplug the unit, remove perishable items if necessary, and note any audible noises or unusual smells. Next, verify temperature settings and test a few doors to ensure there’s no pressure imbalance that could cause cooling inefficiency. Move to the condenser coils—dusty coils reduce heat transfer and can cause overheating and poor cooling. If you discover frost on the evaporator or ice buildup, check the defrost drain and the heater circuit. For leaks, inspect water lines and the drain pan for cracks or overflow. Finally, test airflow from vents; blocked air ducts can create uneven cooling between the top and bottom sections. Throughout this workflow, log each finding with photos or short notes. If issues persist after these steps, you’ll have a clear, defensible case for professional service.
Maintenance routines that prevent problems and extend life
Preventive care starts with regular cleaning and inspection. Clean the condenser coils every 6-12 months, depending on usage and dust levels, and wipe door gaskets with a mild detergent to keep seals supple. Replace or reseal door gaskets showing wear; a poor seal can force the cooling system to work harder and shorten its life. Check the defrost drain periodically and clear any blockages with a flexible brush or recommended cleaning tools. Keep the interior humidity balanced by not overloading or leaving warm items in the fridge for extended periods. For the ice-maker and water line, inspect connections for leaks and ensure the water supply is clean and free of mineral buildup. These routine steps reduce frost formation, improve efficiency, and minimize unexpected outages. According to How To Refrigerator, a simple maintenance cadence delivers measurable reliability gains for most households.
Part replacement guidance: when to replace and how to choose parts
If a component such as the compressor, evaporator fan, or sealed system shows repeated failure, replacement parts may be warranted. Always verify compatibility with your specific LG model by consulting the user manual or the manufacturer’s website. For minor replacements—door seals, magnets, hinges—choose OEM or high-quality aftermarket parts with comparable ratings. When replacing the defrost drain or heater, select components with the same voltage and amperage ratings as the original. If you’re unsure about refrigerant handling or sealed system integrity, avoid DIY refrigerant work and seek professional service. Finally, maintain documentation of replacements for warranty purposes and future maintenance planning. The aim is to restore original performance without compromising safety or energy efficiency. How To Refrigerator’s approach emphasizes informed decisions and careful testing after any replacement.
Tools & Materials
- Safety gloves(Non-slip grip; insulated if handling hot components)
- Phillips screwdriver (size #2 and #1)(For removing panels and screws)
- Flat-head screwdriver(For prying and wiring access)
- Multimeter(Test voltage and continuity)
- Torx driver set(Some fasteners may use Torx screws)
- Nut driver/plier set(Useful for stubborn fittings)
- Spill towels or absorbent cloths(Contain spills and keep area dry)
- Defrost drain cleaning tool/syringe(Clear blockages in defrost drain)
- Thermometer (fridge and freezer)(Verify internal temperatures)
- Soft brush or coil vacuum wand(Clean condenser coils without damage)
- Bucket(Catch drained water)
- Work flashlight(Inspect dark corners and panels)
- Owner's manual or model-specific guide(Cross-checks for model-specific specs)
Steps
Estimated time: 45-75 minutes
- 1
Power down and baseline check
Unplug the refrigerator and remove any perishable items if needed. Listen for unusual noises at startup and note any irregular smells. This step establishes a safe baseline before you touch components.
Tip: Take a quick photo of panel labeling before disconnecting wires. - 2
Test door seals and airflow
Close all doors and check for drafts or gaps with a dollar bill test or a UV light. Ensure gaps aren’t allowing warm air to intrude and that airflow is not blocked by stored items.
Tip: Rearrange items to prevent blocking vents; airflow is critical for even cooling. - 3
Inspect condenser coils and remove dust
Locate the condenser coils (usually at the back or underneath). Vacuum or brush away dust and debris; a clean coil improves heat transfer and efficiency.
Tip: Unplug before touching coils and avoid bending fins. - 4
Check defrost system and drainage
If you hear excessive frost or see pooling water, inspect the defrost drain for blockages. Clear with a small flexible tool and flush if needed.
Tip: Do not use sharp objects to clear debris; a flexible brush works best. - 5
Verify temperature settings and sensors
Set the fridge to 37-38°F (3-3°C) and freezer to 0°F (-18°C). Use a thermometer to confirm, and test both compartments after 24 hours.
Tip: Document readings to track changes over time. - 6
Decide on next steps (DIY vs pro)
If the issue remains after these checks, categorize the issue by subsystem (compressor, sealed system, ice-maker). For defects in the sealed system or compressor, contact a professional.
Tip: Keep records of tests and photos to share with a technician.
FAQ
Why isn't my LG 4-door refrigerator cooling properly?
Possible causes include dirty condenser coils, blocked vents, failed defrost components, or door seal leaks. Start with a power reset, coil cleaning, and seal inspection before deeper diagnostics.
Not cooling could be due to dusty coils, blocked vents, a defrost issue, or a faulty door seal.
What causes frost buildup in the freezer?
Most frost is caused by a defrost drain blockage or a failing defrost heater. Ice accumulation can also result from frequent door opening or a faulty temperature sensor.
Frost buildup is usually from a blocked defrost drain or a bad defrost heater.
How do I tell if the ice maker is the problem?
If ice production is inconsistent or you hear continuous running water, check the water line for kinks, confirm the shutoff valve is open, and inspect the ice-maker mold for clogs.
Check the water line for kinks and the ice-maker for clogs to assess if it’s the issue.
Can I fix a water leak myself?
Unplug the unit, inspect the drain pan, hoses, and connections for cracks. If a leak persists near the sealed system or compressor, contact a pro to prevent refrigerant exposure.
You can check hoses and drain pans, but serious leaks near the sealed system should be handled by a professional.
When should I replace parts rather than repair?
If a major component (compressor, sealed system) fails or recurs after multiple repairs, replacement may be more cost-effective and reliable than repeated fixes.
Major component failure usually means replacement is the smarter option.
Watch Video
Top Takeaways
- Unplug first and check safety before touching components
- Clean condenser coils regularly to maintain efficiency
- Test door seals and airflow for even cooling
- Defrost drain blockages cause frost and leaks; clear them safely
- Know when to replace a component or call a professional