Kenmore Refrigerator Repair: DIY Fixes and Maintenance
Comprehensive, homeowner-friendly guide to kenmore refrigerator repair. Learn safe diagnostics, maintenance, and step-by-step fixes to improve cooling and extend your fridge's life.

By following this guide, you will diagnose common Kenmore refrigerator issues and perform safe, basic repairs. You'll learn to test the power, check doors and seals, inspect coils, and alternate defrost components, then decide whether a DIY fix is safe or if you should call a pro. This approach emphasizes safety and clear steps for homeowners.
Why a Kenmore Refrigerator Repair Matters
A well-maintained Kenmore refrigerator keeps food safe, reduces energy use, and avoids unexpected outages that can spoil groceries. The How To Refrigerator team emphasizes that simple, early maintenance often prevents major failures, especially on older models. When a Kenmore fridge runs louder than usual, starts cycling on and off, or fails to reach the right temperature, a structured diagnosis can reveal whether you can fix it yourself or if professional service is needed. Understanding the most common failure modes and how they manifest helps homeowners prioritize repairs, plan maintenance tasks, and time purchases for replacement parts. By learning the right checks, you gain confidence to address practical problems without risking safety or voiding warranties.
Common Kenmore Refrigerator Problems and Causes
Kenmore refrigerators share several recurring problems, and many can be diagnosed with simple at-home checks. Not cooling is the most common complaint and can result from a faulty thermostat, a dirty condenser coil, an overfilled evaporator, or a door seal that doesn’t close properly. Frost buildup in the freezer suggests a defrost system issue, a failing defrost timer, or a blocked defrost drain. Water leaks often trace to clogged drainage tubes, loose hoses, or improper leveling that causes water to bypass the intended path. A noisy compressor or unfamiliar buzzing may point to worn bearings, a failing fan motor, or debris near the condenser coils. Finally, an ice-maker that stops producing ice can be caused by a blocked water line, a faulty solenoid, or a misaligned ice-maker assembly. Identifying the likely cause helps you decide whether to clean, adjust, or replace components, and when to replace a part entirely.
Safety First: Electrical and Handling Precautions
Safety should guide every DIY Kenmore refrigerator repair. Always unplug the unit before opening access panels, and if the cord or plug shows damage, stop and replace it. Avoid using metal tools on refrigerant lines or sealed cooling components unless you’re trained to do so; refrigerant handling requires certification and proper equipment. Keep your hands dry and work in a dry area to prevent electric shock. If your fridge sits on a raised surface, ensure stability before you open panels or move parts. Use a flashlight to inspect coils and connections rather than leaning over a running compressor. When in doubt, schedule service and never attempt refrigerant recovery yourself. Following these precautions minimizes the risk of injury and protects the appliance and the home.
Diagnostic Checklist: Not Cooling, Frost, Leaks
Start with the simplest explanations and work toward the more complex systems. Check that the fridge is receiving power: verify the outlet, reset GFCI outlets, and confirm the interior light comes on when you open the door. Inspect the door seals for cracks or gaps—tighten latches and clean the gasket with soapy water to improve sealing. If the interior feels warm, test the thermostat by adjusting the temperature and timing how long it takes to reach the desired coolness. Look at the evaporator and condenser fans to ensure they spin freely. Inspect the defrost drain for clogs and clear them with a pipe snake or warm water. Finally, examine the condenser coils for dust and debris; a clean coil can restore airflow and cooling efficiency.
Cleaning and Maintenance: Defrost, Coils, Seals
Regular maintenance keeps Kenmore refrigerators running efficiently. Start by unplugging the unit and removing the back panel or front grille to access condenser coils; vacuum with a brush attachment to remove dust. Wipe door seals and gasket channels with mild soap, checking for tears that allow cold air to escape. If you notice frost on the walls, refer to the defrost system—the defrost heater and timer can fail gradually; a quick test with a multimeter will reveal faults or indicate it’s time for replacement. Periodically check the drain tube for algae or mineral deposits that can block drainage. Finally, ensure the unit is level so the doors seal correctly and the interior remains at the right temperature.
Tools and Materials You'll Need for DIY Kenmore Repairs
Before you start, assemble a basic toolkit and the specific items that make safe troubleshooting easier:
- Basic tool kit (screwdrivers, pliers) • Required: true • Note: Flathead and Phillips screwdrivers, assorted pliers, and a nut driver
- Multimeter or voltage tester • Required: true • Note: Check for proper voltage and continuity on electrical components
- Vacuum with brush attachment • Required: true • Note: Clean dust from condenser coils and fans
- Soft cloth and mild detergent • Required: true • Note: Clean gaskets and exterior surfaces
- Thermometer • Required: false • Note: Verify interior temperatures for accuracy
- Replacement parts (optional) • Required: false • Note: Only after identifying a faulty component
Step-By-Step Troubleshooting Process (Overview)
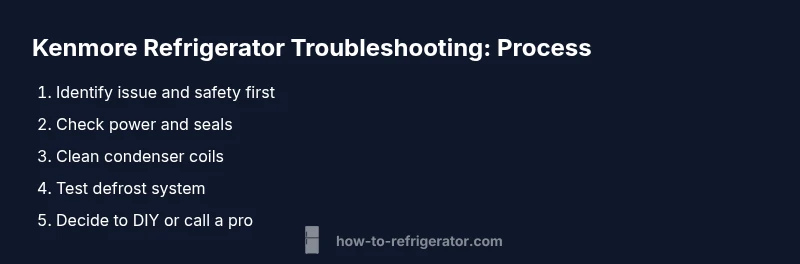
This overview aligns with the detailed step-by-step guide you’ll follow. Start with a safety check, confirm power, inspect seals and coils, test the defrost system, and then decide whether the issue is a DIY-friendly fix or a signal to contact a professional. Each action is designed to be doable within a typical weekend repair window and helps you document what you observe for a technician.
When to Call a Pro and What to Expect
If your diagnosis points to refrigerant leaks, compressor failure, sealed system issues, or if you lack a suitable tool, call a licensed appliance technician. A pro will perform leak testing, refrigerant recovery, replacement of sealed-system components, and safe electrical testing. The cost and time depend on the model and issue, but professional service can prevent further damage and ensure the unit is charged correctly. Having a log of symptoms, error codes, and recent maintenance helps the technician diagnose faster.
Common Replacement Parts and How to Identify Them
Not every problem requires a full replacement; common parts include door seals, fans, relays, defrost timers, thermostats, and condensers. Before ordering parts, verify the model number on the Kenmore label and confirm compatibility with your fridge. If you’re unsure, bring the old part to a reputable parts supplier or consult the service manual.
Tools & Materials
- Basic tool kit (screwdrivers, pliers)(Flathead and Phillips, assorted pliers, and a nut driver)
- Multimeter or voltage tester(Check voltage and continuity on electrical components)
- Vacuum with brush attachment(Clean dust from condenser coils and fans)
- Soft cloth and mild detergent(Clean gaskets and exterior surfaces)
- Thermometer(Verify interior temperatures for accuracy)
- Replacement parts (optional)(Only after identifying a faulty component)
Steps
Estimated time: 60-120 minutes
- 1
Unplug the fridge
Power off the unit and unplug the cord from the wall. Verify there is no voltage before you touch any internal parts. Wait 30-60 seconds to discharge capacitors and reduce shock risk.
Tip: Always unplug before handling electrical components. - 2
Test power supply
Plug a small lamp into the outlet to confirm it supplies power. If the outlet is dead, fix the outlet or reset the circuit before proceeding.
Tip: If the outlet is tripping a GFCI, address electrical issues first. - 3
Inspect door seals and leveling
Examine the gasket for tears and stuck-on debris; clean with soapy water. Use a level to confirm the fridge sits evenly so the door seals properly.
Tip: Tighten screws or adjust feet to restore levelness if needed. - 4
Clean condenser coils
Locate the coils (back or underneath) and vacuum away dust and lint. A clean coil improves airflow and cooling efficiency.
Tip: Do not use metal tools on coils; be gentle to avoid damage. - 5
Test thermostat and temperature
Temporarily set the thermostat cooler and monitor how quickly the interior reaches the target temperature. If the temperature doesn’t drop, the thermostat may be faulty.
Tip: Use a fridge thermometer to verify accuracy. - 6
Check defrost system
If you see frost buildup, inspect the defrost timer and heater; a faulty defrost cycle causes ice and not-cooling. Test with a multimeter or call a pro if needed.
Tip: Defrost issues often require specialized tools. - 7
Evaluate drainage and leaks
Check the defrost drain for clogs and inspect the drain pan. Clear any obstructions and ensure the drain path is clear.
Tip: Pour warm water down the drain to clear blockages. - 8
Decide next steps
If issues persist after these checks, consult a professional for refrigerant or sealed-system repairs. Document symptoms and any tests you performed.
Tip: Keep a log of observations for faster diagnosis later.
FAQ
Why is my Kenmore refrigerator not cooling?
Not cooling can result from a faulty thermostat, dirty condenser coils, a blocked defrost drain, or a leaking door seal. Start with power checks, seal inspection, and coil cleaning before evaluating parts replacement.
Not cooling can be caused by thermostat, coils, or door seals. Start with power, doors, and coils.
How can I tell if the condenser coils are dirty on a Kenmore refrigerator?
Dirty coils reduce cooling efficiency and can cause overheating. Check behind or under the fridge, then vacuum with a brush and wipe away dust.
Dirty coils reduce cooling; vacuum and wipe away dust.
Is it safe to repair a Kenmore refrigerator myself?
You can perform simple maintenance, but avoid sealed-system refrigerant work or compressor repairs unless you are trained and certified. For anything involving refrigerant, call a pro.
DIY is ok for basic maintenance; avoid refrigerant work.
What should I do if I see frost buildup in the freezer?
Frost indicates a defrost system issue or a drain blockage. Inspect the defrost timer and heater and clear the drain; if frost persists, consider professional service.
Frost means defrost issue or drain blockage; check timer and heater, clear drain.
How long does Kenmore refrigerator repair take?
Repair duration depends on the issue and access to parts. A typical service call can range from a few hours to a full day, depending on complexity.
Time varies; expect a few hours to a day depending on the fix.
Should I replace the ice maker during a repair?
Only if the ice maker itself is defective or causing leaks. Many ice-maker problems can be resolved by replacing a solenoid or valve.
Replace ice maker only if it's defective; often solenoid fixes the issue.
Watch Video
Top Takeaways
- Diagnose common issues with a structured checklist.
- Unplug and verify electrical supply before any work.
- Clean condenser coils to restore cooling efficiency.
- Decide DIY vs pro based on safety and refrigerant handling.
- Document symptoms for future maintenance.