Kenmore Coldspot 106 Repair and Maintenance Guide
A comprehensive, homeowner-friendly repair guide for the Kenmore Coldspot 106. Learn diagnostics, safe fixes, and maintenance to keep your fridge cooling efficiently and food-safe.

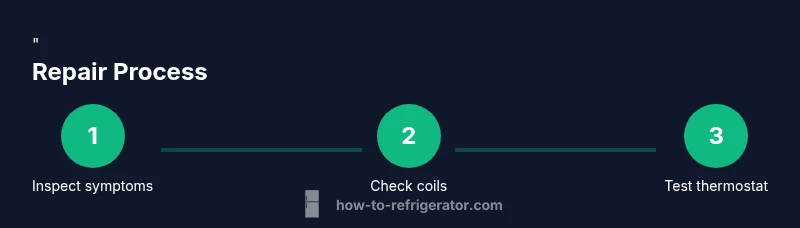
You will diagnose and repair common cooling issues on Kenmore Coldspot 106 by inspecting the condenser coils, door seals, defrost system, and temperature controls, then perform safe fixes and routine maintenance. This guide covers steps, tools, precautions, and when to call a pro. Understanding model specifics helps ensure accurate diagnosis and lasting results.
Understanding the Kenmore Coldspot 106 and its common symptoms
The Kenmore Coldspot 106 has served many households for years, prized for its straightforward design and reliable performance. When this model experiences cooling issues, you might notice warm air at the fridge door, frost buildup in the freezer, fluctuating temperatures, or spoiled groceries. The path to a successful fix starts with accurate symptom recognition and a cautious, stepwise approach. Homeowners who learn to map symptoms to likely causes can avoid costly replacements and extend the life of the unit. In this guide we reference model specifics and best practices from How To Refrigerator to help you apply proven, safe methods. By staying systematic and patient, you can restore consistent temperatures and protect food safety. The Kenmore Coldspot 106 is a classic that benefits from regular upkeep, especially coil cleanliness, door seal integrity, and proper thermostat settings.
Safety first: prerequisites and precautions
Safety is the foundation of any repair task. Before you touch the appliance, unplug it and remove all food from both the fridge and freezer compartments. Work on a dry surface with non-slip footing, keep kids and pets away, and wear gloves and eye protection. Use a flashlight to inspect dark corners and avoid touching electrical components if you are unsure about wiring. If you must test electrical aspects, use a multimeter with the appliance unplugged and only reattach power after you have completed the inspection. This section also covers how to discharge capacitors safely when necessary and how to handle ice maker lines without leaks. Following these precautions reduces the risk of shock, burns, or refrigerant exposure. Remember, if you feel unsure at any point, it’s prudent to pause and consult a professional.
Symptoms mapping: matching signs to likely causes
Not cooling, frost buildup, and odd noises each signal different culprits. For not cooling, think clogged condenser coils, compromised door seals, dirty evaporator, or thermostat miscalibration. Frost buildup often points to a faulty defrost system or evaporator drainage interference. A buzzing or clicking noise can indicate a failing compressor or a loose fan blade. Condensation on inside walls may reflect high humidity or door seal gaps. We’ll pair common symptoms with practical checks you can perform safely, starting with the easiest fixes and moving toward more involved inspections. This section emphasizes careful observation and documentation to guide subsequent steps.
Diagnostic steps you can perform
Begin with a visual inspection of door gaskets for gaps and wear. Clean the condenser coils and check for dust buildup around the compressor area. Verify fridge and freezer temperatures with a digital thermometer, targeting about 37–40°F for the fridge and 0–5°F for the freezer. Listen for unusual fan sounds and ensure airflow is unobstructed. If you notice frost near the evaporator, test the defrost timer and heater elements following the model’s service manual. Record readings and observations before proceeding; this helps you decide whether the issue is quick to fix or requires component replacement.
Cleaning and inspection: coils, seals, defrost drain
Condenser coils should be cleaned every 6–12 months, or sooner if they appear dusty. Use a coil brush and a vacuum to remove lint from behind and beneath the unit. Inspect door seals for tears or gaps—gaskets should seal when the door is closed. A torn seal can let warm air in and cause excess frost and inefficient cooling. Check the defrost drain line for clogs; a backed-up drain can cause frost accumulation and water pooling inside. Wipe down interior surfaces to remove moisture that contributes to condensation. This thorough inspection is essential for addressing root causes rather than merely treating symptoms.
Not cooling fixes: addressing the core culprits
If the unit isn’t cooling, start with the simplest checks: doors closed firmly, coils clean, thermostat correctly set. If the thermostat is off or inaccurately reading, recalibrate or replace it. Clean coils typically restore airflow and efficiency, and worn door gaskets can be swapped to restore proper seal. If frost forms quickly or if the defrost cycle appears inactive, testing the defrost timer, heater, and sensor is warranted. In some cases, a refrigerant leak is to blame, which requires a licensed technician. This section walks you through safe, practical steps while outlining signs you should escalate.
Maintenance and preventive care to extend life
To keep the Kenmore Coldspot 106 operating reliably, implement a simple quarterly maintenance routine. Clean the coils and fans, inspect doors and hinges, replace torn gaskets, and verify temperature settings. Keep the interior organized to avoid blocking vents and ensure proper air flow. Record routine checks in a maintenance log, including temperatures, sounds, and any visual changes. Regular maintenance not only improves cooling performance but can also prevent costly repairs down the line and extend the appliance’s lifespan. A proactive approach reduces the chance of unexpected outages and helps maintain food safety.
When to call a pro and expected outcomes
If you encounter refrigerant smells, hissing noises after a repair, or refrigerant leaks, do not continue. Complex electrical faults, compressor failures, or sealed system issues require a licensed technician. For not-cooling issues that persist after cleaning coils, inspecting seals, and confirming thermostat settings, a professional diagnostic can identify hidden problems and provide a safe repair plan. The cost for professional service varies by region and repair scope; obtaining multiple quotes helps ensure fair pricing. This block emphasizes prudent escalation when DIY options fail or carry safety risks.
Tools & Materials
- Screwdriver set (Phillips and flat-head)(Phillips #2 and slotted 1/4 inch for most panels)
- Nut driver or socket set(For securing panels and hardware behind panels)
- Multimeter or voltage tester(To verify electrical connections; unplug before testing)
- Digital thermometer or fridge thermometer(Target fridge 37–40°F, freezer 0–5°F)
- Condenser coil brush and vacuum attachment(Clean coils behind or beneath unit)
- Soft cloths and towel(Clean surfaces and catch condensation)
- Defrost drain cleaning tool or pipe cleaner(Helpful for defrost drain clogs)
- Replacement door seals(If gaskets are worn or torn)
- Gloves and eye protection(Basic safety gear)
- Drain pan and absorbent towels(Contain drips during defrost or coil cleaning)
Steps
Estimated time: 60-90 minutes
- 1
Unplug and prep
Always unplug the refrigerator before any internal work. Remove all perishables and place in a cooler. Take photos of wiring or panels to aid reassembly. Clear the space around the unit and gather your tools so you aren’t scrambling mid-task.
Tip: Double-check the plug location and ensure the area is dry before handling any metal parts. - 2
Access rear panel and locate coils
Move the fridge slightly to access the rear or underneath panels where condenser coils reside. Use a screwdriver to remove the access cover. Avoid touching the compressor or electrical components directly.
Tip: Keep track of screws and their locations; a small mismatch can complicate reassembly. - 3
Clean condenser coils
With a coil brush or soft brush, gently remove dust and lint from coils. Vacuum the area to capture debris. Reinspect for any bent fins and straighten them carefully with a fin comb if needed.
Tip: Don’t bend fins excessively; misalignment can restrict airflow. - 4
Inspect door seals and gaskets
Close the doors and check for gaps. If you see light at the door seam or feel air leakage when near the gasket, replace or repair the seal. Clean the gasket contacts with a damp cloth.
Tip: Ensure door closes evenly without sticking. - 5
Check thermostat settings
Confirm the thermostat is set within the recommended range. If readings seem off, calibrate by moving the dial in small increments and monitor the effect over 24 hours.
Tip: Document initial and post-adjustment temperatures to track progress. - 6
Test reassembly and monitor
Reconnect power, reload items, and wait 15–30 minutes while temperatures stabilize. Check for unusual noises, frost, or leaks. Re-check temperatures after an hour and adjust if necessary.
Tip: Avoid overloading the shelves during the initial test phase. - 7
Final check and long-term monitoring
Keep a log of temperatures and any anomalies over the next 24–72 hours. If issues recur, consider a professional assessment or component replacement.
Tip: A consistent 24–72 hour monitoring window helps confirm stability.
FAQ
Why is my Kenmore Coldspot 106 not cooling?
Not cooling often comes from dirty condenser coils, worn door seals, or thermostat miscalibration. Start with a coil clean, seal check, and verify temperatures before pursuing more complex fixes.
Not cooling is usually due to airflow or temperature control issues. Start with coils and seals, then test temperatures.
How often should I clean the condenser coils on this model?
Clean condenser coils every 6–12 months, or sooner if you visually see dust buildup. Regular cleaning helps maintain airflow and cooling efficiency.
Clean the coils about twice a year unless you see dust buildup.
Can I fix a defrost drain clog myself?
A defrost drain clog is a common DIY fix. Clear the clog with a flexible pipe cleaner or using warm water; avoid harsh chemicals that could damage components.
Yes, you can usually clear a defrost drain with a pipe cleaner and warm water.
What temperatures should the fridge and freezer be set to?
Aim for 37–40°F (3–4°C) in the fridge and 0–5°F (-18°C) in the freezer for optimal food safety and storage performance.
Keep the fridge around 37 to 40 degrees and the freezer near zero to five.
What tools do I need for a basic DIY repair?
Basic tools include a screwdriver set, a multimeter, a digital thermometer, and a coil brush. Add replacement gaskets if needed.
You’ll want a screwdriver, multimeter, thermometer, and coil brush for most DIY fixes.
When should I call a pro for a Kenmore Coldspot 106?
Call a pro for refrigerant issues, sealed-system faults, persistent non-cooling after basic checks, or if you encounter electrical hazards beyond basic testing.
Call a pro for refrigerant leaks or complex electrical issues.
Watch Video
Top Takeaways
- Identify whether symptoms point to coils, seals, or thermostat
- Clean coils and inspect seals to restore efficiency
- Calibrate the thermostat and monitor temperatures for 24–72 hours
- Escalate to a professional for refrigerant or sealed-system issues