JennAir French Door Refrigerator Troubleshooting Guide
Learn how to diagnose and fix common issues with a JennAir french door refrigerator. Step-by-step fixes, safety tips, maintenance guidance, and when to call a pro for not cooling, leaks, frost, or sensor problems.

In this guide, you will learn how to diagnose and fix common problems with a JennAir french door refrigerator, including not cooling, frost buildup, and leaks. You'll find a step-by-step troubleshooting approach, essential tools, safety tips, and maintenance practices to extend your fridge's life. Everything is written for homeowners seeking practical, actionable fixes today.
Understanding the Basics of a JennAir French Door Refrigerator
A JennAir french door refrigerator combines multiple cooling zones, a sophisticated airflow system, and smart sensors to maintain temperature and humidity. When problems arise, the first step is to understand what each component does and how they interact. The How To Refrigerator team emphasizes that early identification of symptoms—like unusual noises, unusual frost patterns, or inconsistent temperatures—can prevent more serious damage. For homeowners, having a working knowledge of the system makes troubleshooting faster and safer. The keyword jenn air french door refrigerator should guide your inspection, especially when matching symptoms to the model's typical behavior. This guide also reflects how JennAir's design emphasizes modular components, so many issues can be isolated to one area without replacing the entire unit.
Common Cooling Issues and Their First Clues
Not cooling is the most alarming problem, but surface symptoms like warm air from vents, uneven cooling, or excessive frost can point to specific culprits. Start with simple checks: verify the door seals are airtight, confirm the temperature settings, and listen for abnormal compressor or fan sounds. Small changes in temperature readings, when mapped against model-specific ranges, can be telling. In many JennAir french door refrigerator models, the evaporator fan, condenser coils, and defrost system are critical to consistent cooling. When symptoms align with a particular area (for example, frost buildup near the back wall), you can narrow down the likely cause and avoid unnecessary part replacements.
Frost Build-Up and Defrost Drain Problems
Frost on shelves or in the freezer compartment often signals a defrost issue or poor air circulation. The defrost drain is a common bottleneck: if it’s blocked, water can pool and freeze, causing frost accumulation and leaks. Clear, indirect access to the back wall of the freezer and check for clogs in the defrost drain line. A clogged drain can trigger sensors that reduce cooling to protect food. While some frost is normal in older models, persistent frost indicates a need for more in-depth inspection or professional service. The JennAir design relies on automatic defrost, but clogs or damaged heaters disrupt that cycle.
Leaks: Water Under the Door and Inside the Fresh Food Compartment
Water leaks can originate from door seals, ice maker lines, or clogged drains. If you notice water pooling on the kitchen floor near the fridge, inspect the door gaskets for cracks or compression loss. Inside the refrigerator, check for condensate drainage paths and ensure the drain pan is correctly positioned. Leaks around the ice maker often point to a disconnected line or a faulty ice maker module. Addressing leaks quickly not only prevents water damage but also helps maintain the right humidity inside the compartments.
Temperature Control and Sensor Checks
Modern JennAir fridges rely on sensors to regulate temperature. If the sensor is out of calibration or there’s a faulty wiring connection, you may experience temperature fluctuations. Start by validating the control panel settings, performing a quick reset if the model supports it, and testing the temperature with an appliance thermometer. If the sensor readings don’t align with the display values, this can indicate a sensor failure or a control board issue. In some cases, replacing the thermistor or sensor is a straightforward fix, while other scenarios require skilled diagnosis.
Maintenance Habits That Prevent Most Problems
Regular cleaning and preventive maintenance extend the life of any refrigerator, including JennAir models. Clean door gaskets, dust the condenser coils, and ensure proper airflow around the back of the unit. A clean condenser coil runs more efficiently and reduces wear on the compressor. Temperature accuracy improves with proactive maintenance, so schedule a quarterly check of seals, door alignment, and airflow. Routine care reduces the likelihood of frost buildup, leaks, and cooling inconsistencies and helps your JennAir french door refrigerator operate near peak performance.
Safety First: Always Power Down Before Servicing
Working on a refrigerator can involve electrical components and sharp edges. Before performing any inspection or repair, unplug the unit and, if possible, switch off the circuit breaker that powers the appliance. Use insulated tools and wear safety gloves to protect yourself from sharp metal and cold surfaces. Keep pets and children away during troubleshooting. If you locate a potentially dangerous fault—such as a refrigerant leak or a damaged line—do not continue; contact a qualified technician.
Reading Your JennAir Manual and Using Diagnostic Codes
Your model’s owner manual is an invaluable resource for model-specific diagnostics, error codes, and reset procedures. If your unit displays an error code, note it down and cross-check with the JennAir manual. Codes often indicate sensor faults, drainage issues, or motherboard problems. If you don’t have the manual handy, you can usually download a PDF from JennAir’s support site. Understanding these codes helps you decide whether a simple fix is enough or if professional service is required.
What to Do If You Can’t Resolve It Yourself
Not all issues are safe or affordable to fix as a homeowner. If cooling remains inconsistent after basic steps, if you notice refrigerant smells, or if there are unusual noises that escalate, consider calling a professional repair service. The How To Refrigerator team suggests documenting symptoms, noting model details, and sharing any previous maintenance steps when you contact a technician. Proactive communication can reduce diagnostic time and expedite repairs.
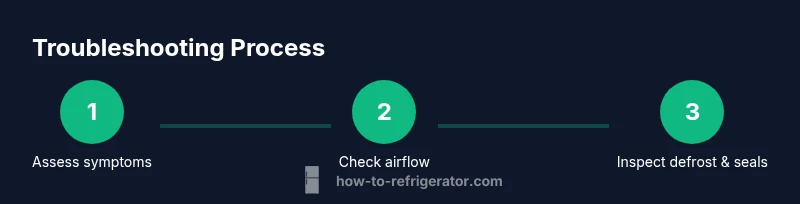
Quick Start: A 10-Point Troubleshooting Checklist
- Confirm doors are fully closed and seals intact; 2) Check temperature settings against recommended ranges; 3) Inspect condenser coils for dust; 4) Listen for abnormal sounds from compressor or fans; 5) Check defrost drain for clogs; 6) Inspect ice maker and water lines; 7) Look for frost patterns that indicate airflow blockages; 8) Verify drain pan placement; 9) Reset controls if supported; 10) Schedule professional service if issues persist.
Maintenance Schedule to Keep a JennAir French Door Refrigerator Running Smoothly
Create a simple monthly checklist: clean seals and gaskets, vacuum coils, check water filters if applicable, and verify door alignments. Regular checks help you spot wear before it becomes a problem. For models with water filtration, replace filters according to the manufacturer’s schedule to maintain water quality and ice taste. A proactive approach reduces the likelihood of not cooling, frost, or leaks and keeps your jenn air french door refrigerator performing at its best.
Tools & Materials
- Phillips and flat-head screwdriver set(Assorted sizes for screws on panels and covers)
- Digital multimeter(For checking sensors and electrical continuity)
- Soft brushes and microfiber cloths(Clean coils and wipe moisture safely)
- Vacuum or compressed air canister(Remove dust from condenser coils)
- Torx/hex keys(Some JennAir models use Torx screws)
- Container or towels(Catch any water during defrost drain inspection)
- Thermometer or calibrated thermometer(Verify actual temps in fresh food and freezer)
- Replacement door seal gaskets(If seals appear worn or cracked)
- Manual or digital model reference(Model number helps locate correct guidance)
Steps
Estimated time: 1-2 hours
- 1
Power down and prepare
Unplug the refrigerator and switch off the circuit breaker if available. Remove nearby items and lay towels to catch any condensation. Protect yourself from sharp edges and extreme cold surfaces while you inspect.
Tip: Always start with safety and unplug before touching any components. - 2
Check door seals and alignment
Inspect the gaskets for cracks, tears, or uneven compression. Clean with a damp cloth and perform a quick door-ajar test to ensure an airtight seal. Misaligned doors can create frost and cooling inefficiencies.
Tip: A simple door alignment adjustment can restore proper seal without tools. - 3
Test temperature controls and setpoints
Set both compartments to recommended ranges (roughly 37-40°F for fresh food and 0°F for freezer). Use a thermometer to verify actual temps. If readings don’t match the display, note the discrepancy for later diagnosis.
Tip: Document any variance to share with a technician if needed. - 4
Inspect condenser coils and airflow
Locate coils (usually rear or bottom-front). Remove dust using a brush or vacuum. Ensure there is unobstructed airflow around the unit and behind the grille. Poor airflow leads to overheating and reduced cooling efficiency.
Tip: Do not use water directly on electrical components. - 5
Examine the defrost drain and frost patterns
Look for frost buildup on the back wall or inside the freezer. If you see standing water near the drain, attempt a gentle flush with warm water to clear blockages. A blocked defrost drain is a common source of frost and leaks.
Tip: Do not force through a clogged drain; use a flexible pipe cleaner or bent wire to remove debris gently. - 6
Check the ice maker and water lines
Inspect the ice maker for proper connection and ice cube production. Check water lines for kinks or leaks and ensure the line is fully seated. Leaky lines can cause puddles and humidity changes that affect cooling.
Tip: If you suspect a line issue, shut off water supply before further handling. - 7
Test sensors and wiring with a multimeter
Carefully access the sensor wiring harness and test for continuity. Compare readings with the expected ranges from the service manual. A faulty sensor or loose connector can throw off temperatures and trigger alarms.
Tip: Only perform electrical tests if you are comfortable; otherwise skip and contact a pro. - 8
Reset controls or perform a field service reset
If the model supports it, perform a factory reset to clear minor firmware glitches. Follow the manual's procedure, document any error codes, and observe whether issue recurs after reset.
Tip: Note any error codes shown after reset for later reference. - 9
Reassemble, power up, and monitor
Secure panels, reconnect any disconnected components, and restore power. Give the unit a few hours to re-stabilize and check temperatures again with a thermometer.
Tip: Allow 2-4 hours for temperature stabilization. - 10
Decide on next steps if unresolved
If temperatures remain off, if you detect refrigerant issues, or if you see persistent leaks, schedule professional service. Having model and symptom notes ready will speed up diagnosis.
Tip: Gather model number, serial, and recent maintenance history before calling.
FAQ
What is the first step if my JennAir refrigerator isn't cooling?
Start by confirming the doors are fully closed and the seals are intact. Check the temperature settings and listen for unusual fan noises. If temperatures remain off after basic checks, continue with a more thorough inspection or contact support.
First, make sure the doors are closed and seals are good. Then verify the temperature settings and listen for odd noises before proceeding with deeper checks.
How can I fix frost buildup in a JennAir french door fridge?
Frost often points to defrost drain blockage or airflow issues. Inspect and clear the defrost drain, confirm proper airflow around the back, and clean condenser coils. If frost recurs, it may require professional service.
Frost usually means defrost drain or airflow issues; clear the drain, check airflow, and clean the coils. Repeated frost may need a pro.
When should I replace a sensor in a JennAir refrigerator?
If temperature readings are inconsistent with the display and the fault code points to a sensor, replacement is likely necessary. Verify sensor values with the service manual and consider professional service for accuracy.
If the temps don’t match the display and codes indicate a sensor, you likely need a replacement—best confirmed by a pro.
Is a water leak always caused by the ice maker line?
Leaks can originate from door gaskets, drain lines, or ice maker connections. Inspect all potential sources, starting with the water line and gaskets, and secure or replace as needed.
Leaks aren’t just from the ice maker; check lines and door seals too, and fix where needed.
Can I perform a reset on the JennAir fridge myself?
Many JennAir models support a factory or soft reset via the control panel. Follow the manual’s procedure exactly to avoid unintended changes, and monitor temperatures afterward.
Some models can reset from the control panel; follow the manual and then re-check temps.
When should I call a pro instead of DIY?
If you hear refrigerant smells, see visible frost beyond normal ranges, or suspect a compressor issue, stop and call a professional. Document symptoms and model details to speed up diagnosis.
Call a pro if you suspect refrigerant issues or compressor problems; have your model and symptoms ready.
Watch Video
Top Takeaways
- Identify symptoms early to target the right area.
- Blockages in the defrost drain are a frequent frost/leak source.
- Condenser coils need periodic cleaning for efficient cooling.
- Safety comes first: unplug before inspecting or handling electrical parts.
- When in doubt, consult a professional with model details and symptoms.