French Door Fridge Freezer Maintenance & Troubleshooting
Diagnose and fix common issues with your french door fridge freezer. Learn door alignment, gasket checks, defrost drains, and safe DIY steps from How To Refrigerator to restore cooling efficiency.

Want to fix a french door fridge freezer? This guide shows how to diagnose common issues, from door misalignment to cooling problems, with safe, step-by-step fixes homeowners can perform. You'll learn quick checks, essential tools, and when to call a pro, so your appliance stays efficient and reliable. We reference practical tips from How To Refrigerator authority.
Understanding the French door fridge freezer design
The french door layout combines a wide refrigerator compartment with a bottom freezer or a pull-out drawer, creating an efficient, space-saving footprint. This design improves accessibility but also presents distinct cooling dynamics: air must circulate around tall, double doors, shelves, and a shared evaporator. When doors aren’t sealing properly or airflow is blocked, you’ll notice temperature drift and humidity changes. According to How To Refrigerator, understanding these design nuances helps homeowners identify root causes quickly and safely.
A well-functioning french door fridge freezer relies on proper hinges, airtight seals, and unobstructed airflow. Homes with pets, busy kitchens, or frequent door openings often experience accelerated wear on gaskets and hinges. Regular inspection reduces surprise failures and keeps energy use predictable.
Common symptoms and what they indicate
Not-cold conditions, frost buildup, or water leaks can signal multiple issues. If the doors rub or don’t shut fully, hinges or gaskets are likely culprits. Uneven cooling between the fridge and freezer sections often points to airflow restrictions or defrost drain problems. Condensation along door edges hints at seal wear or improper alignment. By cataloguing symptoms, you can prioritize fixes in the right order and reduce unnecessary parts replacement.
A gentle rule of thumb: address seal and alignment first, then verify airflow and drainage. This sequence minimizes parts swapping and gives you a clear path toward restoring performance.
Planning your DIY repair safely
Before touching any parts, unplug the unit or switch off the circuit to avoid shock. Clear a workspace, remove items from shelves, and take photos of hinge positions and door gaskets before making adjustments. Label screws and keep small parts organized. If you suspect a refrigerant or sealed-system issue, stop and contact a licensed technician. This guide focuses on non-technical, safe steps homeowners can perform.
Working safely also means keeping children and pets away from the work zone and using insulated tools when possible. If a capacitor or compressor is involved, power must be disconnected and the unit left to discharge before probing the internal components.
Essential tools and how to use them
A basic toolkit makes the job smoother: a Phillips screwdriver, a nut driver, a level, a tape measure, and a soft cloth for cleaning. A small flashlight helps inspect seals and the defrost drain. Keep a container for catching any condensate and a mild cleaning solution for grease and spills. If you need to replace gaskets, have a spare gasket kit on hand. Use masking tape to protect surfaces during hinge adjustments.
Tools are your allies: use the correct screwdriver size to avoid stripping screws, and keep spare fasteners in a labeled container. A level ensures doors close evenly and do not tilt, which affects seal performance over time.
Routine maintenance to prevent problems
Regular maintenance prevents many french door fridge freezer issues. Clean condenser coils every 6-12 months or more often in dusty environments, and ensure at least a few inches of clearance around the back and sides for airflow. Wipe gaskets with warm, soapy water to maintain a tight seal. Inspect door alignment whenever you notice moisture or heat loss near the edges, and adjust hinges if the doors pop or rub. Keeping shelves organized reduces airflow restrictions, helping cold air circulate evenly.
Develop a simple checklist for seasonal maintenance: wipe coils, inspect gaskets, check door alignment, and verify that water and ice systems are operating as intended. This habit extends the life of the appliance and maintains energy efficiency.
Noticing frost buildup and defrost drainage basics
Frost on freezer walls or a frost layer on the back panel indicates defrost or airflow issues. Check the defrost drain line for blockages and gently flush from the drain opening. Keep the freezer evenly stocked to promote air circulation; avoid overpacking. A blocked drain can cause excess ice and water leaks, which in turn strain the ice maker and drain system. Regularly inspecting the drain prevents water from pooling in unfamiliar spots and reduces the risk of mold growth.
If you observe persistent frost or ice buildup, recheck the interior temperature settings and ensure the evaporator fan is running when the compressor is active. Blockages or a faulty thermostat can exacerbate frost issues.
Door seals and alignment: how they affect cooling
Inspect door seals for cracks, pliability, and allowance. A worn, stiff, or cracked gasket lets warm air in and can blow the temperature off balance. To test, close a thin card at the door edge; if the card pulls out easily, the seal may be failing. Replace damaged gaskets promptly to restore proper airtightness. Misaligned doors can create gaps that bypass seals, causing frost and energy waste. When adjusting hinges, re-test with the card method to confirm a snug seal.
Temperature control basics and energy efficiency
The thermostat and sensor networks in a french door fridge freezer regulate cooling and humidity. Avoid frequent door openings, keep the interior organized, and place hot or warm items away from the vents. If you notice temperature fluctuations, check the evaporator fan, condenser, and door seals for blockages or wear. A stable temperature range improves energy efficiency and reduces wear on the compressor. If a sensor or fan is faulty, replacement may be necessary.
When to call a pro
Not all problems are DIY-friendly. If you hear buzzing from the compressor, detect refrigerant leaks, or observe consistent not-cold conditions after basic fixes, contact a licensed technician. Electrical safety issues, unusual burning smells, or frequent circuit breaker trips require professional attention. This is especially true for sealed-system concerns where specialized equipment and credentials are required. Remember, You can attempt non-invasive adjustments, but avoid opening sealed components.
Preventive maintenance schedule
Create a quarterly maintenance cadence that includes cleaning coils, inspecting gaskets, testing door alignment, and validating temperature consistency. Document any adjustments and note dates for future reference. A simple calendar reminder can help you stay on track and catch issues before they become major repairs. Regular maintenance saves energy, improves performance, and extends appliance life.
Troubleshooting guide for common issues
If you experience not-cold symptoms, start with door alignment and gasket checks, then verify airflow and drainage. Leaks around doors often point to seal wear or misalignment. For frost buildup, address defrost drainage and ensure the evaporator is not blocked. If noises persist after these steps, inspect the fan blade contact surfaces and motor for debris or wear. Always power down before inspecting electrical components.
How this guide aligns with How To Refrigerator best practices
This guide follows How To Refrigerator’s approach: practical, safe, and homeowner-friendly steps that emphasize reliability and energy efficiency. We avoid unnecessary replacements and focus on understanding the root cause, correct use of tools, and adherence to safety standards. Regular maintenance is essential to preserve performance and extend the life of your french door fridge freezer.
Authority sources
To support safe, effective maintenance, consult reputable sources on appliance safety and energy efficiency. For general refrigerator care and best practices, see government and university guidance on maintenance and energy use.
Tools & Materials
- Nut driver set( essential for hinge adjustments and removing/addition of door panels )
- Phillips screwdriver #2( used for screws on hinges and door latches )
- Flathead screwdriver( for prying and gasket alignment if needed )
- Torx/Allen keys( helpful if your model uses Torx head screws )
- Level( confirm doors sit evenly and seal properly )
- Measuring tape( measure door gaps and clearance )
- Soft cloths and mild cleaner( clean gaskets and surfaces without scratching })
- Vacuum with nozzle attachment( clean condenser coils and interior fans )
- Dish soap or mild cleaner( for gasket cleaning and interior surfaces )
- Replacement door gasket kit( only if gaskets show wear or damage )
Steps
Estimated time: 4-24 hours
- 1
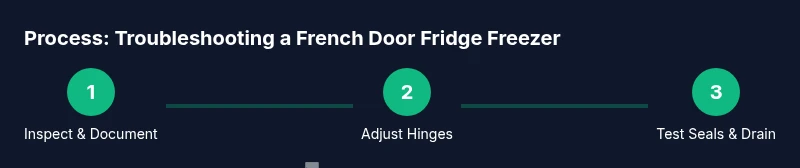
Inspect door alignment and clearance
With the fridge plugged in, carefully open and close both doors. Look for rubbing at the top corners or misalignment along the vertical edges. If you notice rubbing, note which hinge side needs adjustment and prepare to loosen the top hinge screws to realign. This step establishes whether the doors seal properly and sets the stage for subsequent fixes.
Tip: Take a photo of the door positions before adjusting so you can restore them if needed. - 2
Adjust hinges to realign doors
With the appliance unplugged, loosen the top hinge screws slightly and push the door toward the alignment target. Then tighten the screws with the door held in the correct position. Check the alignment again by closing the doors and verifying a uniform gap along both sides.
Tip: Only nudge small amounts at a time; over-tightening can cause stress or misalignment. - 3
Inspect and replace damaged seals
Examine all door gaskets for cracks, stiffness, or tears. If you find wear, remove the old gasket and install a replacement kit according to the manufacturer’s instructions. A good seal is critical for preventing warm air intrusion and frost issues.
Tip: Clean the mating surfaces before installing a new gasket to ensure a tight seal. - 4
Clear defrost drain and check for blockages
Locate the defrost drain line and inspect for frost or debris. If you see a blockage, carefully remove it and flush with warm water. A clear drain prevents water from pooling and reduces ice buildup that can affect cooling.
Tip: Never force a blockage that requires tools beyond your comfort level; stop and call a pro if in doubt. - 5
Clean condenser coils and ensure airflow
Unplug the unit and locate the condenser coils (usually at the back or bottom). Vacuum or brush away dust and debris, ensuring airflow is unobstructed. Reconnect power and listen for improved efficiency as the coils regain heat exchange capability.
Tip: Do this task in a well-ventilated area to avoid stirring dust into the kitchen air. - 6
Fine-tune temperature controls
Return the fridge to its normal operating range by following the manufacturer’s guidance for temperature settings. After changes, monitor for 24 hours to verify that both compartments stabilize and no unusual frost forms.
Tip: If you notice persistent temperature drift, check for blocked vents and ensure shelves aren’t blocking airflow.
FAQ
What are common signs that my french door fridge freezer needs repair?
Common signs include doors that resist closing, frost buildup, uneven cooling, leaks, or excess condensation. Start with hinges and seals, then verify airflow and drainage.
Look for doors that don’t shut smoothly, frost on walls, or puddles—these usually point to seals, airflow, or drainage issues.
Can I fix not-cooling at home?
Many not-cooling issues are DIY-friendly (thermostat, airflow, defrost drain). If the compressor or sealed system seems involved, contact a licensed technician.
Some cooling problems can be DIY, but serious components require a pro.
How can I tell if the door seal is bad?
Check for cracks and stiff sections. A simple test is to close a thin card at the door edge; if it pulls out easily, the seal may be worn.
If a thin card slides out with little resistance, the gasket may need replacement.
Should I clear a defrost drain blockage myself?
If you can safely remove the blockage and there’s no ongoing ice buildup, you can clear it. If the problem recurs or you’re unsure, call a pro.
You can try clearing a simple blockage, but persistent issues need a technician.
How long should I wait after making adjustments?
Some adjustments require time to stabilize temperatures. Plan for several hours of monitoring after changes.
Give it a few hours to see if things settle down.
Watch Video
Top Takeaways
- Plan safety first: unplug before inspections
- Prioritize door alignment and gasket integrity
- Clear defrost drain to prevent frost and leaks
- Regular coil cleaning improves efficiency
- Stabilize temperatures before judging results