How to Use a Refrigerator Thermometer: A Home Guide
Learn how to use a refrigerator thermometer to verify temps, calibrate for accuracy, and maintain food safety. This step-by-step guide covers placement, reading, troubleshooting, and long-term maintenance for reliable fridge temperatures.

By the end of this guide, you will know how to use a refrigerator thermometer to verify that your fridge stays within safe temperatures, how to place and read the thermometer, and how to calibrate it for accuracy. You'll also learn common mistakes and a simple testing routine you can perform in under 20 minutes.
Why a Refrigerator Thermometer Matters
If you're looking to protect perishable foods and keep your kitchen safe, understanding how to use refrigerator thermometer accuracy is essential. A dedicated thermometer provides a clear, unbiased read of the air temperature inside your fridge, helping you avoid under- or over-cooling. The How To Refrigerator team emphasizes that consistent, measured readings are the backbone of reliable food safety practices. Using a thermometer is a simple, low-cost step that yields big results: fewer spoiled items, less guesswork, and better energy management for your home. By learning the basics now, you’ll reduce the chances of bacterial growth and keep leftovers safer for longer. This guide will show you exactly how to use refrigerator thermometer readings to inform decisions about temperature settings and door usage—so you can act quickly when readings drift.
Reading Temperature Targets for Food Safety
Maintaining proper fridge temperatures is critical for slowing bacterial growth and preserving the quality of dairy, meat, produce, and ready-to-eat foods. In general, aim to keep the fridge around 38°F (3°C) or cooler, with the freezer at 0°F (-18°C). Small fluctuations are normal, but sustained readings outside these ranges indicate the need for adjustment. Regular checks help you establish a baseline for your specific appliance, which can vary due to door openings, load levels, or seasonal temperature changes. Our guidance reflects findings from How To Refrigerator analyses, which show that proactive monitoring reduces waste and extends the life of perishable items. Remember: an accurate thermometer complements good habits like rapid cooling after cooking and proper storage order.
Picking the Right Thermometer for Your Fridge
There are several thermometer styles suitable for household use. Digital thermometers with a probe tend to offer quick, precise readings, while dial thermometers are simple and low-cost. Some models include a secondary sensor for ambient door temperature, which is useful if your fridge door frequently opens. If you prefer remote monitoring, wireless options can send alerts to your phone. Regardless of type, prioritize readability, a wide measurement range, and accuracy to within 1–2°F (0.5–1°C). We recommend keeping a spare battery and ensuring the device is calibrated for best results.
Calibrating and Verifying Accuracy
Calibration ensures your thermometer reporting matches true temperatures. Start by validating accuracy with a known reference: ice-water calibration, which should read near 32°F (0°C). To perform this test, fill a glass with ice, add cold water, and insert the probe without touching the sides or bottom. After 3 minutes, note the reading. If it deviates more than a degree or two, consult the user manual for a calibration screw or reset procedure. Regular recalibration after changing batteries or moving the unit is wise. If you see persistent drift, it may be time to replace the thermometer.
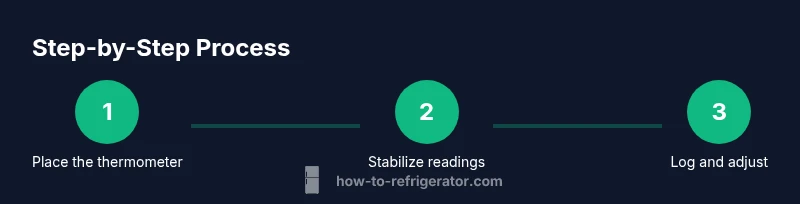
Step-by-Step: Testing Your Fridge Temperature
To systematically verify temperatures, follow a simple routine. Place the thermometer in the center of a middle shelf, away from the door and from the back wall where cold air concentrates. Allow 5–10 minutes for stabilization, then record the reading at the same time each day for a week. Compare your results to the target range and adjust the fridge's thermostat if readings remain consistently off. Maintain a log so you can track trends over time and catch early signs of malfunction.
Common Mistakes and How to Avoid Them
Avoid common pitfalls that skew readings. Do not place the thermometer in the door bin where temperatures swing with every slam; avoid placing it near the evaporator vent or near the back wall where air is consistently cold. Do not skip calibration after replacing batteries or moving the unit. Also, don't rely on a single reading—temperatures can fluctuate with meal prep, warm items added, or the compressor cycling. Taking multiple readings over several days gives you a more accurate picture of your fridge's performance.
Maintenance for Long-Term Accuracy
Keep your thermometer clean and dry; wipe away condensation that can obscure readings. Check batteries at least every year, replacing as needed. Keep the device away from heat sources (stove, oven, direct sunlight) that could skew results. Periodic recalibration is a best practice, especially after moving the appliance or performing routine defrosts or cleaning. A well-maintained thermometer is a simple, reliable tool that protects food quality and reduces energy waste.
Real-World Scenarios: Vacation, Groceries, and Door Openings
When you’re traveling, hosting, or restocking shelves, your fridge experiences different loads and temperature dynamics. A higher grocery load can temporarily raise internal temperatures, so you may need to reposition the thermometer or recheck after a few hours. After grocery runs, wait until the interior settles before relying on readings for decisions about re-stocking or cooling new items. If your household tends to leave doors ajar or the seal is weak, use thermometer readings to determine whether the door concerns are affecting the overall temperature and address seal issues promptly.
Tools & Materials
- Refrigerator thermometer (digital or dial)(Choose with wide range and accuracy to ±1°C or ±2°F)
- Batteries (spare)(Essential for digital models)
- Notepad and pen(Record readings and dates)
- Timer or smartphone(Track stabilization times and check intervals)
- Marker or tape(Mark placement location for consistency)
- Ice-water (for calibration)(Optional; use for ice-water calibration test)
- Cleaning cloth(Wipe condensation before readings)
Steps
Estimated time: 15-20 minutes
- 1
Choose the placement spot
Select a central shelf away from the door and back near the middle of the fridge. This location reduces swing from door openings and vents, giving a representative temperature reading.
Tip: Mark the spot with tape so readings are consistent each time. - 2
Place the thermometer correctly
Position the sensor where air is representative, not directly against walls or vents. For a probe, keep the sensing tip in the air, not touching metal edges.
Tip: Avoid cramped areas that trap humidity, which can skew readings. - 3
Let the temperature stabilize
After placing the thermometer, wait 5–10 minutes to allow the temperature to stabilize. Record the reading once it's steady.
Tip: Do not move the thermometer during stabilization; movement causes false readings. - 4
Read and compare
Note the temperature and compare it to the target range (typical fridge target around 38°F / 3°C). If readings are consistently high or low, plan an adjustment.
Tip: Log readings daily for a week to observe trends rather than a single data point. - 5
Adjust settings if needed
If readings drift beyond range, adjust the fridge thermostat a small amount and recheck after stabilization. Large swings may indicate board or sensor issues.
Tip: Make incremental changes and recheck to avoid overcorrection. - 6
Document and maintain
Keep a running log of temperatures, dates, and any adjustments. Schedule periodic calibration checks and battery replacements.
Tip: Set a monthly reminder to review readings and seals.
FAQ
What is a refrigerator thermometer and why do I need one?
A refrigerator thermometer measures the air temperature inside your fridge, helping you maintain safe storage conditions. It provides objective data to guide temperature settings and reduce spoilage. Regular use supports food safety best practices.
A fridge thermometer shows the air temperature inside your fridge, which helps you keep food safe and reduce waste.
Where should I place the thermometer in my fridge?
Place the thermometer on a middle shelf, away from the door and back wall where air moves. This location minimizes swings and reflects typical storage conditions.
Put the thermometer on a middle shelf away from the door so readings reflect typical food storage conditions.
How often should I check fridge temperatures?
Check temperatures at the same time each day for a week after installation or after changing settings. Then monitor periodically—weekly or monthly checks are common practice.
Check the temperature at the same time daily for a week after setup, then do regular checks.
Can I calibrate using the ice water method?
Yes. Submerge the probe in a glass of ice water to test for a near-32°F (0°C) reading. If significantly off, use the calibration feature or refer to the manual for adjustments.
You can calibrate with ice water to confirm it reads about 32 degrees Fahrenheit, and adjust if needed.
What should I do if the fridge reads too warm or too cold?
If readings are consistently outside the target, adjust the thermostat in small increments and recheck after stabilization. If the problem persists, there may be a sensor or door-seal issue.
If it stays too warm or cold, adjust the thermostat a little and recheck; persistent issues may require inspection of seals or sensors.
Is calibrating necessary if I have a digital thermometer?
Many digital thermometers are factory calibrated, but occasional recalibration can improve accuracy, especially after battery changes or movement.
Digital thermometers are often pre-calibrated, but recalibrating after battery changes helps accuracy.
Watch Video
Top Takeaways
- Use a dedicated thermometer for accurate fridge temps
- Place readings away from doors and vents
- Calibrate and verify accuracy regularly
- Log readings to spot trends
- Address door seals and airflow to maintain stability