How to Test Refrigerator Compressor Without a Multimeter
Learn safe, practical methods to assess a refrigerator compressor without a multimeter. Step-by-step checks, caveats, and when to call a pro. How To Refrigerator shares expert guidance for homeowners troubleshooting appliance issues.

You're aiming to determine if the refrigerator compressor may be failing without a multimeter. This quick guide explains safe non-meter checks, what symptoms to watch for, and practical steps homeowners can take before calling a pro. You’ll learn to listen for abnormal cycling, feel for overheating, and inspect coils and door seals to form a confident next step.
Why testing without a multimeter matters
If your refrigerator is acting up but you don’t have a multimeter handy, you can still gather meaningful clues about the compressor by focusing on symptoms, audible cues, and physical signs. According to How To Refrigerator, homeowners often pinpoint obvious faults through simple observations rather than electrical measurements. These non-meter checks can help you decide whether a compressor likely needs professional service versus a routine repair like cleaning coils or replacing a worn fan belt. While a meter offers precise data, many issues reveal themselves through how the unit behaves: running cycles, temperature swings, and unusual heat around the back of the appliance. The goal is to triage safely and efficiently, so you know when to call a repair technician. In this article, we’ll walk you through safe, practical checks that do not require specialized tools, while highlighting when to stop and seek expert help. Remember: protecting your safety and the appliance is the priority, not diagnosing a complex electrical fault from home.
Safety basics before you begin
Before you touch any components, unplug the refrigerator and wait a full minute to reduce the risk of electric shock or compressor startup. Keep water and moisture away from any exposed terminals, and wear non-slip footwear if you need to move the unit. If you suspect a refrigerant leak, do not attempt any disassembly—refrigerants can be hazardous, and professional intervention is required. Use a flashlight and a digital thermometer to observe temperatures without leaning in to hot surfaces. The emphasis here is safety, not speed: a careful, methodical approach reduces the chance of creating more problems than you solve. How To Refrigerator emphasizes proper isolation and personal protective gear as foundational steps. If at any point you feel unsure, pause and consult a qualified technician.
Visual and auditory symptom checks
Begin with the outside signs: is the freezer cold but the refrigerator not? Are you hearing a buzzing, humming, or clicking that seems abnormal in duration or volume? Look at door seals to ensure a tight seal, and check the condenser coils behind or beneath the unit for dust buildup. A dirty coil can make the compressor work harder and mislead you into blaming the compressor. Listen for a compressor start-up sequence that is unusually long or has a groan; this can indicate bearings or motor trouble. Note the cycling pattern: a healthy fridge cycles on and off with regular intervals depending on ambient temperature. If you observe extended on-cycles, frequent cycling, or no cycling at all, this is a signal to investigate further. Throughout this section, document what you see and hear, as it provides a baseline for the next steps. How To Refrigerator’s guidance here aligns with common-sense checks homeowners can perform safely. Based on How To Refrigerator Analysis, 2026 shows that small patterns in cycling and noise often correlate with compressor issues, but diagnostics remain essential.
Evaluating airflow and condenser cleanliness
Airflow obstruction and dirty coils are common culprits that masquerade as compressor faults. Start by unplugging the fridge, moving it away from the wall, and vacuuming around the condenser with a brush attachment. While you can’t measure pressure without a meter, you can observe changes in cooling performance: is the back of the fridge warm or hot after running for a while? If the heat seems excessive, the compressor may be overworked, or there could be airflow restrictions. Check the fan blade inside the freezer compartment; if it’s blocked or wobbly, it can cause cycling irregularities that resemble compressor issues. Take temperature readings at the top shelves and near the evaporator to compare with the lower sections. This section focuses on conditions that stress the cooling system, which often points to coil cleanliness and airflow as a root cause rather than a failed compressor.
Can you verify motor function by feel and sound?
Feeling for vibrations or warmth can offer clues, but be mindful: you should never touch a live electrical connection. With the unit unplugged, gently touch the compressor housing if accessible (some models seal this area); if it feels unusually hot even after the appliance has cooled, this may indicate an overworked motor. Listen again during startup and shutdown: a healthy compressor has a decisive start and stop with minimal noise. A grinding or grinding-like sound during startup can indicate bearing wear. If the compressor seems to struggle to start or cycles on and off with long pauses, consider scheduling a professional inspection. Remember, absence of dramatic sounds does not guarantee health; some issues are subtle or intermittent.
Non-contact temperature and cycling observations
Without touching live components, you can still monitor temperature trends and cycling behavior. Use a room thermometer near the unit to gauge ambient influence and track whether the top and bottom sections maintain appropriate temperatures. If you notice the compressor running constantly for hours with little temperature change, that is a red flag. Conversely, if the unit runs for very short cycles and never reaches the desired interior temperature, the system may be struggling. Document these patterns with timestamps. While these observations can't replace a diagnostic test, they provide valuable context that helps you and a technician pinpoint potential issues more efficiently. How To Refrigerator notes that consistent, measurable patterns are easier to interpret than sporadic behavior.
Interpreting signs of potential compressor failure
Certain observable signs—persistent overheating, unusual noise, and failing to maintain temperature—are suggestive of a failing compressor but not conclusive. If dust or grime accumulation is blocking the condenser, the compressor will strain and fail prematurely; cleaning may restore performance but won’t fix a worn-out compressor. A refrigerant leak can also create abnormal cooling behavior that mimics compressor problems. In such cases, a professional diagnostic remains essential. Remember to correlate symptoms with the appliance’s age, maintenance history, and environmental conditions. The How To Refrigerator team emphasizes a careful, data-driven approach: use symptom patterns, not guesses, to decide on next steps and prioritize safety.
When to escalate: failure signs and next steps
When symptoms persist or you detect persistent warmth around the compressor, a professional service is warranted. Prepare to describe the observed symptoms, cycling patterns, noise, and any temperature deviations. Gather model information, service history, and any maintenance notes. If you plan to pursue service, ask for a diagnostic visit rather than immediate part replacement. In most cases, a technician will check electrical connections, refrigerant levels, and the compressor’s integrity with appropriate tools. How To Refrigerator recommends scheduling a visit promptly if the unit continues to underperform after non-meter checks, to prevent further damage and energy waste. This plan helps you protect your home and budget while ensuring the root cause is correctly identified.
Practical test plan: a homeowner's checklist
Create a simple, repeatable checklist to avoid missing steps. Start with safety: unplug, inspect seals, clean coils, and note temperatures. Then observe cycling, noise, and heat signs as the unit runs. Next, compare room temperature to interior readings over a given interval (for example, two hours) and log any deviations. Finally, decide on a course of action: clean and recheck after a cooldown period, call a pro, or consider replacement if the model is old and inefficient. This plan provides structure without requiring specialized equipment, ensuring you make informed, cautious decisions. The plan also helps when communicating with a technician, since you’ll have concrete observations to discuss and share.
Common mistakes to avoid and safety reminders
Don’t rely on a single observation to diagnose the compressor; combine symptoms, timing, and reliability data to form a reasonable conclusion. Avoid reopening sealed areas or probing connectors when the unit is plugged in. Always unplug before touching the backside or access panels. Do not attempt refrigerant handling or internal repairs; refrigerants and high-pressure systems require licensed professionals. Maintain consistent safety practices, use the proper PPE, and never rush through checks. By following a structured approach and keeping expectations grounded, you’ll reduce risk and increase the likelihood of a correct assessment.
Tools & Materials
- Flat-head screwdriver(For prying loose covers if needed; use cautiously on non-electrical areas)
- Flashlight(Bright, steady light to inspect coils and back panel areas)
- Digital thermometer(To observe interior and evaporator temperatures accurately)
- Gloves (non-slip, insulated)(Protect hands when handling shelves or grille covers)
- Vacuum with brush attachment(Helps clean condenser coils; optional but recommended)
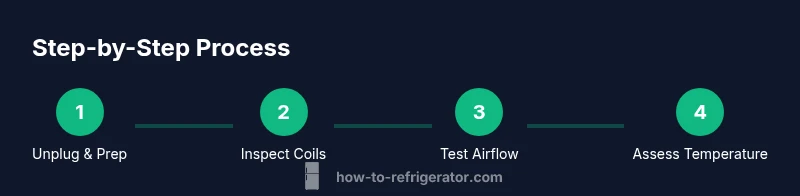
Steps
Estimated time: 45-60 minutes
- 1
Power down and prepare the area
Unplug the fridge and wait a full minute to reduce the risk of shock or compressor restart. Clear the area around the back of the unit and gather your tools so you don’t need to reach for a live connection. Keep pets and kids away from the workspace.
Tip: Never work on an appliance that’s still plugged in. Safety first prevents costly mistakes. - 2
Inspect exterior seals and coils
Check door seals for gaps and inspect the condenser coils for dust buildup. A dirty coil makes the system work harder, which can mimic compressor issues.
Tip: Clean coils using a brush or vacuum; do not use liquids on electronics or motors. - 3
Observe sounds and cycles without power
With the unit unplugged, gently listen near the compressor housing if accessible. When you power it temporarily for a short test under supervision, note any unusual noises during startup.
Tip: A quiet or normal startup is a good sign; focus on any grinding or squealing noises. - 4
Test airflow and fan operation
Ensure the freezer fan and interior vents move air properly after a brief cooldown. Restricted airflow can affect cooling and create symptoms similar to compressor faults.
Tip: If a fan is blocked, clear the obstruction before retesting. - 5
Check interior temperature response
Plug the unit back in and monitor interior temperatures with a thermometer over a short period. Compare upper and lower sections to detect uneven cooling.
Tip: Record temperatures at regular intervals for clear conclusions. - 6
Document symptom patterns
Keep a log of cycling frequency, noises, and temperatures. Pattern recognition helps pinpoint whether issues are intermittent or persistent.
Tip: Consistency in observations strengthens your case when contacting a pro. - 7
Assess the need for professional help
If symptoms persist after non-meter checks, arrange a diagnostic visit with a technician. Provide your observations for faster diagnosis.
Tip: Ask for a written diagnostic report to reference later. - 8
Plan next steps responsibly
Decide on cleaning, part replacement, or professional service based on the gathered data and the appliance’s age and energy use.
Tip: Avoid DIY refrigerant handling or pressure-related work.
FAQ
Is it safe to test a refrigerator compressor without a multimeter?
Yes, you can perform basic non-meter checks like listening for unusual noises, checking airflow, and inspecting coils. Avoid opening live electrical connections and stop if you feel unsure. These checks help you gauge whether a professional assessment is needed.
Yes. You can listen for odd noises, check airflow, and inspect coils safely without a meter, but stop if you’re unsure.
What are the most common signs of a failing compressor?
Persistent overheating, abnormal cycling patterns, loud or unusual noises, and inability to maintain stable temperatures are common indicators. These signs don’t prove a failure but strongly suggest the need for professional evaluation.
Common signs include overheating, odd cycling, loud noises, and failing to keep steady temperatures.
Can visual checks alone diagnose a compressor problem?
Visual checks can point you toward airflow issues or dirty coils, but they cannot reliably confirm compressor failure without proper electrical testing. Use visuals to guide your next steps and conversations with a technician.
Visuals help guide what to check next, but they aren’t a definitive diagnosis.
What should I do if the compressor is hot to the touch?
If the compressor feels hot, power down, unplug, and allow the unit to cool. Reassess after cooling; if heat persists, this can indicate overwork or a refrigerant issue that requires a pro.
If it’s hot, unplug and let it cool, then call a pro if it remains hot.
When is replacement better than repair?
If the model is old, inefficient, or multiple major components show wear, replacement may be more cost-effective in the long run than repeated repairs. A technician can provide a cost-benefit assessment.
Consider replacement if repairs would be frequent or expensive and the unit is aging.
Do these methods apply to all fridge types?
General symptom-based checks apply to most standard refrigerators, but layouts vary. Follow model-specific safety instructions and avoid probing sealed electrical areas.
Most tips work for common fridges, but always check your model’s safety guides.
Watch Video
Top Takeaways
- Observe symptoms before testing with tools.
- Safety always comes first; unplug before touching components.
- Non-meter clues can indicate compressor stress or airflow issues.
- Document patterns to speed up professional diagnosis.
- Plan escalation if symptoms persist after non-meter checks.