How to Adjust Refrigerator Door
Learn how to adjust a refrigerator door for a snug seal and efficient cooling. This guide covers leveling, hinge adjustments, shim placement, and safe DIY steps for homeowners.

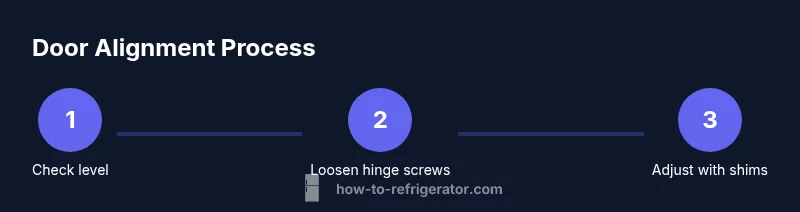
You can fix a misaligned refrigerator door by checking level, then adjusting hinges and shims to bring the door into even alignment with the cabinet. Start with the top hinge and recheck the seal, then tune the bottom hinge if needed. The goal is a square door that seals evenly without gaps, reducing energy waste and frost buildup.
Why door alignment matters
A refrigerator door that sits crooked or leaves gaps at the corners can waste energy, cause frost buildup, and compromise the gasket's longevity. When you adjust the door, you're not just fixing cosmetic issues—you improve sealing, maintain consistent temperatures, and extend the life of the compressor. A properly aligned door closes smoothly and meaningfully returns the interior to the correct temperature. For many homeowners, even a small tilt matters in day-to-day performance and long-term reliability. According to How To Refrigerator, keeping doors aligned is a simple maintenance task with big payoff for efficiency and comfort. A well-aligned door also reduces noise and wear on hinges, making daily use quieter and safer for families.
Quick diagnostic check before adjustment
Before loosening screws, perform a quick check to confirm that adjustment is actually needed. Place a carpenter's level on the top edge of the door and check for side-to-side and front-to-back tilt. Close the door slowly and observe the gasket — if you can slide a dollar bill along the top edge with moderate resistance, the seal is likely good; if you can slip it out easily, the door needs adjustment. Inspect the gap around the door frame: even, uniform gaps indicate proper alignment, while tight spots or wavy edges suggest misalignment or hinge issues. Keep notes of where gaps are most pronounced to guide your adjustments.
Common causes of misalignment
Misalignment happens for a variety of reasons: uneven flooring or cabinetry settlement, loose hinge screws, or over-torqued mounting hardware. Temperature changes and door usage patterns can cause the door to drift gradually over months. In French-door or side-by-side configurations, misalignment may involve both doors and hinges, requiring more nuanced adjustments. If the unit was recently moved or installed incorrectly, the alignment may be off right from the start. Understanding the root cause helps you choose the right corrective action.
Preparing for adjustment
Safety first: unplug the refrigerator or switch off the dedicated circuit before touching any electrical components. Clear the area of groceries and spills, then lay down a protective cloth or towel to prevent scratches. Assemble a basic toolkit: screwdrivers, a level, and shim material. Have photos of the hinge positions before you start so you can reference the original alignment if needed. Mark the screws you loosen with a small piece of masking tape to avoid confusion during reassembly.
Special cases: different hinge types
Top-hinge adjustments are the most common and usually involve riser screws or shims under the hinge base. If you own a French-door or side-by-side model, you may need to adjust both doors and potentially the bottom hinges. Some doors use hex or square head screws, while others rely on Phillips screws. Always consult the manufacturer’s manual for your exact hinge configuration and torque specs. If the model differs significantly, consider contacting a professional to avoid misalignment or damage.
When to call a professional
If after careful adjustments the door still does not seal properly, or if you notice bent hinges, frame damage, or persistent leaks, it’s time to seek a repair technician. Complex hinge systems or damaged cabinet enclosures may require factory replacement parts or specialized tools. Early professional intervention can prevent further wear and preserve energy efficiency. The How To Refrigerator team recommends stepping back when you encounter stubborn hardware to avoid accidental damage.
Tools & Materials
- Phillips head screwdriver (size #2)(Essential for most hinge screws)
- Flathead screwdriver(Useful for shim placement or stubborn screws)
- Hex/Allen wrench set(Some models use hex screws on hinges)
- Adjustable wrench(For stubborn bolts on certain models)
- Carpenter's level(Check front-to-back and side-to-side level)
- Thin shims (plastic or cardboard)(Move door height or tilt by 1-2 mm increments)
- Non-marring padding or towel(Protect finish when moving door)
- Masking tape(Mark alignment before loosening screws)
- Notepad and pencil(Record measurements or notes)
- Flashlight(Improve visibility in dim areas)
- Replacement hinge screws(If original screws are damaged)
Steps
Estimated time: 20-40 minutes
- 1
Check level and assess tilt
Place a carpenter's level on the top edge of the door to verify front-to-back and side-to-side tilt. If the refrigerator is not level, adjust the feet or casters according to the manufacturer’s guidance, not by force. Document any tilt to guide later hinge adjustments.
Tip: Use the level twice—once with the door closed, once with it slightly ajar to ensure accurate readings. - 2
Loosen top hinge screws
With the door supported, loosen the top hinge screws just enough to allow slight movement of the door. Do not remove the screws completely; this helps prevent the door from dropping unexpectedly.
Tip: Keep one hand on the door edge to prevent it from shifting suddenly when screws loosen. - 3
Insert shims and align height
Slide thin shims under the hinge base or between the door and hinge leaf to adjust height and tilt. Make small 1–2 mm changes and recheck the door alignment after each adjustment.
Tip: Start on the hinge side, then test mirror-side alignment for a symmetrical seal. - 4
Tighten top hinge screws and recheck
Tighten screws gradually in a cross pattern to avoid twisting the hinge. Recheck level and door fit; look for even gaps along the top edge and ensure the door sits flush with adjacent cabinetry.
Tip: Use a torque-limiter screwdriver if available to avoid over-tightening. - 5
Adjust bottom hinge if needed
If the door still leans or rubs, loosen bottom hinge screws slightly and make minor adjustments. Re-tighten and recheck alignment and seal.
Tip: Only make small adjustments at the bottom after the top is properly aligned. - 6
Final tests and cleanup
Close the door firmly and verify even gasket contact around all edges. Run through a seal test (dollar bill or business card) at the top, middle, and bottom. Clean away dust and re-tighten any screws if needed.
Tip: Keep a log of adjustments and dates for future reference.
FAQ
What signs indicate my refrigerator door needs alignment?
Look for uneven gaps along the top and sides, a door that sits crooked, or a seal that doesn’t contact the frame consistently. These are common indicators that adjustment is needed.
Signs include uneven gaps and a door that sits crooked, which means it needs alignment.
Can all fridge doors be adjusted with hinges?
Most residential models offer hinge adjustments, but the exact method varies by model and hinge type. Consult your user manual for model-specific steps.
Most doors can be adjusted, but the method varies by hinge type—check your manual.
Should I unplug the fridge before making adjustments?
Yes. For safety, unplug the appliance or switch off the circuit before loosening hinges or handling electrical components.
Yes—unplug or switch off power before starting.
How long does a typical door alignment take?
Most DIY adjustments take about 20 to 40 minutes, depending on hinge type and how much the door needs to move.
Most adjustments take 20 to 40 minutes.
When should I call a professional?
If the door does not seal after adjustments, if hinges are bent, or if the frame is damaged, a repair professional should be consulted.
Call a pro if sealing fails or hardware is damaged.
Is it safe to use shims under the hinge?
Yes, use purpose-built hinge shims or thin plastic/cardboard shims. Avoid thick improvised materials that can misalign the door.
Shims are safe when using proper hinge shims and thin materials.
Watch Video
Top Takeaways
- Verify level before tightening hinges
- Make incremental adjustments with shims
- Recheck seal after each change
- Document your settings for future maintenance