How to Adjust Refrigerator Door Swing: A Homeowner's Guide
Learn how to adjust your refrigerator door swing to improve door seal, reduce energy use, and prevent rubbing. This guide covers tools, step-by-step actions, safety tips, and maintenance for precise door alignment.

In this guide you will learn how to adjust your refrigerator door swing so the door seals properly, avoids rubbing, and stops misalignment. You'll identify hinge types, collect essential tools, and perform a careful, incremental adjustment. Expect a 20–40 minute process for most models, with checks for level and gap accuracy at the end.
Understanding door swing and why it matters
Door swing refers to the path your refrigerator door travels as it opens and closes, and the angle at which it sits when shut. A misaligned swing can compromise the door seal, allow warm air to leak in, and force the compressor to run longer. According to How To Refrigerator, door swing alignment is crucial for a tight seal and efficient cooling. Small deviations, even fractions of an inch, can translate into noticeable performance differences. The consequences aren’t just cosmetic—improper swing can lead to frost buildup, increased energy use, and uneven cooling inside the fridge.
Several factors determine the correct swing: the hinge design (whether the upper hinge is fixed or adjustable), the door weight, and how the cabinet aligns with the surrounding cabinetry. Left-right and inward-outward movement can both be necessary depending on your model. Symptoms of a misadjusted swing include a door that rubs along the gasket, a top gap that widens or narrows as the door closes, and a slight magnet-to-gasket misalignment that prevents a full seal. Before you start, take a quick stock of your door: Are there any visible gaps? Does the bottom edge rub the floor? Are there any cracks in the hinge cover? These cues tell you where to focus your adjustments.
Types of hinges and how they affect adjustment
Most residential refrigerators use a three-screw hinge system (top hinge with three screws, bottom hinge with two screws) or a fixed bottom hinge with an adjustable top hinge. Some models have concealed hinge covers that hide adjustment bolts, while others expose accessible screws. Understanding your hinge type helps you know which screws to loosen and which to tighten. For example, on a typical fixed bottom hinge, you’ll often adjust the top hinge to tilt the door forward or backward to correct the swing. If your fridge has adjustable bottom hinges, you may tilt the door upward to align with the cabinet edge. Note that some French-door units use a hinge design that requires adjusting the jambs rather than the door itself. Before you start turning screws, consult your model’s manual; if you don’t have the manual, locate the visible screws that attach the hinge to the cabinet and the door and identify which direction each screw influences. A little experimentation with small, incremental shifts is usually enough to reestablish proper swing without overcorrecting.
Assessing current swing and setting goals
To plan an adjustment, measure how far the door sits from the cabinet when closed and assess how even the seal is around the entire door. Use a level, a tape measure, and a flashlight to check gaps at the top, middle, and bottom. The goal is a door that sits flush with the cabinet edge and seals evenly along the gasket all around. Mark the hinge position with masking tape before loosening screws so you can return if needed. Take photos from multiple angles; these serve as a reference if you need to revert. If you notice the door drifts closed or remains ajar, you may need to adjust the canting (tilt) of the door rather than the hinge pins themselves. Always work in small increments and recheck after each adjustment.
Execution: step-by-step approach overview
Successful door swing adjustment relies on an orderly sequence: identify the hinge you’ll adjust, loosen the screws just enough to allow movement, shift the door to the desired position, and re-tighten. If your door has a bottom hinge that can be slid, gently nudge the bottom edge toward or away from the cabinet to alter tilt. If the top hinge is adjustable, use the built-in canting screws to tilt the door forward or backward. Keep the screws loose enough to move cleanly but not so loose that the door drops. After each small adjustment, close the door to test swing and seal. If you notice rubbing, back off slightly and recheck alignment. Document the final position before final tightening so you can replicate if needed.
Common issues and troubleshooting
- Door rubs on gasket: This usually means the door is too far in or out or tipped forward. Try a minute tilt adjustment and re-tighten.
- Uneven seal around edges: Inspect gasket for wear; a damaged gasket can mimic swing problems. Replace if needed.
- Difficult to open/close: Check for obstruction in hinge covers or misaligned magnets; clear debris and ensure hinges move smoothly.
- Uneven alignment after reassembly: Re-check tape marks and re-run the adjustment steps with extra care.
Maintenance and preventive checks
After you achieve proper swing, perform routine checks every 6–12 months or after moving the fridge. Clean hinge areas, inspect screws for tightness, and ensure the door seals contact evenly with the gasket. Keep magnets clean and free of debris so the seal remains strong. If you notice wear on the gasket, replace it; a new gasket can improve seal and efficiency more than a minor swing adjustment alone. When you reinstall the door after cleaning, test that it closes softly and seals without effort. If you notice persistent alignment drift, the frame may be out of plumb, or the hinge may be worn and require replacement.
Safety and warnings
- Unplugging is not strictly required for basic hinge adjustments, but if you need to remove doors or work with exposed electrical components, unplug the refrigerator to avoid shocks.
- Doors and shelves are heavy; use proper lifting and have a helper if needed.
- Do not over-tighten screws; this can strip threads or damage hinge components.
- Be mindful of any water lines near the door (ice maker): avoid pinching or kinking lines during adjustments.
Tools & Materials
- Screwdriver set (Phillips and flat-head)(Sizes #1-3; a compact 4-in-1 set is convenient)
- Adjustable wrench(For holding nuts and turning hinges)
- Small level (spirit level)(Used to check door plumb and alignment)
- Tape measure(To verify gaps at top and bottom)
- Masking tape or marker(Mark hinge positions before loosening screws)
- Soft cloth or mat(Protects floor and door finish)
- Model-specific manual or digital copy(Helpful for model-specific hinge details)
Steps
Estimated time: 25-45 minutes
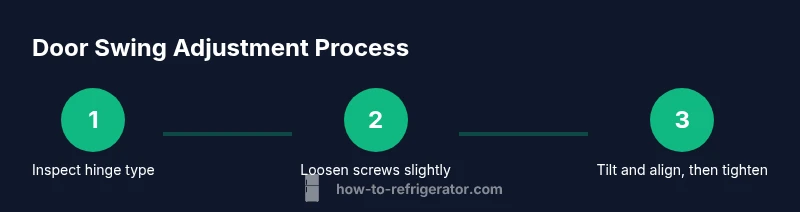
- 1
Identify hinge type and prep
Inspect the hinge arrangement and confirm whether you have a top adjustable hinge, a bottom fixed hinge, or a concealed hinge. Remove any hinge covers carefully to avoid damage. Take photos of the current position for later reference.
Tip: Use masking tape to mark initial hinge positions before you loosen anything. - 2
Mark initial alignment
Place tape markers on the cabinet and door edge to guide subsequent shifts. This gives you a repeatable reference if you need to revert.
Tip: Keep your marks clear and visible during adjustments. - 3
Loosen adjustment screws
Loosen the screws just enough to allow movement of the door without detaching it. Do not fully remove screws unless you plan to replace hinges.
Tip: Work in small increments—tiny movements yield precise results. - 4
Adjust tilt and alignment
Shift the door slightly to correct tilt (forward/backward) and sway (in/out) as needed. Re-check with the level and verify gaps around the gasket.
Tip: Move in 1/16 to 1/8 inch increments. - 5
Tighten screws and re-test
Retighten the screws, ensuring they’re snug but not overtightened. Close the door to test the seal and swing across several cycles.
Tip: Avoid torqueing screws too hard—stripped threads create new problems. - 6
Finalize and document
If the door seats correctly, replace any covers removed earlier and take a final set of photos. Record the final screw positions for future reference.
Tip: Label which screws were loosened and their new positions.
FAQ
What is door swing and why is it important?
Door swing is the path the door takes when opening and closing, and the angle it sits at when shut. Proper swing ensures a tight seal and energy efficiency, while misalignment can cause rubbing and uneven cooling.
Door swing is how the door moves and sits when closed. Getting it right helps seal the fridge and save energy.
Can I adjust door swing without removing the doors?
Yes. Most adjustments are done by loosening hinge screws and repositioning the door while it remains on the hinges.
You can adjust most hinges with the door still on the hinges.
Is it safe to adjust hinges if the fridge is plugged in?
Basic hinge adjustments are safe with the fridge plugged in. If you need to move or remove doors or access electrical components, unplug first.
It's safe to adjust hinges if you’re careful; unplug if you have to move doors or access wiring.
How long does a swing adjustment typically take?
Most adjustments take about 20 to 40 minutes depending on model and hinge design.
Usually 20 to 40 minutes.
What if the rubbing persists after adjustment?
If rubbing continues, inspect for gasket wear or frame plumb issues. Consider replacing hinges or gasket if needed.
If rubbing doesn’t stop, check gasket wear or frame alignment and consider replacement parts.
Does door swing adjustment affect warranty?
Check your manufacturer warranty; minor hinge adjustments are typically allowed, but avoid modifying internal components beyond basic hinges without guidance.
Most basic hinge tweaks don’t void warranties, but consult your manual for model specifics.
Watch Video
Top Takeaways
- Identify hinge type before adjustments.
- Make small, incremental changes and test often.
- Ensure a flush seal around the gasket after adjustment.
- Check for hinge wear or frame plumb if problems persist.