Glass Door Freezer Repair and Maintenance Guide
Learn how to diagnose and repair common glass door freezer problems—from frost buildup to uneven cooling. Includes safety tips, required tools, step-by-step fixes, and maintenance reminders.

This guide helps homeowners diagnose and fix common glass door freezer issues, from frost buildup to uneven cooling. You’ll learn to test door seals, clean the defrost drain, verify temps, and inspect the condenser coils. With the right tools and safety steps, you can restore performance without a costly service call. Follow the step-by-step process to safely troubleshoot, repair, and maintain your glass door freezer for reliable operation.
Why glass door freezer design matters
Glass door freezers present a transparent view into your cold storage, but that visibility comes with maintenance responsibilities. The glass panels show frost and condensation more clearly than metal doors, which can reveal cold-air leakage and door alignment issues. Understanding how heat, humidity, and airflow interact inside a glass door freezer helps you spot problems before they escalate. Door seals, shelf arrangement, and fan operation all influence performance and efficiency, and a regular maintenance routine keeps a glass door freezer operating at peak levels. Expect to check seals, clean shelves, and ensure proper airflow to prevent frost and not cooling from taking hold over time.
Common issues to diagnose
Most glass door freezer problems fall into a few core categories: frost buildup, warm or uneven cooling, door leaks, condensation on the glass, and unusual noises. Frost often means a blocked defrost drain or a failing defrost cycle; condensation on the glass can signal high humidity or a loose seal; not cooling can stem from thermostat, compressor, or refrigerant issues. Ice buildup on shelves reduces airflow and forces the compressor to work harder. If you notice water pooling near the base or a persistent frost ring along the door frame, start checking seals and drainage paths first. Systematic checks save time and reduce frustration.
Safety and preparation before you start
Before any work, unplug the unit and move contents to a temporary cold storage area. Wear protective gloves when handling glass shelves, and set towels to catch defrost water. Work in a dry area and keep your work surface organized to avoid dropping glass components. If you are unsure about electrical testing, pause and seek professional assistance—refrigeration systems contain components that can pose shock hazards. Keep a log of any measurements or changes you make for future reference.
Cleaning and maintenance routines for glass shelves and doors
Regular cleaning of glass shelves and the door gasket helps maintain a tight seal and clear visibility. Use a mild dish soap solution and a soft cloth to wipe shelves, racks, and the inner door surface. Avoid abrasive cleaners that can scratch glass or degrade seals. Dry all surfaces thoroughly before reassembling. Periodically inspect and wipe the gasket with a damp cloth to remove dust and film; a clean gasket seals better and reduces condensation around the door edge. Keep the interior slightly dust-free to improve airflow and energy efficiency.
Troubleshooting frost, condensation, and not cooling
Frost buildup can indicate a clogged defrost drain or a malfunctioning defrost timer; clear the drain with a flexible tool and ensure the timer cycles normally. Condensation on the glass usually means humidity ingress or a compromised seal; clean the gasket and test the door closure repeatedly. If the freezer is not cooling, verify the thermostat setting and listen for compressor operation. A slow or noisy compressor might signal a refrigerant issue or a failing fan. Systematic, patient testing helps confirm the root cause before replacing parts.
When to call a pro and preventive tips
If you detect refrigerant odors, hissing noises, or refrigerant leaks, or if not cooling persists after your DIY steps, contact a professional technician promptly. For homeowners, preventive maintenance can avoid emergencies: schedule a quarterly seal check, keep coils clean, manage door alignment, and monitor interior temperatures. Keeping a simple maintenance log marks improvements and flags recurring issues early, saving time and money in the long run. A proactive approach reduces downtimes and extends the life of your glass door freezer.
Tools & Materials
- Flathead screwdriver(Size as needed for hinge panels)
- Phillips screwdriver(Use for shelves and fasteners)
- Multimeter(Test thermostat and defrost timer)
- Soft cloths and sponge(Window and gasket cleaning)
- Mild dish soap(Gentle cleaning solution)
- Spray bottle(Diluted cleaner application)
- Small bucket(Catch defrost water)
- Replacement door gasket(Only if a damaged seal is found)
- Vacuum or brush for coils(Clean condenser coils if accessible)
- Gloves(Protection for hands and glass)
Steps
Estimated time: 60-120 minutes
- 1
Unplug the freezer
Disconnect power at the outlet to eliminate shock risks. Remove perishable items and place a towel to catch any defrost water. This step ensures your safety before inspecting components.
Tip: Keep the plug within reach to restore power quickly after checks. - 2
Access interior and remove shelves
Open the door and carefully lift out glass shelves and baskets. Inspect for cracks or chips; set components aside on a soft towel to avoid damage. Repacking items helps you work with a clear space.
Tip: Handle glass gently to prevent accidental breakage. - 3
Inspect the door seal
Examine the gasket for cracks, gaps, or deformation. Run a simple seal test by closing the door on a folded dollar bill or card and sliding it out slowly. Replace or repair any damaged sections before testing cooling.
Tip: Clean the gasket with mild soap and water before judging its condition. - 4
Test interior temperatures
Place a thermometer in the center of the fridge and another in the freezer. Confirm that the interior target range aligns with manufacturer guidelines, usually around -18 C for freezers. Adjust settings if allowed and retest after an hour.
Tip: Avoid opening the door during the test to prevent temperature swings. - 5
Check defrost drain and ice buildup
Locate the defrost drain and ensure it is clear. If you see ice, melt it safely and remove any blockage. A blocked drain causes frost to flood into the freezer and reduce performance.
Tip: Use a flexible wire or pipe cleaner—never force hard objects into the drain. - 6
Inspect condenser coils and airflow
If accessible, gently vacuum or brush dust from the condenser coils. Clean airflow pathways and ensure nothing blocks the rear grille. Poor airflow causes inefficient cooling and excess frost on glass surfaces.
Tip: Unplug the unit before touching coils and wear a mask if dusty. - 7
Test electrical components and reassemble
With the unit reassembled, test the thermostat and defrost timer with the multimeter as needed, then plug in and monitor performance for 24 hours. If temperatures stabilize, you’re close to a fix; if not, seek pro help.
Tip: Take photos during disassembly to guide reassembly.
FAQ
What are the common signs that my glass door freezer needs maintenance?
Look for frost buildup, condensation on the glass, uneven cooling, unusual noises, or water pooling around the base. These issues suggest seal, drainage, or airflow problems that require inspection.
Watch for frost on the glass, leaks around the door, and warm spots inside the freezer—these indicate maintenance is needed.
Is it safe to perform DIY fixes on a glass door freezer?
Many routine checks are safe if you unplug first and avoid refrigerant handling. Do not repair sealed refrigerant lines yourself; contact a pro for that.
Yes, you can handle basic checks safely after unplugging, but avoid touching refrigerant components.
How often should I clean the defrost drain?
Check the defrost drain during routine maintenance and clear any blockage whenever frost returns. A monthly light cleaning helps prevent clogs.
Check the defrost drain regularly and clear blockages as soon as you notice frost buildup.
What temperature should a glass door freezer be set to?
Most freezers perform best around minus 18 degrees Celsius (0 degrees Fahrenheit). Verify with your model’s manual and adjust within that range.
Aim for about minus 18 Celsius, or 0 Fahrenheit, and adjust according to your manual.
What if the door seal is damaged?
Replace the gasket or consult a technician if you are unsure. A damaged seal causes frost and inefficiency.
If the seal is damaged, replace it or get a pro to do so for best results.
When should I call a professional?
If you detect refrigerant issues, compressor problems, or persistent cooling failures after DIY steps, contact a licensed technician.
Call a pro if you hear refrigerant issues or when cooling does not improve after troubleshooting.
Watch Video
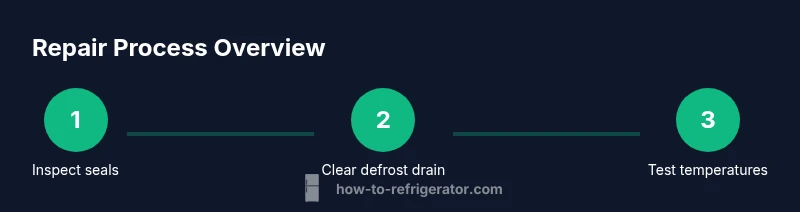
Top Takeaways
- Inspect seals and airflow regularly.
- Clear defrost drains to prevent frost.
- Test temperatures after fixes to verify results.
- Replace damaged gaskets for better efficiency.
- Know when to call a pro for refrigerant issues.