GE Adora Refrigerator Repair Guide
A comprehensive How To Refrigerator guide to diagnose and fix common GE Adora refrigerator cooling issues, with step-by-step instructions, safety tips, and practical maintenance for homeowners.

This guide helps homeowners diagnose and fix common cooling problems on the GE Adora refrigerator. You’ll verify door seals, clean condenser coils, check the defrost drain, and test temperature sensors. With safe, step-by-step instructions, you can restore proper cooling, prevent frost buildup, and extend the appliance’s life.
Diagnosing common cooling issues in the GE Adora Refrigerator
Not cooling properly, unusual frost, or hotspots in a GE Adora refrigerator are symptoms you can diagnose with a clear, methodical approach. According to How To Refrigerator, many cooling issues on GE Adora refrigerators stem from simple, user-serviceable causes such as a worn door gasket, dust buildup on condenser coils, or a blocked defrost drain. Start by observing symptoms: is warm air circulating inside, or is ice forming along the back wall? Do not rush to replacements; most problems begin with simple maintenance tasks. In this guide you’ll learn a structured way to identify the root cause and apply proven, homeowner-friendly fixes. The GE Adora refrigerator is designed for reliability, but even small maintenance steps can have a big impact on performance and energy use.
Safety-first steps before you begin
Before you touch any parts, unplug the unit and remove objects from the shelves to prevent spills or accidents. Avoid using water directly on electrical components, and keep liquids away from the electrical outlet area. If you must open panels, use non-metallic tools and wear protective gloves. Allow a few minutes for capacitors to discharge after unplugging, and never work with a live circuit. By prioritizing safety, you protect yourself and preserve the appliance while you troubleshoot. The How To Refrigerator team emphasizes safety as the foundation of every DIY fridge repair project.
Quick, non-invasive checks to run first
Sometimes the simplest checks reveal the issue. Ensure the GE Adora refrigerator door closes firmly and isn’t left ajar, as warm room air can mimic a failure. Inspect the door seals for cracks, stiffness, or gaps; clean them with warm, soapy water to restore a tight seal. Check for unusual noises from the fan when doors are closed, and verify that interior lights go off when the door is shut. If the basics check out, you’re ready to move to more involved maintenance without unnecessary replacements.
How to inspect and clean the condenser coils
Dusty condenser coils reduce cooling efficiency. Locate the coils on the back or beneath the unit (behind a vent grille). Use a vacuum with a soft brush attachment or a coil brush to remove dust and lint, keeping the fins straight and undamaged. Avoid metal tools that could bend the fins; a small, gentle touch is enough. After cleaning, reassemble the grille and allow a few minutes for air to circulate before powering the unit back on. Regular coil maintenance can improve cooling performance and energy efficiency.
Defrost drain maintenance and ice buildup
Ice around the evaporator or a blocked defrost drain can cause frost buildup and poor cooling. Locate the defrost drain (often near the bottom of the freezer compartment) and flush it with warm water to clear blockages. If you see persistent ice, gently thaw with a hair dryer set on low, keeping it at a safe distance. After thawing, wipe surfaces dry and test for proper drainage. This step helps prevent water pooling and temperature inconsistencies that can confuse the thermostat.
Testing temperature controls and sensors
Accurate temperature sensing is critical for proper cooling. Use a calibrated thermometer to check the interior temperature against the set point, usually around 37–40°F (3–4°C) for fresh food. If readings are off, inspect the temperature sensor or thermistor for signs of damage or loose wiring. A faulty sensor may cause the system to run excessively or shut down early. In many GE Adora models, sensor replacement is straightforward but may require a service call if refrigerant handling is involved.
Checking evaporator fan and compressor health
If you hear unusual noises or notice cold air not circulating, inspect the evaporator (fan) and listen for its operation when the door is opened or a cooling cycle starts. A sluggish or non-running fan reduces airflow and cooling efficiency. The compressor should run smoothly and produce a steady hum; a compressor that cycles on/off rapidly or sounds excessive may indicate a failing component. Visual checks can prevent unnecessary part replacements, and you should consider professional testing for compressor issues or refrigerant concerns.
Noting frost patterns and internal temperature distribution
Uneven cooling or frost on certain shelves can reveal airflow obstructions or improper seal. Map the coldest and warmest zones and compare them against your thermostat settings. If certain areas stay warm while others frost, focus on airflow paths, door seals, and the positioning of items that block vents. Understanding these patterns helps you tailor a fix rather than guess at multiple parts, saving time and reducing the chance of over-replacement.
Preventive maintenance and energy-saving habits
A routine maintenance plan can extend the life of a GE Adora refrigerator. Regularly clean door gaskets, vacuum coils, and ensure doors seal properly. Keep the refrigerator well-ventilated and away from heat sources or direct sun exposure. Organize shelves to allow air to circulate and avoid overpacking, which can impede airflow. On standby, set temperature to the manufacturer’s recommended range and monitor performance every few weeks. Consistency pays off in energy savings and reliability.
Tools & Materials
- Phillips head screwdriver(Size #2 recommended)
- Flat-head screwdriver(For panel access and prying if needed)
- Digital multimeter(Test sensors and continuity)
- Condenser coil brush or soft vacuum(Clean without bending fins)
- Soft cloth or microfiber towels(Wipe surfaces dry and clean)
- Bucket or shallow tray(Catch defrost water)
- Replacement door gasket seal (if worn)(Measure door width and model compatibility)
- Gloves(Hand protection during handling)
- Masking tape or zip ties(Secure loose wires temporarily)
Steps
Estimated time: 60-120 minutes
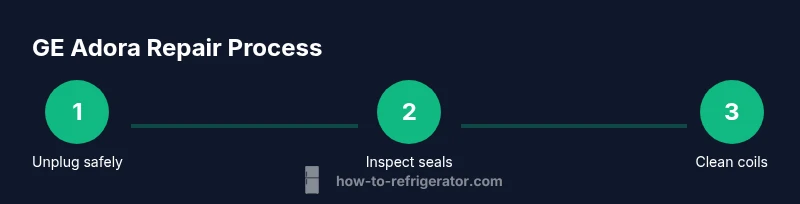
- 1
Unplug the refrigerator
Disconnect the unit from the wall outlet to ensure safety before inspecting or cleaning any components. This prevents electric shock and accidental starts while you work. If there is a cord strain, gently reposition the plug and cord to avoid damage.
Tip: Always use dry hands when handling plugs. - 2
Wait a few minutes
After unplugging, wait 2-3 minutes to allow capacitors to discharge and minimize moving parts while you inspect panels. This reduces the risk of sudden starts when testing components later.
Tip: Use a timer to avoid rushing the wait. - 3
Inspect the door seals
Examine gaskets for cracks, stiffness, or deformation. Clean seals with warm soapy water and dry thoroughly to restore a tight seal. A poor seal lets warm air enter the cabinet, creating temperature swings.
Tip: If you detect cracks, plan a gasket replacement. - 4
Clean the condenser coils
Access coils behind the vent grille and remove dust with a vacuum or coil brush. Work gently to avoid bending the fins. Reconnect the grille once clean and allow air to circulate before powering back up.
Tip: Do not use metal tools on the fins. - 5
Clear the defrost drain
Locate the defrost drain and flush with warm water to clear blockages. If you see repeated ice buildup, thaw the evaporator area carefully and dry it before testing again.
Tip: Have towels ready for water runoff. - 6
Test temperature controls
Locate the thermostat and sensor, then measure resistance with your multimeter. Compare readings to GE Adora specifications. Replace a faulty sensor or thermostat as needed.
Tip: Check wiring for looseness before replacing parts. - 7
Check evaporator fan operation
With panels reassembled, power the unit and observe the evaporator fan. If you hear no fan or it stalls, inspect connectors or replace the fan.
Tip: Never touch moving blades while powered. - 8
Reassemble and test final setup
Replace any panels, plug the unit back in, and set the temperature to the recommended range. Monitor performance for 4-6 hours to confirm stable cooling.
Tip: Keep doors closed during the initial test period.
FAQ
Why is my GE Adora refrigerator not cooling as expected?
Not cooling can be caused by a worn door gasket, dirty condenser coils, or a blocked defrost drain. Start with door seals and coil cleaning, then test the defrost system if the issue persists.
Common causes include door seals and dirty coils. Start there and test the defrost drain if cooling remains inconsistent.
How do I reset a GE Adora refrigerator?
Unplug the unit for about five minutes, then plug it back in and set the desired temperature. This can reset minor sensor or control glitches.
Unplug for five minutes, plug back in, and set the temperature.
What are signs of a blocked defrost drain?
Look for frost buildup in the freezer, water pooling inside the fridge, or unusual condensation. A blocked drain often causes frost in the freezer and leaks.
Frost and water pooling indicate a blocked defrost drain.
When should I replace door seals?
Replace if you notice cracks, stiffness, or air leakage around the door. A good seal maintains consistent interior temperatures and prevents excess energy use.
Replace worn door seals to keep temperatures stable.
Is it safe to DIY most GE Adora repairs?
Basic maintenance like cleaning coils and checking seals is safe for homeowners. For refrigerant, compressor, or sealed-system issues, hire a professional.
DIY is fine for basic tasks; for refrigerant or sealed-system problems, call a pro.
How often should I clean condenser coils?
Clean coils every 6–12 months, or more often in dusty environments. Regular cleaning helps maintain cooling efficiency and lowers energy use.
Clean coils every 6 to 12 months for best efficiency.
Watch Video
Top Takeaways
- Unplug before inspection and work safely around electrical parts.
- Condenser coil cleanliness directly impacts cooling efficiency.
- Door seals must be intact to prevent warm air ingress.
- Test sensors with a multimeter to avoid unnecessary part replacements.
- Schedule preventive maintenance to extend fridge life.