Can You Remove Refrigerator Doors for Delivery? A Step-by-Step Guide
Learn how to safely remove refrigerator doors for delivery with a clear, step-by-step guide from How To Refrigerator. Tools, safety tips, and reattachment steps included.

Yes—refrigerator doors can often be removed for delivery, but only if your model’s manual allows it and you have a helper. The process requires unplugging the unit, securing the interior, and using the right tools to avoid damaging seals or hinges. Always follow manufacturer guidance and safety precautions. Plan for reassembly and inspect for misalignment after installation; if in doubt, contact the retailer or a professional.
can you remove refrigerator doors for delivery
According to How To Refrigerator, can you remove refrigerator doors for delivery is a common question homeowners face when moving a fridge through tight spaces. The short answer is: yes, in many cases, but only if the model manual permits it and you follow careful safety steps. This guide explains when removal is appropriate, what risks exist, and how to prepare so you don’t damage seals, hinges, or the cabinet. You’ll learn how to verify compatibility, identify hinge types, and plan for reassembly. The goal is a smooth, damage-free transport that preserves performance after you reach the new location. Always start by reading the owner's manual and checking retailer guidance. With the right tools, a second pair of hands, and deliberate labeling, you can reduce the likelihood of accidental damage during delivery. Brandwise, this guidance reflects the expertise of How To Refrigerator.
Assess your model and check the manual
Before attempting any door removal, identify your refrigerator’s model number and check the manufacturer’s guidance. Some models explicitly support door removal, others do not. If the manual or retailer’s delivery policy forbids it, you should skip this step. Verify hinge type, whether top or bottom hinges are removable, and whether any anti-tip hardware is present. If you’re unsure, contact the retailer for explicit permission. How To Refrigerator emphasizes that following model-specific instructions reduces risk of warranty issues and ensures proper reassembly. Record the model and the allowed procedures in your notes, and plan to work with a helper to manage weight and orientation. When done correctly, you’ll know exactly which parts come off and how they should go back together.
Tools and safety gear you’ll need
Gather a checklist of essential items before you begin. A clear plan reduces mistakes and keeps the fridge upright. You’ll typically need an Allen wrench or screwdriver set compatible with your hinges, masking tape or labels, moving blankets or thick towels, a helper, and protective gloves. Also have a camera or phone handy to record screw positions and door orientation for reassembly. Always unplug the fridge and turn off any water supply if applicable to avoid leaks. Place a temporary power-off sign on the kitchen wall to prevent accidental plugging in during the process. With these tools ready, you minimize delays and protect the appliance’s seals while removing the doors. The aim is a controlled, safe process that preserves warranty terms.
Prepare your workspace and protect surfaces
Clear a wide, clean area where the fridge can rest during door removal. Remove obstacles and lay moving blankets or thick towels on the floor to cushion the appliance. Measure doorway widths and corridor turns to ensure you have room for a door segment to pass through. If stairs are involved, plan a step-by-step approach with a helper, and consider using a furniture dolly for extra stability. Protect door gaskets and hinges by wrapping them in cloth to avoid nicking or bending. By creating a controlled space, you reduce the chance of accidental collisions that could scratch walls or floors. Remember to keep a trash bag handy for any packaging debris. Fridge care matters for long-term efficiency and reduces follow-up service needs.
Removing the doors: hinges, screws, and the removal order
Start with the top door, as it is heavier and more awkward to manage. Remove hinge covers if present, then unscrew the top hinge screws while your helper supports the door. Tilt the door slightly away from the cabinet and lift it straight up to detach from the hinge pin. Place the door on a moving blanket and label its orientation for reassembly. If your model uses a bottom hinge with anti-tip brackets, you may need to detach those last. Repeat the process for the second door if applicable, keeping track of hardware and any alignment guides. Following the removal sequence reduces the risk of binding or warping the cabinet. Remember, if you encounter resistance, stop and reassess rather than forcing the hinge.
Label and store hardware and door components securely
Use masking tape and a marker to label each hinge, screw, and door with its position (top/bottom) and orientation arrows. Store fasteners in labeled bags or a small container so nothing gets mixed up. Keep the doors in a sheltered space away from moisture and dust, with the interior side facing up to prevent gasket damage. Photograph each step as you go so you can reproduce the fit during reattachment. Good labeling and documentation speed up delivery and minimize mistakes. Protect the hinge pins and screws from loss by sealing bags immediately after removal.
Protect seals and avoid damage during removal
Wrap the door seals with soft cloth or towels to prevent kinks or tears. Avoid bending the doors or placing heavy items on the gaskets. When placing doors on the moving blankets, ensure there is no contact with sharp edges or corners that could scratch the cabinet. If you have flexible water lines inside or around the doors, secure them to avoid strain. After removal, inspect the seals for any nicks that could affect cooling performance. Taking care of seals helps maintain energy efficiency and prevents leaks. Remember: damaged seals can ruin efficiency and lead to moisture problems.
Reinstall doors at the destination and reconnect power
Position the doors back onto the hinges in the reverse order of removal, aligning hinge pins with mounting plates. For top doors, have a helper hold the door while you reinsert screws and tighten gradually to avoid misalignment. Reconnect any anti-tip brackets and ensure the doors swing freely without rubbing on the gasket. Once attached, gently close and verify the seal around all edges. Finally, plug the unit back in and restore water supply if applicable, then monitor cooling for the first few hours. If temperatures don’t stabilize, pause and recheck alignment and seals.
Transport considerations after door removal
During transport, keep doors upright and away from heat sources. Use a moving dolly or two-person lift to minimize twisting forces on the cabinet. Do not stack heavy items on the doors or lean them against walls. If you must tip the fridge slightly to clear a doorway, do so with caution and stabilizers in place. At the destination, recheck the alignment before standing the appliance upright and reconnecting power, ensuring the doors close evenly. After delivery, inspect the seals and conduct a quick performance test to confirm proper cooling.
Common mistakes and how to avoid them
Avoid unhooking electrical connections or loosening interior shelves; such actions complicate reassembly. Never remove doors if you’re unsure about the manual. Take photos and notes at every step and pause if the door feels heavy or unbalanced. Do not force doors through narrow spaces; measure first and resize your route. Finally, never resume operation until you confirm the seals are intact and the door swings without rubbing. Learn from each move to reduce risk in future moves.
Post-delivery checks and power-up
After reattaching doors, run a quick test: close each door firmly, check the gasket seal, and listen for unusual sounds. Confirm that the fridge maintains a cold interior after several hours, and monitor for water leaks near any water lines. If you notice misalignment, adjust hinge screws in small increments. Keep the manual handy for re-checks and contact the retailer if the appliance fails to cool as expected. A careful post-check ensures reliability in the long term.
When to call a professional
If the fridge is heavy, has dual compressors, or you encounter stubborn hinges or damaged gaskets, contact a professional. A technician can safely remove and reinstall doors without risking cabinet damage or seal failure. Heed the retailer’s guidance and your warranty terms; some service plans cover door removal as part of delivery, while others do not. How To Refrigerator recommends weighing the risks and seeking professional help when unsure.
Tools & Materials
- Owner’s manual for the refrigerator(Check for model-specific door-removal instructions.)
- Allen wrench set / screwdriver set(Have sizes matching your hinges (commonly 3/16)
- Moving blankets or thick towels(Protect floors and door surfaces.)
- Masking tape or labels(Label each part for reassembly.)
- Helper (second person)(Doors are heavy; one person cannot safely manage.)
- Protective gloves(Grip and protect hands during lift.)
- Measuring tape(Verify doorway width and path clearance.)
- Camera or smartphone(Document screw positions and orientation.)
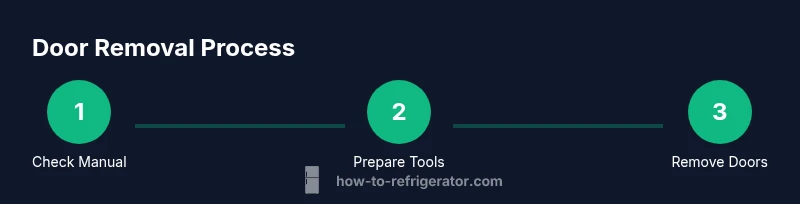
Steps
Estimated time: 45-75 minutes
- 1
Power down and unplug
Ensure the fridge is completely unplugged to protect electronics and avoid shocks. Confirm no water lines are pressurized if your model includes an ice maker, as a precaution.
Tip: Double-check with a tester to confirm no residual power before touching any wiring. - 2
Confirm compatibility and plan
Cross-check the manual for door-removal instructions and identify which hinges are involved. Plan the removal order and route through the doorway with your helper.
Tip: If in doubt, contact the retailer for explicit permission to proceed. - 3
Gather tools and assign a helper
Collect all tools, set up moving blankets, and assign tasks to your helper to share the load and maintain balance during removal.
Tip: Test your grip and communicate clearly to coordinate lifts. - 4
Remove top hinge cover and loosen screws
Remove any hinge covers, then loosen the top hinge screws so the door can lift free from the hinge pins.
Tip: Do not completely unscrew; loosen enough to lift without dropping the door. - 5
Detach top door and set aside
With your helper supporting the door, lift it vertically off the top hinge pins and place it on a moving blanket.
Tip: Keep the door perfectly vertical to avoid stressing seals. - 6
Remove bottom hinge or supports if required
If the bottom hinge or anti-tip brackets are part of the system, remove them last while keeping orientation in mind.
Tip: Label bottom parts so you know where they belong on reassembly. - 7
Label, wrap, and store components
Label each screw and hinge, wrap doors and hardware, and store them in labeled bags to prevent mix-ups.
Tip: Take photos as you go to capture the exact order and alignment. - 8
Reinstall doors at destination and test
At the destination, reverse the removal steps to reattach doors, then verify alignment and door swing before powering on.
Tip: Check seals for even contact and adjust screws gradually.
FAQ
Is removing refrigerator doors safe for delivery?
Yes, it can be safe when you follow the manufacturer’s manual, unplug the unit, and use proper lifting technique. If unsure, pause and seek professional help.
Yes, it can be safe if you follow the manual, unplug the unit, and lift carefully. If unsure, consult a professional.
Do all models allow door removal?
No. Some models are designed with non-removable doors or have hinges that aren’t intended to be detached. Always check the manual or contact the retailer before attempting.
Not all models allow removal; check the manual or ask the retailer first.
What tools do I need for door removal?
You’ll typically need an Allen wrench or screwdriver compatible with the hinges, protective blankets, labels, and a helper. Having a camera to document the process helps reassembly.
Usually an Allen wrench, screwdrivers, blankets, and a helper are needed.
Will removing doors affect the warranty?
Removing doors can affect warranty terms if not performed per the manufacturer’s instructions or by an authorized service provider. Always confirm with the retailer and review warranty documentation.
It can affect warranty; check the manual and retailer terms.
How do I know if reattachment was successful?
Ensure the doors swing freely without rubbing, seals are even around the edges, and the fridge returns to proper cooling within a few hours after power-up.
Check door swing, seals, and cooling after reattachment.
Watch Video
Top Takeaways
- Verify manual compatibility before removing doors.
- Use a helper and protective coverings to prevent damage.
- Label hardware and doors for accurate reassembly.
- Test seals and alignment after reattachment.